Monday, December 28, 2020

Banana Mini Muffins #MuffinMonday

Sweet fluffy bites, perfect with a glass of cold milk or a cup of hot tea, your family will eat these banana mini muffins in a flash.

Food Lust People Love: Sweet fluffy bites, perfect with a glass of cold milk or a cup of hot tea, your family will eat these banana mini muffins in a flash. These little guys are a great recipe for using up that last banana that always languishes at the end of a bunch, brown and speckled but oh so sweet.

I am a fan of baking mini muffins because they tend disappear more quickly than the full-size ones. I put these on the table after dinner last night and even though everyone had eaten well, they each took a mini muffin for dessert. Yay! I tell you, that would never have happened with normal muffins.

Banana Mini Muffins

These little guys are a great recipe for using up that last banana that always languishes at the end of a bunch, brown and speckled but oh so sweet. 

Ingredients 
1 cup or 125g all-purpose flour
1/4 cup, firmly packed, or 50g light brown sugar
3/4 teaspoons baking powder
1/4 teaspoon baking soda
1/4 teaspoon salt
1 ripe banana (about 1/2 cup or 125g)
1/4 cup or 60ml canola or other light oil
2 tablespoons Greek yogurt
1 egg

Method
Preheat the oven to 375°F or 190°C. Prepare your 12-cup mini muffin pan by greasing it or line it with paper liners. 

Mash your banana with a fork in a mixing bowl.


Add in the oil, yogurt and egg and whisk them together with the banana.


Lightly whisk the flour, sugar, baking powder, baking soda, and salt together in another mixing bowl to combine.


Fold the wet ingredients into flour mixture until just moistened.


Divide batter among the muffin cups. I love my little scoop for this job but if you don’t have one, a spoon will do.


Bake the muffins in your preheated oven until a toothpick inserted into the center comes out clean, about 12-15 minutes. Cool in the pan for a few minutes then remove the muffins from the pan and continue to cool on a wire rack.

Food Lust People Love: Sweet fluffy bites, perfect with a glass of cold milk or a cup of hot tea, your family will eat these banana mini muffins in a flash. These little guys are a great recipe for using up that last banana that always languishes at the end of a bunch, brown and speckled but oh so sweet.

Enjoy!

Food Lust People Love: Sweet fluffy bites, perfect with a glass of cold milk or a cup of hot tea, your family will eat these banana mini muffins in a flash. These little guys are a great recipe for using up that last banana that always languishes at the end of a bunch, brown and speckled but oh so sweet.

It's the last Monday of the month so that means it's Muffin Monday! Check out all of the great muffins my Muffin Monday friends are sharing today!


Muffin Monday 
 #MuffinMonday is a group of muffin loving bakers who get together once a month to bake muffins. You can see all of our lovely muffins by following our Pinterest board. Updated links for all of our past events and more information about Muffin Monday can be found on our home page.

Pin these Banana Mini Muffins!

Food Lust People Love: Sweet fluffy bites, perfect with a glass of cold milk or a cup of hot tea, your family will eat these banana mini muffins in a flash. These little guys are a great recipe for using up that last banana that always languishes at the end of a bunch, brown and speckled but oh so sweet.
.


Sunday, December 27, 2020

Lemon Poached Chicken and Leeks

Lemon poached chicken and leeks is a light and flavorful dish made with chicken broth, white wine and garlic. It's so easy too, in a slow cooker. Even boneless, skinless chicken breasts turn out tender and tasty.

Food Lust People Love: Lemon poached chicken and leeks is a light and flavorful dish made with chicken broth, white wine and garlic. It's so easy too, in a slow cooker. Even boneless, skinless chicken breasts turn out tender and tasty.

We’ve been eating a lot more boneless, skinless chicken breast these days for various reasons, not the least of which was my primary care physician expressing concern about my high cholesterol. So I’m always on the lookout for ways to add flavor to what is often a fairly bland part of the bird.

Poaching, that is gently cooking it in liquid at a low temperature, is ideal for adding extra tastiness and simultaneously making sure that the chicken doesn’t dry out. The best kitchen tool for poaching, in my opinion, is your slow cooker. 

In a normal pot, you have to constantly monitor the temperature to make sure the broth (or whatever your poaching liquid of choice) is only simmering and equally importantly, is still covering the chicken. 

In a slow cooker, the machine does all that for you. 

Lemon Poached Chicken and Leeks

If you’d like to skip using wine, I suggest replacing it with more chicken broth measured with perhaps a tablespoon or two of white balsamic vinegar. Can’t find leeks? They can be replaced by your favorite vegetable from the allium family like onions, scallions, shallots or chives. This recipe was inspired by a slow cooker spinach and artichoke chicken one on TheKitchn.

Ingredients
2 3/4 lbs or 1240g boneless, skinless chicken breasts
3/4 teaspoon fine sea salt
Few generous grinds black pepper (I use a peppercorn mix.)
1/4-1/2 teaspoon cayenne
2 large leeks
2 cloves garlic
1 medium lemon
1 1/2 cup or 560ml chicken broth
1/2 cup or 120ml dry white wine

For serving:
chopped fresh parsley leaves

Method
Season the chicken breasts all over with the salt and two peppers. We like things on the spicy side so I definitely use more cayenne. 


Trim the leeks of their root ends and hard green bits and discard. Rinse them well under running water, then slice the tender green and white parts of the leeks into rounds about 1/4 in or 6mm wide. 


Smash then mince the garlic and cut the lemon into eight wedges, removing any seeds as you do. 


Place the chicken breasts in a single layer in a 6-quart or larger slow cooker. Top them with the garlic. 


Add in the leeks then pour in the chicken stock and white wine. 


Tuck the lemon wedges all around the chicken. 


Cover and cook on the LOW setting until the chicken is cooked through and registers 165°F on an instant-read thermometer, 2 1/2 to 3 1/2 hours.


Transfer the chicken breasts to a cutting board. Use a sharp knife to cut the chicken into 1/2 inch or 1cm slices.


Use a slotted spoon to transfer the leeks to a lipped serving dish, then arrange the chicken slices on top of the leeks. Tuck the lemon wedges around the chicken for color. 

Food Lust People Love: Lemon poached chicken and leeks is a light and flavorful dish made with chicken broth, white wine and garlic. It's so easy too, in a slow cooker. Even boneless, skinless chicken breasts turn out tender and tasty.

Top with some of the cooking liquid and a few generous grinds of black pepper. 

Food Lust People Love: Lemon poached chicken and leeks is a light and flavorful dish made with chicken broth, white wine and garlic. It's so easy too, in a slow cooker. Even boneless, skinless chicken breasts turn out tender and tasty.

Sprinkle on some chopped parsley for garnish. 

Food Lust People Love: Lemon poached chicken and leeks is a light and flavorful dish made with chicken broth, white wine and garlic. It's so easy too, in a slow cooker. Even boneless, skinless chicken breasts turn out tender and tasty.

Enjoy warm, at room temperature or even cold!

It's Sunday FunDay and today we are sharing special recipes to ring in the New Year! Check them all out below. Many thanks to our host, Sneha of Sneha's Recipe!

We are a group of food bloggers who believe that Sunday should be a family fun day, so every Sunday we share recipes that will help you to enjoy your day. If you're a blogger interested in joining us, just visit our Facebook group and request to join.

Pin this Lemon Poached Chicken and Leeks!

Food Lust People Love: Lemon poached chicken and leeks is a light and flavorful dish made with chicken broth, white wine and garlic. It's so easy too, in a slow cooker. Even boneless, skinless chicken breasts turn out tender and tasty.

 .

Monday, December 21, 2020

Sous Vide Creme Brulee

This sous vide crème brûlée is creamy and rich, just as crème brûlée should be, with a crispy golden sugar topping. If you have a sous vide machine, it’s so much easier than baking in a water bath in the oven. 

Food Lust People Love: This sous vide crème brûlée is creamy and rich, just as crème brûlée should be, with a crispy golden sugar topping. If you have a sous vide machine, it’s so much easier than baking in a water bath in the oven.

We discovered crème brûlée, as many people do, in the restaurants of Paris. It became a favorite, the dessert my husband always ordered, if it was on the menu. When we moved on from La Belle France, I had to learn to make it myself. Weren’t nobody serving it in the beautiful backwater that was the little oilfield town of Macaé, Brazil! 

The first time I posted a crème brûlée recipe on my blog, in fact, was for my mother’s birthday back in 2011, the first month of food blogging. My most recent crème brûlée recipe was made with persimmons but you could use your favorite fruit. 

In a word, we LOVE crème brûlée!

Back in the day, I used the broil setting in the oven to caramelize the sugar topping or a spoon heated to scorching over the gas burner but I’ve had a kitchen torch for years and years, just to make this favorite family dessert. My only objection to making creme brûlée is the struggle when I try to remove the baking pan from the oven half filled with water. I tend to slosh. 

Using the sous vide machine and canning jars solves that problem. Unfortunately, it creates another one. Keeping the jars under water. Still, with a couple of weights, sous vide is much easier! I hope you’ll give it a try. 

Sous Vide Creme Brûlée

If you don’t have a vanilla bean, you can substitute 1 teaspoon of vanilla paste or 2 teaspoons vanilla extract. In the case of the latter two, skip the simmering, cooling milk step and just add them to the cold milk. This recipe is adapted from one on The Seaside Baker.

Ingredients
For the custard:
2 1/2 cups or 592g heavy whipping cream
1 vanilla bean pod, split and scraped
6 large egg yolks (98g)
1/2 cup or 100g sugar
tiny pinch salt

To serve:
8 teaspoons sugar
Kitchen torch

Method
Set your sous vide precision cooker to heat the water to 176°F or 80°C.

Wash and dry six 4 oz canning jars with lids. Any shape will do for the custard, but I like using the short, squat ones to give more surface area to caramelize sugar on when the custard has set. 

On medium heat, warm cream, vanilla pod and seeds and bring to a boil. Remove from heat, cover, and let rest for 15 minutes.


In a large bowl, whisk egg yolks, sugar and pinch of salt together until the sugar has dissolved and the mixture no longer feels gritty between your fingertips. It will thicken a little, which is good. 


Remove the vanilla bean pod from the cooled cream.

Add the cream a little at a time to the egg yolk mixture, whisking continually. 


Divide the custard between the six clean jars.


Tighten the lids until they are just closed in order to allow the jars to release air bubbles while cooking. This is called "fingertip tightness," the variable of "closed-ness" achieved by using only your fingertips to screw on the lids. If they start emitting bubbles right when you put them underwater, tighten just a little bit more. 

Carefully place jars in the preheated sous vide container. Since they have air in the headroom of the jar, they’ll want to tip and float. Place weights on top to keep them submerged and straight. I used bricks. 

Cook for 1 hour. My apologies for no photos of this part. Jars in a plastic container, underwater with bricks on top do not photograph well. 

Once done, remove the canning jars from the water and leave to cool on a wire rack for 30 minutes. Don’t tip the water on top off as this helps keep the seal. 


After cooling, place the jars in a refrigerator for at least 1 hour or up to 2 days.

About 30 minutes before serving, remove them from your refrigerator so they can warm up a bit. 

Just before serving remove the lids and sprinkle about a teaspoon of sugar onto the custard.


Torch the sugar until it has caramelized and serve immediately. 

Food Lust People Love: This sous vide crème brûlée is creamy and rich, just as crème brûlée should be, with a crispy golden sugar topping. If you have a sous vide machine, it’s so much easier than baking in a water bath in the oven.

Enjoy!

Food Lust People Love: This sous vide crème brûlée is creamy and rich, just as crème brûlée should be, with a crispy golden sugar topping. If you have a sous vide machine, it’s so much easier than baking in a water bath in the oven.


It's Multicooker Monday so that means my blogger friends are sharing recipes using their various small cooking devices. Many thanks to our leader Sue of Palatable Pastime and this week's behind the scenes worker bee, Wendy of  Day in the Life on the Farm. Check out the other recipe links below. 


Multicooker Monday is a blogger group created by Sue of Palatable Pastime for all of us who need encouragement to make better use of our small appliances like slow cookers, Instant Pots, Air Fryers, rice cookers and sous vide machines. We get together every third Monday of the month to share our recipes. If you are a food blogger who would like to post with us, please request to join our Facebook group. 

Pin this Sous Vide Crème Brûlée!

Food Lust People Love: This sous vide crème brûlée is creamy and rich, just as crème brûlée should be, with a crispy golden sugar topping. If you have a sous vide machine, it’s so much easier than baking in a water bath in the oven.

 .

Sunday, December 20, 2020

Spicy Marinated Cheese

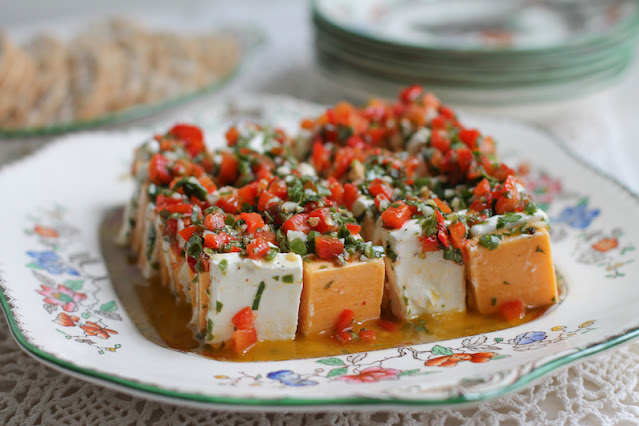
Spicy marinated cheese is not just pretty, it’s also delicious! It’s the perfect party food for the cheese lovers in your life. 

Food Lust People Love: Spicy marinated cheese is not just pretty, it’s also delicious! It’s the perfect party food for the cheese lovers in your life.

Personally I can, and often did, eat cheese in prodigious quantities sliced straight off the block or wedge. In fact, in a recent conversation with my primary care physician, I blamed cheese for my high cholesterol and (ahem) I’ve been cutting down on its consumption since. I’ve never smoked and I’m not much of a sweet eater. After alcohol, I’d call cheese my second vice. 

It’s hard to resist. 

I've been pretty good for weeks but today I’m going to eat spicy marinated cheese! My friend and fellow blogger Camilla is hosting our Sunday FunDay event today and she chose the theme holiday cheese boards, saying “Let's share recipes or tips for making holiday cheese boards. Think phyllo-wrapped baked cheeses, pickle relishes, homemade crackers, spiced nuts, and more. Anything you would put on a cheese board is fair game. Be as creative as you like!” This is like permission, right? 

Make sure you scroll down past my recipe to see what everyone else has made. 

Spicy Marinated Cheese

Start this recipe early in the day because it’s best if the cheese has at least eight hours to marinate. It can also be made one day ahead. My recipe is adapted from one on the blog The Kitchen is my Playground

Ingredients
8 oz or 227g block extra sharp cheddar cheese
8 oz or 227g block cream cheese

For the marinade:
1 red bell pepper aka (Br.E. capsicum)
3 cloves garlic
1 hot red chili pepper
1/2 cup or 120ml white balsamic vinegar
1 teaspoon sugar
1/4 teaspoon fine sea salt
1/2 cup or 120ml extra-virgin olive oil
small bunch fresh parsley, leaves picked off
2 green onion tops, green part only
small bunch fresh basil, leaves picked off
few good grinds black pepper

The herbs needed for Spicy Marinated Cheese.

Method
The first step in this recipe is to put your two cheeses in the freezer. They are much easier to slice neatly when well chilled. 

Secondly, we’ll roast the outside of the bell pepper in order to peel it. You can put it in a baking pan and use the broiler (making sure to turn the pepper often) or use a long fork to hold the red pepper over your gas stove till it chars and bubbles all over. 

Roasting the red bell pepper for spicy marinated cheese.

Either way, once the pepper is properly charred, pop it in a plastic bag and close. Set aside. Once cooled, the peel will slip right off.

Properly roasted bell pepper for spicy marinated cheese.

Mince the garlic and the hot chili pepper. Put them both in a clean jar with the vinegar. Add in the sugar and salt and give the jar a swish to help them dissolve. The vinegar helps reduce the sharpness of the garlic and chili pepper while simultaneously being infused with their flavors.  

The garlic and hot chili pepper in vinegar for making spicy marinated cheese.

Finely chop your parsley, onion tops and basil. Add the olive oil to the marinade jar along with the herbs. Give the jar a good shake. 

The herbs and oil going in the marinade for making spicy marinated cheese.

Use your clean hands to remove all of the skin off the bell pepper and a sharp knife to remove the core. Discard the seeds. Cut half of the bell pepper into thin strips, then small cubes. Run a knife through these a few times to mince. 

Chopping the red pepper for making spicy marinated cheese.

(Save the other half of the bell pepper for another recipe. It can be used in place of the jar of pimentos in my spicy pimento cheese recipe.)

Add the bell pepper to the marinade jar along with a few good grinds of black pepper and shake well to combine. 

Adding the red pepper to the marinade for making spicy marinated cheese.

Cut the block of cheddar in half lengthwise; then cut it crosswise into 1/4 in or 1/2 cm thick slices. Lay the cheddar out single file on your cutting board. 

Slicing the cheddar cheese for making spicy marinated cheese.

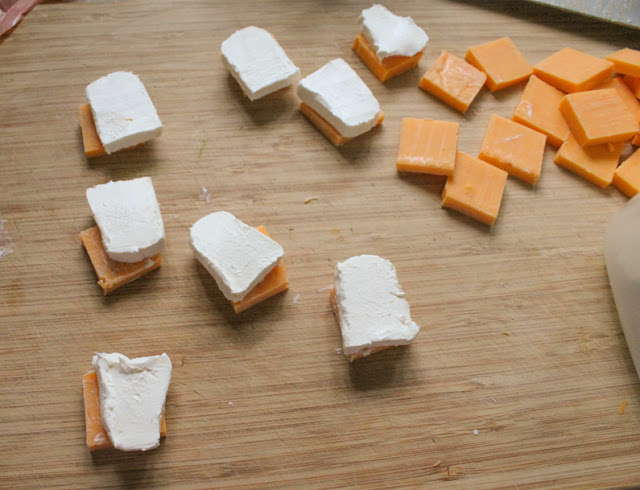
Cut the cream cheese block in half lengthwise and put half back in the freezer. Cut the cream cheese in similarly thick slices. As you cut the cream cheese, place each piece on top of a piece of cheddar. This makes the cream cheese easier to handle because as it softens up, it will stick to whatever you set it on and it’s easier to handle if that’s not the cutting board. Get the other half out of the freezer and slice it up too, still setting each slice on top of the cheddar. 

Slicing the cream cheese for making spicy marinated cheese.

Arrange your pairs of cheese slices in as small a dish as possible where they will fit comfortably without being too crowded. 

Arranging the cheeses in a bowl for making spicy marinated cheese.

Give the marinade another good shake then spoon the more solid bits over the cheese squares. 

Food Lust People Love: Spicy marinated cheese is not just pretty, it’s also delicious! It’s the perfect party food for the cheese lovers in your life.

Pour the rest of the marinade over. 

Food Lust People Love: Spicy marinated cheese is not just pretty, it’s also delicious! It’s the perfect party food for the cheese lovers in your life.

Cover the dish with cling film and refrigerate it for at least eight hours.


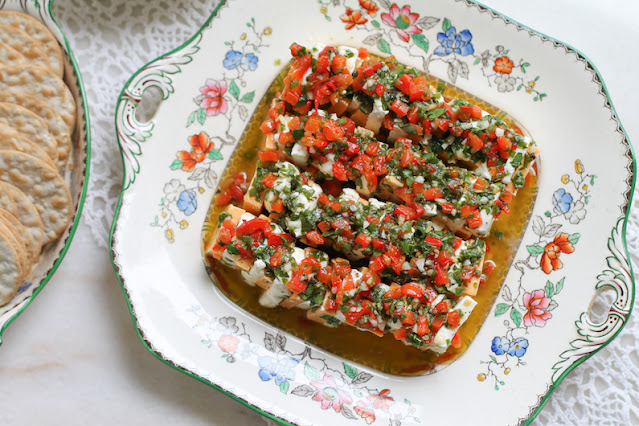
To serve, transfer the cheese to a serving platter and spoon a little of the marinade over it. 

Food Lust People Love: Spicy marinated cheese is not just pretty, it’s also delicious! It’s the perfect party food for the cheese lovers in your life.

Save the rest of the marinade to use as salad dressing. It makes a wonderful vinaigrette. 

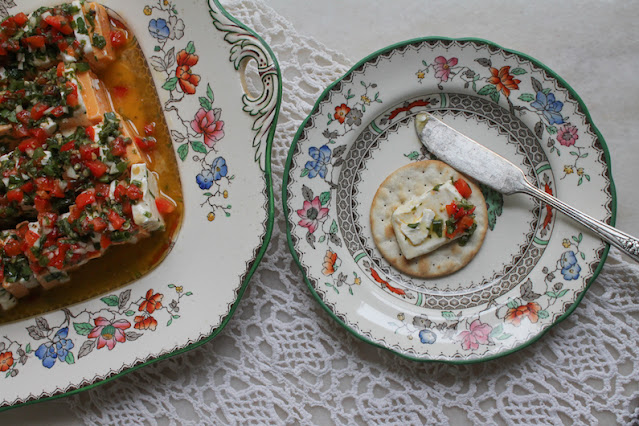
Serve the spicy marinated cheese with crackers or sliced baguette.

Food Lust People Love: Spicy marinated cheese is not just pretty, it’s also delicious! It’s the perfect party food for the cheese lovers in your life.

Enjoy! 

Check out all the other holiday cheese board posts my Sunday FunDay friends are sharing! Many thanks to Camilla of Culinary Adventures with Camilla for this fun theme and for hosting!

We are a group of food bloggers who believe that Sunday should be a family fun day, so every Sunday we share recipes that will help you to enjoy your day. If you're a blogger interested in joining us, just visit our Facebook group and request to join.

Pin this Spicy Marinated Cheese! 

Food Lust People Love: Spicy marinated cheese is not just pretty, it’s also delicious! It’s the perfect party food for the cheese lovers in your life.

 .