Monday, May 30, 2022

Peanut Butter Muffins with Peanut Butter Streusel

Peanut Butter Muffins with Peanut Butter Streusel are the perfect muffins for the peanut butter lovers in your life, so full of peanut butter flavor inside and out!

Food Lust People Love: Peanut Butter Muffins with Peanut Butter Streusel are the perfect muffins for the peanut butter lovers in your life, so full of peanut butter flavor inside and out!

Regular readers will notice from the photos that I am not in my usual kitchen. But such is my dedication to Muffin Monday that in my suitcase I packed the disposable muffins cups, flour, and baking powder just so I could bake these muffins. And a spatula. Also two sharp knives and my little knife sharpener, but those had nothing to do with these peanut butter muffins!

I love staying in Airbnbs because of the kitchen but often they are ill equipped, with the most common missing items being a decent knife and a non-stick pan. I get it. Casual renters can ruin good knives and scratch non-stick pans but, dang, those would really elevate my cooking experience. I draw the line at packing pans (for a flight – road trips maybe!) but I often do bring one or two good knives in my checked bag. 
Is there something you travel with when you know you’ll have a kitchen to cook in? I'd love to hear what it is.
Peanut Butter Muffins with Peanut Butter Streusel 

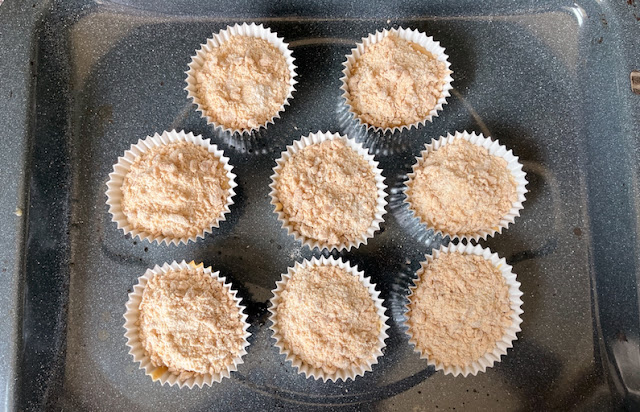
This recipe makes 8 regular sized muffins. To make the streusel, it is essential that the peanut butter be well chilled so you can make crumbles. Since this is an unusual number of muffins, you might want to follow my lead and use a flat baking pan and disposable muffin cups, like these Reynolds brand foil baking cups. They are foil outside with a paper muffin cup inside so they don’t need the support of a muffin pan. Back when I was baking large quantities of cupcakes and muffins for my daughters' school fundraisers, these were a godsend. 

Ingredients
For the muffins:
3/4 cup or 94g flour
1/2 cup or 100g sugar
3/4 teaspoon baking powder
1/4 teaspoon fine sea salt
1/3 cup or 80g smooth peanut butter (I use reduced fat Jif)
1/2 cup or 120ml milk
1 egg 
1/2 teaspoon vanilla

For the streusel:
¼ cup or 32g all-purpose flour
2 tablespoons or 25g sugar 
3 tablespoons or 45g creamy peanut butter, well chilled 

Method
Preheat your oven to 350°F or 180°C and prepare your muffin pan by greasing it or lining it with paper muffin cups. 
Make the streusel by combining the ingredients in a small bowl and using a pastry blender or the tines of a fork to mix them lightly to create crumbles. Put the bowl in the fridge until you are ready to use the streusel. 


In a large bowl, whisk together the flour, sugar, baking powder and salt. 


In another bowl, whisk together the peanut butter, milk, egg and vanilla. 


Fold the wet ingredients into the dry ones until just combined. 


Divide the batter between your 8 muffin cups.


Top with the streusel. 


Bake in the preheated oven for 20-25 minutes or until the muffins are golden and a toothpick inserted in the middle comes out clean.


Remove from the oven and cool on a wire rack, if you have one! My little kitchen did not.

Food Lust People Love: Peanut Butter Muffins with Peanut Butter Streusel are the perfect muffins for the peanut butter lovers in your life, so full of peanut butter flavor inside and out!

Enjoy! 

As I mentioned above, it's Muffin Monday today, the last Monday of the month when my friends and I share our favorite muffin recipes. Check them out below. 
#MuffinMonday is a group of muffin loving bakers who get together once a month to bake muffins. You can see all of our lovely muffins by following our Pinterest board. Updated links for all of our past events and more information about Muffin Monday can be found on our home page.

Pin these Peanut Butter Muffins
with Peanut Butter Streusel!

Food Lust People Love: Peanut Butter Muffins with Peanut Butter Streusel are the perfect muffins for the peanut butter lovers in your life, so full of peanut butter flavor inside and out!

 .

Friday, May 20, 2022

Baked Crawfish Rangoon

These baked crawfish Rangoon are not just pretty to look at; they are tasty too with a garlicky, spicy cream cheese crawfish filling and crunchy baked outsides. 

Food Lust People Love: These baked crawfish Rangoon are not just pretty to look at; they are tasty too with a garlicky, spicy cream cheese crawfish filling and crunchy baked outsides.

Here’s the recipe I promised you in last month’s Muffin Monday post, made with leftover boiled crawfish that we cooked and peeled ourselves. You can substitute frozen crawfish or even chilled cooked shrimp if you can’t get those. 

These little guys are super tasty with or without the dipping sauce but the sauce does add a welcome extra hit of chili pepper to spice them up. 

Baked Crawfish Rangoon

The final step of prep before baking is a spritz of oil to help the rangoon brown in the oven. You can use baking spray but I prefer a mister of just oil, if you have one. This recipe makes 3/4 cup or 180ml dipping sauce and about 40 rangoon. These can be made a day ahead and chilled until you are ready bake and serve. They are best served freshly baked for utmost crispiness. 

Tip: If you do happen to have leftover rangoon after they are already baked, simmer them in a little stock or broth for a delicious light soup.

Ingredients 
For the crawfish rangoon:
1 (8 oz or 226g) package cream cheese, at room temperature
2 cloves garlic
2 green onions
1 red chili pepper (optional)
1 tablespoon low-sodium soy sauce
1 egg, divided
7 oz or 200g cooked crawfish
40 wonton wrappers
Oil spray

For the sweet chili dipping sauce:
1/2 cup or 120ml plus 1 tablespoon water, divided
1 tablespoon cornstarch
2 medium cloves garlic, minced 
3 red chili peppers, minced
1/3 cup or 66g sugar
3 tablespoons rice vinegar
1/2 teaspoon fine sea salt

Method
Preheat oven to 350°F or 180°C. Line a large baking pan with a silicone liner or baking parchment. 

Whisk the egg white with a teaspoon of water in a small bowl. 


Finely mince the garlic cloves, green onions and red chili pepper, if using. 


In a medium bowl, stir together the cream cheese, garlic, green onions, soy sauce and egg yolk. 


Chop the crawfish roughly. Fold them into the cream cheese mixture. 


Arrange the wonton wrappers on your work surface then spoon 2 teaspoons of the crawfish mixture (about 14g) into the center of each wrapper.

Dip your finger or a pastry brush in the beaten egg white and run it around the edges of each wonton wrapper. Fold each of the corners up and toward the center of each wonton wrapper, pinching to seal each edge and top shut.


Arrange the crawfish rangoon in a single layer on the baking sheet, spacing them 1 inch apart. 


Spritz the rangoon with oil spray. (This is optional but will help enhance the golden brown color and crispiness.)

Bake the rangoon until they are golden brown and crispy, 15 to 18 minutes. I managed to fit 24 in one pan so I baked the second batch of 16 when those were done. 


While they bake, make the dipping sauce. In a small bowl, whisk together 1 tablespoon water and cornstarch. Set aside.

In a small pot, mix together the remaining 1/2 cup or 120ml water, garlic, peppers, sugar, vinegar and salt. Bring to a boil over medium heat, reduce heat and simmer for 3 to 5 minutes.


Stir cornstarch mixture to re-combine, then whisk into simmering sauce and cook until thickened, about 1 minute more. Remove from heat, let cool, and use immediately or store in an airtight container in the refrigerator.


Remove the rangoon from the oven and serve them with the dipping sauce.

Food Lust People Love: These baked crawfish Rangoon are not just pretty to look at; they are tasty too with a garlicky, spicy cream cheese crawfish filling and crunchy baked outsides.

Enjoy!

Today my Fish Friday Foodie friends are sharing Seafood in Small Bites. Make sure to check out all the links below. Many thanks to our host, Camilla from Culinary Adventures with Camilla


Would you like to join Fish Friday Foodies? We post and share new seafood/fish recipes on the third Friday of the month. To join our group please email Wendy at wendyklik1517 (at) gmail.com. Visit our Facebook page and Pinterest page for more wonderful fish and seafood recipe ideas.


Pin these Baked Crawfish Rangoon!

Food Lust People Love: These baked crawfish Rangoon are not just pretty to look at; they are tasty too with a garlicky, spicy cream cheese crawfish filling and crunchy baked outsides.

 .


Thursday, May 19, 2022

Orange Marmalade Carrot Cake #BundtBakers

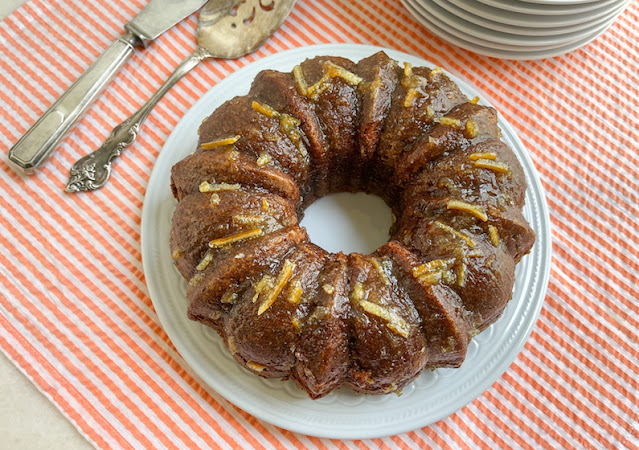
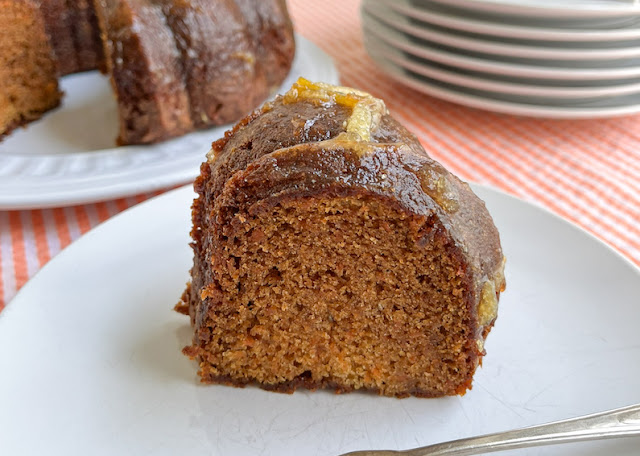
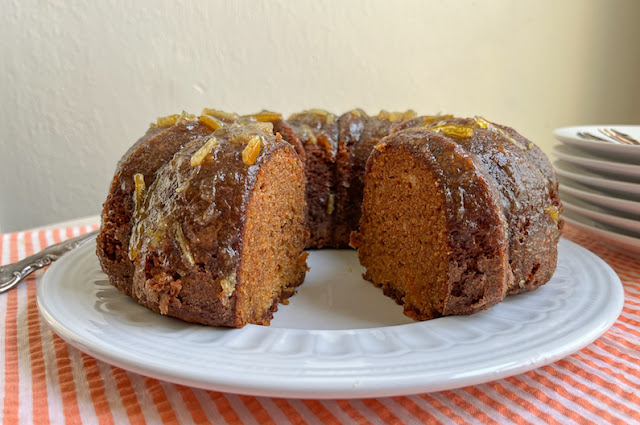
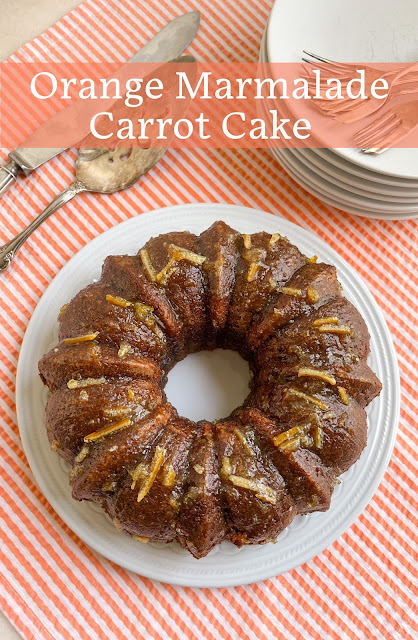
This orange marmalade carrot cake is a riff on my more traditional carrot cake recipe. The marmalade adds enormous flavor and creates a more-ish sticky glaze as well.
  
Food Lust People Love: This orange marmalade carrot cake is a riff on my more traditional carrot cake recipe. The marmalade adds enormous flavor and a sticky glaze as well.

Many years ago my mom went through a juicing phase and her refrigerator drawer was always filled with big bags of carrots. She may correct me here but I recall that her favorite was to juice a bunch of carrots and then some oranges. It was a delightful combination with the orange juice enhancing the sweetness of the carrot juice. 

For this Bundt Bakers challenge, that great flavor partnership came to mind and I decided to recreate it in cake form. The batter is a modified version of our family favorite, David’s Carrot Cake and, instead of cream cheese icing, I used more marmalade for an extra boost of orange.

Orange Marmalade Carrot Cake

I baked this cake in a 12-cup Nordic Ware anniversary Bundt pan but it would no doubt fit in a 10-cup one as well. The marmalade adds extra stickiness to the cake, which is delicious, but also means you really need to grease and flour the pan well so it comes out neatly. You have been warned!

Ingredients
2 eggs at room temperature
1 1/2 cups or 300g sugar
3/4 cup or 190 ml canola or other light oil, plus extra for greasing pan
12 oz or 340g carrots
1/2 cup or 155g orange marmalade
2 cups or 250g flour, plus extra for the pan
2 teaspoons baking powder 
1 1/2 teaspoons baking soda
1 teaspoon cinnamon 
½ teaspoon salt

For the glaze:
1/4 cup or 78g orange marmalade
Splash (or two) water

Method
Peel and cut the stem ends off of your carrots. Cover them with water in a medium sized pot and cook until very fork tender.  


Drain the water off and mash the carrots with a potato masher until there aren’t any lumps. Transfer the mashed carrots to a bowl and leave to cool.


When your carrots are cool and you are ready to start making the batter, preheat your oven to 350°F or 180°C and prepare your 10 or 12-cup Bundt pan by brushing it with oil (or butter) and flouring it.

Add all the ingredients to a large mixing bowl, including the cooled carrots and mix well. 
 

Scrape the bowl down with a rubber spatula and beat for about two more minutes on high.

Pour into your prepared pan.


Bake for about 45-50 minutes or until a wooden skewer inserted comes out clean. Set on a wire rack to cool for about 10 minutes. 


Use a wooden skewer or toothpick to loosen the edges of the cake and invert it on the wire rack. Leave to cool while you make the glaze. As you can see, my cake stuck in a couple of places. Let this be a reminder to you to grease and flour your pan generously!


Gently warm the marmalade in a small pot over a low heat or in a bowl in the microwave. Add small splashes of water, stirring well, until you reach a good brushing or pouring consistency. Spoon or brush the glaze on the warm cake. 


Cool completely before slicing to serve.
 
Food Lust People Love: This orange marmalade carrot cake is a riff on my more traditional carrot cake recipe. The marmalade adds enormous flavor and a sticky glaze as well.

Enjoy!

Food Lust People Love: This orange marmalade carrot cake is a riff on my more traditional carrot cake recipe. The marmalade adds enormous flavor and a sticky glaze as well.

It’s time for my Bundt Baker friends to share cake recipes again! This month our chosen ingredient is jams, preserves or marmalades, incorporated in the batter or used as a swirl. Check out all the lovely recipes we have for you below: 

#BundtBakers badge

#BundtBakers is a group of Bundt loving bakers who get together once a month to bake Bundts with a common ingredient or theme. You can see all of our lovely Bundts by following our Pinterest board. We take turns hosting each month and choosing the theme/ingredient. Updated links for all of our past events and more information about BundtBakers, can be found on our home page.


Pin this Orange Marmalade Carrot Cake!

Food Lust People Love: This orange marmalade carrot cake is a riff on my more traditional carrot cake recipe. The marmalade adds enormous flavor and a sticky glaze as well.

 .

Tuesday, May 10, 2022

Mixed Grain Sourdough Soda Bread #BreadBakers

This mixed grain sourdough soda bread is delicious when freshly baked but is also great toasted. Serve it with your favorite jam, cheese or salad. 

Food Lust People Love: This mixed grain sourdough soda bread is delicious when freshly baked but is also great toasted. Serve it with your favorite jam, cheese or salad.

Last fall, when the weather was starting to turn just a little bit cooler, I got a text from a dear friend inviting me over for a casual lunch outside on her patio. The menu was chicken salad, cheese and fruit. She already had a dessert planned as well so I decided to bake some healthy bread to accompany our lovely lunch.

When our Bread Baker host chose "no knead bread" for this month's theme, I realized that I had never shared the recipe. It is adapted from one on the King Arthur Baking site and calls for their “King Arthur Harvest Grains Blend, or other seeds and grains of your choice.” 

I used a mix of quick cook grains from Central Market, a Texas grocery store, that includes farro, barley, brown rice, wheat and oat groats so I chose to soak them briefly first before baking. If you are using a mix like the one sold by King Arthur Flour, meant to be baked in bread, by all means, skip this step. 

Mixed Grain Sourdough Soda Bread

This loaf is the perfect accompaniment to chicken or tuna salad but equally, we loved it with a swipe of butter and jam. Best of all, it’s full of flavor from the sourdough starter but is quick to make and bake. 

Ingredients
1 1/2 cups or 180g whole wheat flour
2/3 cups or 83g flour
1/4 cup or 45g mixed grains
1/2 teaspoon baking soda
1/2 teaspoon salt
2/3 cup or 150g sourdough starter, ripe (fed) or discard
1/2 cup or 120ml milk, plus extra as needed
2 tablespoons butter, melted
2 tablespoons honey

Optional, but recommended, for after baking: melted butter for brushing on top

Method
Pour boiling water over your mixed grains in a small bowl. Soak for about 3 minutes then drain and pour them onto a clean kitchen towel to dry them out.  Separate out a teaspoon or two and reserve for topping. 


Preheat the oven to 400°F or 200°C. Lightly grease a 9 in or 23cm round springform pan or line it with baking parchment. 

In a medium-sized mixing bowl, whisk together the flours, the larger pile of grains, baking soda, and salt.


In a separate bowl, whisk together the sourdough starter, milk, butter and honey. 


Pour this mixture into the dry ingredients and stir to combine. I use a Danish dough whisk for this step which makes mixing it much easier. 


The dough will be a bit crumbly. If it's too dry to hold together when you squeeze it, you can add a tablespoon or two more of milk. 


Press the dough into a nice round ball shape. Flatten the ball slightly, and press the reserved grains into the top. Put it in your prepared pan.


Use a sharp knife or lame to cut a cross in the top about 1/2 in or 1 cm deep. 


Bake the loaf for 30 to 40 minutes, until it’s golden brown and a cake tester or toothpick inserted into the center comes out clean. 

Remove the loaf from the oven, and brush the top with melted butter, if using.

Food Lust People Love: This mixed grain sourdough soda bread is delicious when freshly baked but is also great toasted. Serve it with your favorite jam, cheese or salad.

Pop it onto a cutting board. 

Food Lust People Love: This mixed grain sourdough soda bread is delicious when freshly baked but is also great toasted. Serve it with your favorite jam, cheese or salad.

Cool completely before slicing. 

Food Lust People Love: This mixed grain sourdough soda bread is delicious when freshly baked but is also great toasted. Serve it with your favorite jam, cheese or salad.

Enjoy! 

As I mentioned above, our Bread Bakers theme this month is No Knead Breads. Many thanks to Sneha of Sneha’s Recipe for hosting. Check out what we've been baking below: 


#BreadBakers is a group of bread loving bakers who get together once a month to bake bread with a common ingredient or theme. Follow our Pinterest board right here. Links are also updated each month on this home page. We take turns hosting each month and choosing the theme/ingredient.


Pin this Mixed Grain Sourdough Soda Bread!

Food Lust People Love: This mixed grain sourdough soda bread is delicious when freshly baked but is also great toasted. Serve it with your favorite jam, cheese or salad.

 .

Sunday, May 8, 2022

Fresh Peach Cream Pie

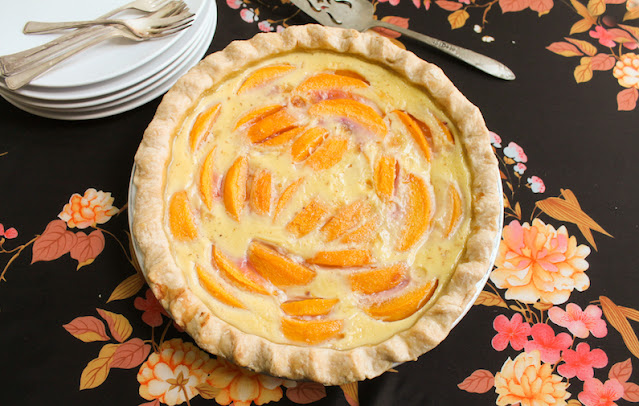
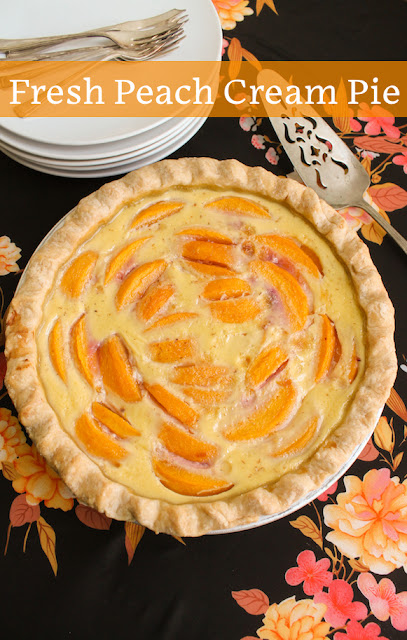
This old-fashioned fresh peach cream pie is lighter than a custard pie but still rich and sweet enough to be a delightful dessert. Make it with fresh peaches, if you have them and canned or frozen peaches if you don’t.

Food Lust People Love: This old-fashioned fresh peach cream pie is lighter than a custard pie but still rich and sweet enough to be a delightful dessert. Make it with fresh peaches, if you have them and canned or frozen peaches if you don’t.

Not long after my maternal grandmother died back in 2001, my great aunt Joy asked my grandfather for her sister’s recipe file. It was a small metal file box with a bunch of index cards, many handwritten or typed out by my grandmother or other family members. The sisters had always had a small rivalry going over their cooking and baking prowess so the rest of us were pretty upset that he’d handed it over. 

I knew I couldn’t flat out ask Aunt Joy for it back but I finally got up the nerve and asked if I could borrow it for a while, just to look through. Well, wouldn’t you know it, but the file box was nowhere to be found! 

Until finally, a few years ago, Aunt Joy’s daughter sent me a message to say she had something for me. I assumed it was her mom's pepper sauce but was even more pleasantly surprised that it was the long-lost recipe box. I just about burst into tears!

This fresh peach cream pie recipe was on one of those cards. It’s a treasure. 


Fresh Peach Cream Pie

Many older recipe call for scalded milk, as this one does. All that means is milk that has been heated to just below the boiling point. For more information on that, I highly recommend this informative post from my friend, pastry chef Jenni Field wherein she gives you the how and why of scalded milk.

Ingredients
For the filling:
1 1/2 cups or 355ml milk
2 eggs
1/4 cup or 50g sugar
1/2 teaspoon vanilla
1/4 teaspoon ground nutmeg
3 fresh peaches (approx. weight 1 lb 3.5 oz or 550g)
1 pie crust from this recipe or your own favorite (ingredients needed for mine below)

For the pie crust:
1 1/4 cups or 156g all-purpose flour  
1⁄4 cup plus 2 tablespoons or a little shy of 70g shortening (I prefer Crisco, when I can get it.)
1/2 teaspoon fine sea salt 
2 to 3 tablespoons cold water

Method
Scald the milk and set it aside to cool. Instructions here: https://pastrychefonline.com/how-to-scald-milk/

Preheat oven to 375°F or 190°C. Make the pie crust by following these instructions or your own favorite.

Roll out the pie crust and fit it into a pie plate. Crimp the edges and dock the bottom and sides with a fork. 


Bake the pie crust in the preheated oven for five minutes. Remove from the oven and set aside. 

In a mixing bowl, whisk the eggs, sugar, vanilla and nutmeg together. 


The scalded milk should be just slightly warm by now. Pour it into the egg mixture slowly, whisking continuously as you do. 


Peel, pit and slice the peaches. 


Arrange them to cover the sides and bottom of the pie crust. 


At this point, I put the pie in a large pan to make transfer to the oven less fraught with the possibility of spillage. Pour the milk mixture over the peaches. 


Carefully transfer the pie to the oven. 

Bake for 55-60 minutes or until the custard is just set (a knife will come out clean) and the pie crust is golden. My oven heats unevenly so I turn the pie around midway through. 


Leave to cool completely on a wire rack. 

Cut in slices to serve. Enjoy!

Food Lust People Love: This old-fashioned fresh peach cream pie is lighter than a custard pie but still rich and sweet enough to be a delightful dessert. Make it with fresh peaches, if you have them and canned or frozen peaches if you don’t.

It’s Sunday FunDay and today we are sharing recipes for Mother’s Day! Check out all the links below. Many thanks to our host, Wendy of A Day in the Life on the Farm.

 
We are a group of food bloggers who believe that Sunday should be a family fun day, so every Sunday we share recipes that will help you to enjoy your day. If you're a blogger interested in joining us, just visit our Facebook group and request to join.

Pin this Fresh Peach Cream Pie!

Food Lust People Love: This old-fashioned fresh peach cream pie is lighter than a custard pie but still rich and sweet enough to be a delightful dessert. Make it with fresh peaches, if you have them and canned or frozen peaches if you don’t.

 .