Wednesday, February 28, 2024

Everything Pizza Tartin

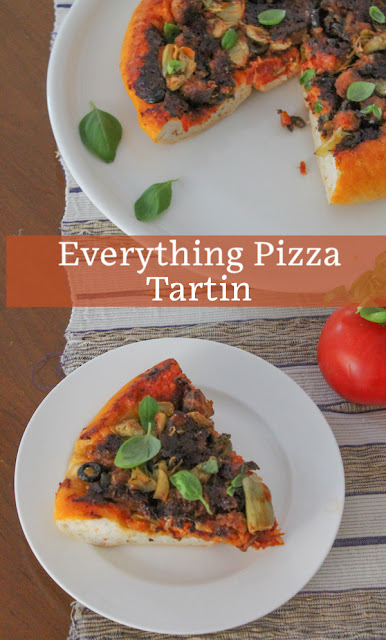
This Everything Pizza Tartin aka Upside Down Pizza is baked with the crust on top, so you can load up on "toppings" like Italian sausage, onion, artichokes, jalapeños and olives and still have a crunchy crust. 

Food Lust People Love: This Everything Pizza Tartin aka Upside Down Pizza is baked with the crust on top, so you can load up on "toppings" like Italian sausage, onion, artichokes, jalapeños and olives and still have a crunchy crust.

Back when I had an oven heated by bottled gas, I struggled to get it hot enough to bake a loaded pizza crust crunchy on the bottom. Putting too many toppings – a particular problem I have – meant my crust was often soggy. Sure, I could put fewer toppings but no one wants a skimpily topped pizza, do they? 

Then suddenly a solution occurred to me. Everything Pizza Tartin is baked upside down, French apple pie style, with ALL of my favorite ingredients, so the thick crust is still extra crunchy. Just flip to serve!
 
Here it is, straight out of the oven, before flipping. 


I use this particular pan because it can go from stovetop to oven. I brown the Italian sausage, then I take it off the heat to layer on the rest of the ingredients, finally tucking the dough in on top.

But you can cook the sausage then bake your everything pizza tartin in a large pie plate or a well-seasoned cast iron skillet. You do not want a pan that sticks. And don’t forget to cut some slits in your crust to let the steam escape. No soggy tops, or rather, bottoms!

I cannot tell you how pleased with myself I was when I figured this out!

Everything Pizza Tartin – Upside Down Everything Pizza 

You do have to be careful to cook it just long enough so the crust is golden brown but the bottom doesn’t burn. When it’s starting to get just a little bit dark in places, it’s absolutely perfect. I figure about 25-30 minutes, depending on how many toppings you’ve added.

Ingredients

For the 10in or 26cm round thick crust:
2 1⁄4 cups or 280g flour

1 rounded teaspoon active yeast – about 4g 
3⁄4 cup or 180ml warm water

1⁄2 teaspoon salt

1 teaspoon olive oil 

For the topping: 
2 links Italian sausage, approximate weight 4 3⁄4 oz or 135g 
Olive oil

Generous handful sliced pepperoni – say 10 or 12 slices

1 cup or 110g grated mozzarella cheese 
1⁄2 cup or 120ml pizza sauce


Other possible toppings:

Small artichoke hearts, well drained and halved

Sliced jalapeños, pickled or fresh

Finely sliced onion

Black olives

Your favorite pizza topping -­ no need to limit your toppings! 

Recommended: Fresh basil leaves for serving 

Method
To make the crust, mix 1 cup or 125g flour with the yeast and add in the warm water. Leave to prove for about 5 minutes. You should see some bubbling. 


Add the salt then the rest of the flour, a little at a time, mixing continuously until you have a soft dough. You might not use quite all of the flour. Knead for about five minutes or until the ball of dough is smooth and elastic. 


Leave to prove in a warm place, covered with cling film or a damp towel, for about 45 minutes or until doubled in size. (Pizza dough can be prepared one day ahead. Leave to rise, covered, in the refrigerator. Allow to come to room temperature before rolling out and baking. You can also substitute store-­bought pizza dough.)

Preheat your oven to 400°F or 200°C when the dough has about 15 minutes rising time left. 


Meanwhile, prepare your toppings. In the bottom of your ovenproof skillet, brown the sausage in small balls, adding a drizzle of olive oil. 


Remove from the heat once browned and spoon off some of the excess fat cooking the sausages might have created. 


Sprinkle in the finely sliced onion, the artichokes, jalapeños, olives and other toppings, distributing them evenly. Top these with the pepperoni slices. 


Sprinkle on the mozzarella cheese. Spoon on the pizza sauce, spreading it around gently with the back of the spoon.


Roll or press your crust out so that it’s just a bit larger than the
diameter of your fillings in the pan. Cut three slits to allow steam to escape while it’s baking. 


Fit the crust over the fillings and tuck it in all around the sides. Use a pastry brush to brush olive oil over the top of the crust and down the tucked sides. 

Bake the pizza tartin in your preheated oven for about 25­-30 minutes or until the crust is a lovely golden color and quite crisp on the outside. When you tap it, it should sound hollow. 


Leave the pizza tartin to cool for about 5­-7 minutes then invert it carefully onto a serving plate. 


If any of the bits do stick, just scoop them off the pan and replace on the pizza tartin. 

Sprinkle with fresh basil leaves and cut in wedges and serve hot. 


Food Lust People Love: This Everything Pizza Tartin aka Upside Down Pizza is baked with the crust on top, so you can load up on "toppings" like Italian sausage, onion, artichokes, jalapeños and olives and still have a crunchy crust.

Enjoy!

Welcome to the fifth installment of our Alphabet Challenge for 2024. Today’s recipes are brought to you by the letter E. Many thanks to our challenge creator, Wendy of A Day in the Life on a Farm

Check out all the recipes brought to you by the letter E. 

Here are my posts for the alphabet challenge, thus far: 
E: today's post! Everything Pizza Tartin

Pin this Everything Pizza Tartin! 

Food Lust People Love: This Everything Pizza Tartin aka Upside Down Pizza is baked with the crust on top, so you can load up on "toppings" like Italian sausage, onion, artichokes, jalapeños and olives and still have a crunchy crust.

.

Monday, February 26, 2024

Jalapeño Cheddar Muffins #MuffinMonday

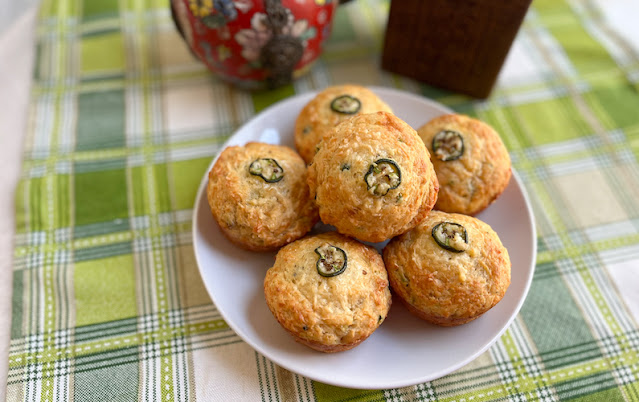
Slightly spicy and oh so cheesy, these jalapeño cheddar muffins are fluffy inside with a little cheesy crunch on the outside. In short, they are delicious. Perfect for breakfast OR snack time. They are also a great accompaniment for soup!

Food Lust People Love: Slightly spicy and oh so cheesy, these Jalapeño Cheddar muffins are fluffy inside with a little cheesy crunch on the outside. In short, they are delicious. Perfect for breakfast OR snack time. They are also a great accompaniment for soup!

Once again, I’m sharing a small batch recipe for Muffin Monday, the last Monday of the month. It makes just six normal sized muffins but I must confess that my husband and I each ate two, one after the other, as soon as I took the photos for this post. They are so good! Just double the ingredients if you need 12.

Jalapeño Cheddar Muffins

I used a English mature cheddar for the extra sharp cheddar in this recipe because it’s our favorite but I have to admit for prettier muffins, an orange-colored cheddar might make a nicer contrast with the green jalapeños on top. Does anyone know why we color our cheddar here in the States? I must research this but if you know, please tell me why! 

Ingredients for 6 muffins
1 fresh jalapeño
Drizzle olive or canola oil to grease 6-cup muffin pan
1 cup or 125g flour
1 teaspoon baking powder
1/4 teaspoon salt
Few good grinds of fresh black pepper
4 oz or 112g extra sharp cheddar
1/3 cup or 78ml milk
3 tablespoons canola or other light oil
2 teaspoons Worcestershire sauce (We prefer Lea & Perrins.)
1 egg

Method
Slice six thin rounds from your jalapeños to use for decoration, then mince the rest of them, discarding the seeds (if you want them less spicy) and stems. 


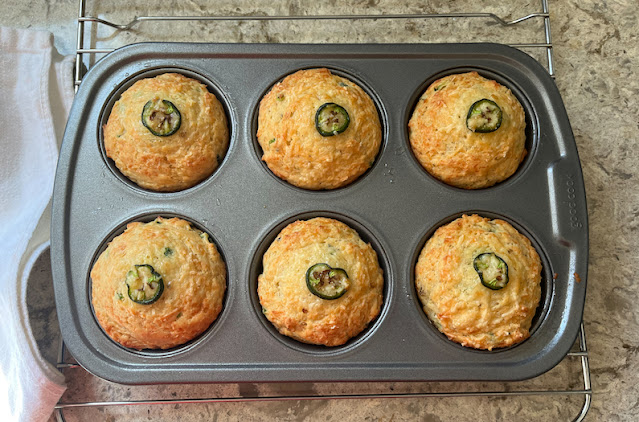
Preheat your oven to 350°F or 180°C and grease your 6-cup muffin pan liberally with canola or olive oil.  I don’t recommend using muffin liners when baking with cheese because the melty cheese makes the muffins hard to remove from the paper.

Grate your cheese. Put aside a small handful for topping the muffins. Whisk together your flour, baking powder, salt and pepper in a large bowl. 


Add the bigger pile of cheese to the flour bowl and stir to coat the cheese.


Now add the minced jalapeños and stir to coat again.


In another bowl, whisk together the milk, oil, Worcestershire sauce and egg. 
 

Pour your wet ingredients into the dry ingredients and fold them together until just mixed. 


This is a really stiff batter, almost a dough. But trust. When the muffins bake, all that cheese is going to melt and you will end up with lovely tender muffins.

Divide the batter evenly among the 6 muffin cups. Top each with some reserved cheese and a slice of jalapeño.


Bake in your preheated oven about 20-25 minutes or until a toothpick inserted in the middle comes out clean.

Food Lust People Love: Slightly spicy and oh so cheesy, these Jalapeño Cheddar muffins are fluffy inside with a little cheesy crunch on the outside. In short, they are delicious. Perfect for breakfast OR snack time. They are also a great accompaniment for soup!

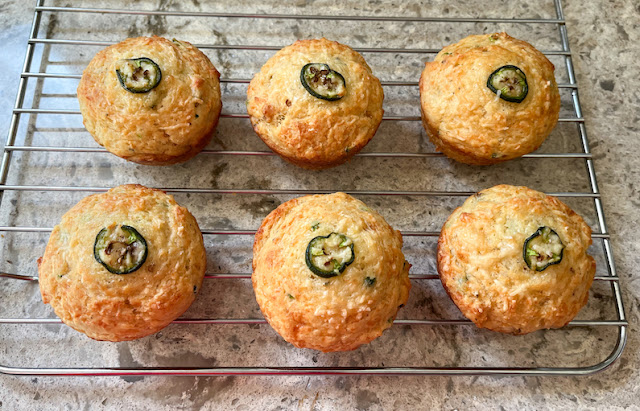
Cool on a rack for a few minutes and then remove the muffins from the pan to cool completely.  

Food Lust People Love: Slightly spicy and oh so cheesy, these Jalapeño Cheddar muffins are fluffy inside with a little cheesy crunch on the outside. In short, they are delicious. Perfect for breakfast OR snack time. They are also a great accompaniment for soup!

If, despite liberal greasing, your muffins still stick to the pan a little, just run a knife or silicone spatula around the outside of each muffin and they should pop free.

Food Lust People Love: Slightly spicy and oh so cheesy, these Jalapeño Cheddar muffins are fluffy inside with a little cheesy crunch on the outside. In short, they are delicious. Perfect for breakfast OR snack time. They are also a great accompaniment for soup!

Enjoy!  

As I mentioned above, it’s Muffin Monday, our favorite day of the month! Check out the other recipes my blogger friends are sharing: 

#MuffinMonday is a group of muffin loving bakers who get together once a month to bake muffins. You can see all of our lovely muffins by following our Pinterest board. Updated links for all of our past events and more information about Muffin Monday can be found on our home page.


Pin these Jalapeño Cheddar Muffins!

Food Lust People Love: Slightly spicy and oh so cheesy, these Jalapeño Cheddar muffins are fluffy inside with a little cheesy crunch on the outside. In short, they are delicious. Perfect for breakfast OR snack time. They are also a great accompaniment for soup!

 .

Sunday, February 25, 2024

Mini Scones

These fluffy two-bite mini scones are a wonderful addition to your breakfast table. Serve them hot so that pat of butter will melt inside when you split them in two!

Food Lust People Love: These fluffy two-bite mini scones are a wonderful addition to your breakfast table. Serve them hot so that pat of butter will melt inside when you split them in two!

This recipe is based on one that a Scottish friend shared with me. She uses self-rising flour and cream to make hers a two-ingredient dough and didn’t have any measurements to offer! “Just add enough of each to make a proper scone dough,” said she. Challenge accepted! (In her defense, she went to culinary school so this stuff is second nature to her.)

Don’t panic though. I’m going to give you ingredient amounts so you can replicate these little mini scones. I used a 2 in or 5cm cookie cutter. You can use a bigger cookie cutter to make larger scones. You’ll just have to pat the dough out a little thicker so that they are proportional and bake them a little longer.

Gillian would appreciate this, she of no actual recipe: One time I didn’t have cream so I started making these with full fat Greek yogurt instead. I do love experimenting! It adds a lovely flavor and works fabulously. That is the recipe I'm sharing today.

Mini Scones

If you have self-rising flour you know is active, by all means, use it instead of the cake flour, baking powder, baking soda and salt, adding an extra 2 teaspoons of flour. I don’t often buy self-rising flour because I find it gets old if not used up in a timely manner. I keep the baking powder in the refrigerator so it’s always active well past its sell by date.

Ingredients 
1 cup or 245g full fat Greek yoghurt
1 3/4 cups or 218g flour
1 1/2 teaspoons baking powder
1/4 teaspoon baking soda
1/4 teaspoon fine sea salt

To brush on before baking: 2-3 tablespoons milk

Method
Preheat the oven to 350°F or 180°C. Line a large baking sheet with baking parchment or a silicone liner. 

In a mixing bowl, mix together the flour, baking powder, baking soda and salt. 

Fold the yoghurt and flour mixture together until fully incorporated. If the mixture is too dry or too wet, add more flour or more yogurt accordingly. You are looking for a soft dough that isn’t too sticky.


Press the scone mixture flat until it’s about 1/2 in or 1cm thick, then use a small cookie cutter to make circles. 


Patch together the leftover dough, trying not to knead it much and pat it out again. 


Cut out more scones. Place them on the lined baking tray, almost touching. Use a pastry brush to brush the tops with a little milk. 


Bake for 15-20 minutes, or until the scones are risen, golden, and cooked through. 


I like to split them in two right when they come out of the oven and add a pat of butter. 


Or serve with jam and butter or cream while still warm.

Food Lust People Love: These fluffy two-bite mini scones are a wonderful addition to your breakfast table. Serve them hot so that pat of butter will melt inside when you split them in two!

Enjoy!

It’s Sunday FunDay and today we are sharing recipes to celebrate National Hot Breakfast Month. We hope to inspire you to get in the kitchen and cook a hot breakfast for yourself or someone you love before February ends. Check out the links below: 

 
We are a group of food bloggers who believe that Sunday should be a family fun day, so every Sunday we share recipes that will help you to enjoy your day. If you're a blogger interested in joining us, just visit our Facebook group and request to join.


Pin these Mini Scones!

Food Lust People Love: These fluffy two-bite mini scones are a wonderful addition to your breakfast table. Serve them hot so that pat of butter will melt inside when you split them in two!

 .

Wednesday, February 14, 2024

Cajun Chicken Eggplant Dressing

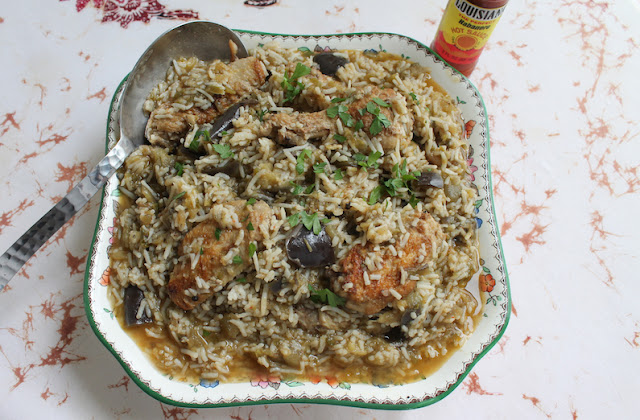
Spicy and delicious, this Cajun chicken eggplant dressing can be a side dish or dinner! Either way, if you like eggplant, you are going to love it. 

Food Lust People Love: Spicy and delicious, this Cajun chicken eggplant dressing can be a side dish or dinner! Either way, if you like eggplant, you are going to love it.

This was one of my mom’s favorite dishes and one I absolutely detested growing up. For too many years she’d make me put some on my plate, just to try it, until she suddenly said, “Hey, the more for me!” and quit forcing me. Hallelujah! 

When I finally learned to love eggplant through the Italian gateway dish/drug of eggplant parmigiana,  I started cooking Mom’s old eggplant-based favorites and, sur-PRISE, sur-PRISE, sur-PRISE, as Gomer Pyle used say, I loved them all!

Side note to my overseas/younger readers: Gomer Pyle was a character in a terribly hokey 1960s tv show I watched as reruns when I was a kid in the '70s. One of his standard lines "Sur-PRISE, sur-PRISE, sur-PRISE" - emphasis on the last syllable - was always uttered with a big wide eyes, possibly followed by another of his favorite interjections: SHAZAM! He was innocent, easily amazed and we loved him. In case you want to look it up, he was on The Andy Griffith Show.

If you love eggplant like I love eggplant, you might like to try my Cheesy Eggplant Pork Roast Rolls, my Caprese Stuffed Roasted Eggplant or Mom’s other huge favorite, Cajun Shrimp Eggplant Casserole. All delicious but the Caprese Stuffed Roasted Eggplant is especially lovely if you need a pretty main dish for the vegetarians in your life. 

Isn't it amazing how our taste buds and aversions to texture can change as we grow up? 

Cajun Chicken Eggplant Dressing

You can make this dressing with your preferred chicken parts but know that chicken with skin on and bones helps make the dish more flavorful. If you choose bigger pieces, like thighs, just make sure you cook them till they are tender. On the cooked rice, I like long-grained basmati rice but my Cajun grandmother would have used short grained, grown locally in southern Louisiana. You do you. 

Ingredients
2 1/2 lbs or 1134g chicken wing parts (use the tips to make stock!) 
1/2 teaspoon fine sea salt
freshly ground black pepper
ground cayenne
1/4 cup or 60ml canola oil
1 medium onion, peeled and finely minced
1 medium bell pepper, de-seeded, stem removed, finely minced
2 stalks celery, finely minced
2 medium eggplants (about 2 lbs or 900g in weight)
3 cups or 400g cooked rice
1/2 teaspoon fine sea salt, plus more to taste
1 teaspoon cayenne (use less if you don’t like things spicy), plus more to taste 
Freshly ground black pepper, plus more to taste

Optional: chopped parsley for garnish

Method
Season the chicken with salt, black pepper and a good sprinkle of cayenne then pan-fry in the canola oil, uncovered, in your Dutch oven until golden brown on all sides. Remove to a plate and set aside. 


Add the onion, bell pepper and celery to the pot and sauté over a low heat until the vegetables are soft and the onion is translucent. I find putting the lid on helps this go faster but don’t forget to stir frequently. 


Peel the eggplant in strips, leaving some peeling on for color, then cut them into cubes. You can leave all the peels on but the color of the dish will be markedly darker. My mom used to say that when her grandmother made it, the eggplant turned even the chicken kind of black. I cannot verify this as I always peel mine thusly. 


Once the onion mixture has softened, return the golden chicken pieces to the pot. (For the eagle-eyed, I just removed the pot from the stove for photos. My stovetop doesn't have great lighting.)


Pile the eggplant cubes on top and season with the salt, cayenne and a few generous grinds of black pepper. 


Add a half cup or 120ml water to the pot and put the lid to your Dutch oven on snugly. Cook over a high heat for a few minutes, until you start to see a little steam trying to escape, then turn the heat down to simmer. 

Cook for about an hour, checking periodically to see if you need to add a little water, if it looks dry. With a proper tight-fitting lid, the eggplant releases enough liquid that this shouldn’t be necessary but best to check. 

This is after about half an hour. 


This is after a full hour. You will notice that I did not stir so the chicken remains submerged. 


Take the lid off the pot and add in the cooked rice. Now you should mix well. 


Cook, covered, for about five minutes or until the rice is heated through. Stir occasionally to make sure it doesn’t start to stick to the pot. 

Taste the dressing and add more salt, cayenne and black pepper if needed. Mine is usually good for salt but we like more pepper. Again, you do you. 


Pile the dressing in a serving bowl and garnish with a little chopped parsley for color. My grandmother would never have missed this step! Every savory dish she cooked was finished with a little parsley. 

Food Lust People Love: Spicy and delicious, this Cajun chicken eggplant dressing can be a side dish or dinner! Either way, if you like eggplant, you are going to love it.

Enjoy!

Welcome to the fourth installment of our Alphabet Challenge for 2024. Today’s recipes are brought to you by the letter D. Many thanks to our challenge creator Wendy of A Day in the Life on a Farm


Here are my posts for the alphabet challenge, thus far:
A: Anchovy Deviled Eggs
B: Spicy Braised Ginger Pork Belly
C: Cecilie's Favorite Coleslaw
D: Cajun Chicken Eggplant Dressing - This post!


Pin this Cajun Chicken Eggplant Dressing!

Food Lust People Love: Spicy and delicious, this Cajun chicken eggplant dressing can be a side dish or dinner! Either way, if you like eggplant, you are going to love it.

 .

Tuesday, February 13, 2024

Chocolate Chocolate Chip Mini Loaves #BreadBakers

These Chocolate Chocolate Chip Mini Loaves are baked with cocoa and chocolate chips. Applesauce adds moisture and nutrition - not that you’ll notice it’s there flavor-wise! It's all about the chocolate!

Food Lust People Love: These Chocolate Chocolate Chip Mini Loaves are baked with cocoa and chocolate chips. Applesauce adds moisture and nutrition - not that you’ll notice it’s there flavor-wise! It's all about the chocolate!

Like many of my friends who love cooking and baking, I have a lot of pans that I rarely use but still keep, you know, just in case. The little vintage loaf pans I used for this recipe are a good example. I inherited them, if memory serves, from my paternal grandmother who used them to make fruitcake to give away at Christmastime. 

I actually own six of these little pans but since there are just two of us at home, it seemed like a good idea just to make four mini loaves. If you don't have mini loaf pans, you can bake this batter as muffins.

Chocolate Chocolate Chip Mini Loaves

This recipe is for a small batch of just four mini loaves but it’s easily doubled if you need eight. Or even trebled. This batter is very forgiving like that. My mini loaf pans have a capacity of one cup or 240ml by volume.

Ingredients
1 cup or 125g flour
1/4 cup or 20g cocoa
1/4 cup or 50g white sugar
1/4 cup, packed, or 50g brown sugar
1 teaspoon baking powder
1/4 teaspoon salt
1/4 cup or 75g applesauce (I used homemade but store-bought works fine.)
1 egg
3 tablespoons milk
3 tablespoons canola oil, plus extra for the pans
1/4 cup or 50g semi-sweet chocolate chips plus a little extra for topping, if desired.

Method
Preheat your oven to 350°F or 180°C and prepare your four mini loaf pans by brushing or spraying the insides with oil.

In a large mixing bowl, whisk together your flour, sugars and baking powder. 


Mix in the chocolate chips and use your clean hands to separate any that are stuck together. 


In another smaller bowl, whisk together your applesauce, egg, milk and oil.


Pour your wet mixture into the dry ingredients and fold until they are just combined. 


Divide the batter evenly between the prepared mini loaf pans. Add a few more chocolate chips to the top, if desired.  


Bake in your preheated oven for about 20-25 minutes or until the mini loaves are puffed up and a toothpick comes out clean when inserted in the middle.


Remove from the oven and allow to cool for a few minutes.

Run a offset spatula or butter knife around the edges of the pans and gently turn the  loaves out of the pans and cool further on a wire rack.

Food Lust People Love: These Chocolate Chocolate Chip Mini Loaves are baked with cocoa and chocolate chips. Applesauce adds moisture and nutrition - not that you’ll notice it’s there flavor-wise! It's all about the chocolate!

Enjoy!

Food Lust People Love: These Chocolate Chocolate Chip Mini Loaves are baked with cocoa and chocolate chips. Applesauce adds moisture and nutrition - not that you’ll notice it’s there flavor-wise! It's all about the chocolate!

It's the second Tuesday of the month so that means it's time for my Bread Baker friends to share their recipes. Our theme is chocolate breads! Many thanks to our host Wendy of A Day in the Life on the Farm


#BreadBakers is a group of bread loving bakers who get together once a month to bake bread with a common ingredient or theme. Follow our Pinterest board right here. Links are also updated each month on this home page. We take turns hosting each month and choosing the theme/ingredient.


Pin these Chocolate Chocolate Chip Mini Loaves!

Food Lust People Love: These Chocolate Chocolate Chip Mini Loaves are baked with cocoa and chocolate chips. Applesauce adds moisture and nutrition - not that you’ll notice it’s there flavor-wise! It's all about the chocolate!

 .