Showing posts with label Alice Medrich. Show all posts

Wednesday, October 25, 2017

Black Bottom Pecan Praline Bars

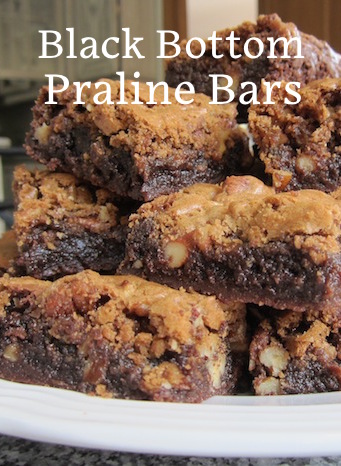
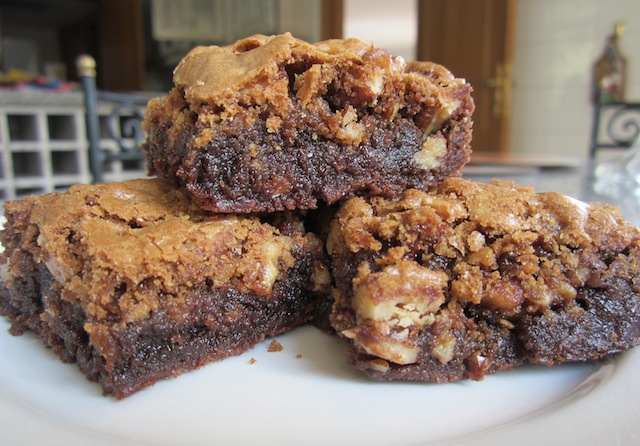
These guys are called Black Bottom Pecan Praline Bars and they are a big chocolately chewy, crunchy stack of sweet evil. Make some to take to a friend's house. You probably shouldn't be alone in your house with them. Fair warning.

Food Lust People Love: These guys are called Black Bottom Pecan Praline Bars and they are a big chocolately chewy, crunchy stack of evil. Make some to take to a friend's house. You probably shouldn't be alone in your house with them. Fair warning.

I am overwhelmed by the number of food blogs there are out there. I tend to like the ones that are lighthearted and funny as well as having delicious recipes. Tell me a good story, then share some good food, and I will come back and spend time with you regularly. It’s like finding a new friend and we have a lot in common. I saw this recipe first at a favorite, Cravings of a Lunatic, but when I read Kim's post, she had gotten it from the helpful blogger and purveyor-of-valuable-advice Chef Dennis. He, in turn, got it from renown baker and chocolate expert, Alice Medrich’s book, Chewy Gooey Crispy Crunchy Melt-in-Your-Mouth Cookies.

And that is what the internet means to me. Sharing and community and delicious food. Usually mixed in with a few good laughs. (And since I started writing this blog, I can call it research! Win-win!) You seriously need to make these brownies and share in the joy and love and succulently chocolate chewiness.

Black Bottom Pecan Praline Bars


(Method adapted slightly from the original recipe by Alice Medrich.  Ms. Medrich doesn’t toast her pecans or use a microwave.  I have to toast pecans or I feel the spirit of my late Aunt Karen hovering over me. She always toasted her pecans because she said it enhanced their nutty flavor. Trust me: Aunt Karen was right. Plus she made the very best pecan pie. You should try it! )

Ingredients
For the brownie layer:
8 tablespoons or 120g unsalted butter
6 1/2 ounces or 185g semi-sweet chocolate
3/4 cup plus 2 tablespoons or 175g sugar
1 teaspoon pure vanilla extract
1/4 teaspoon salt
2 large eggs (cold)
1/2 cup or 65g all purpose flour

For the praline layer:
1/2 cup or 65g all purpose flour
1/2 teaspoon baking soda
8 tablespoons or 120g unsalted butter - melted
3/4 cup or 150g packed brown sugar
1/2 teaspoon salt
2 large egg yolks
1 teaspoon pure vanilla extract
2 1/2 cups (after chopping) or 250g pecans (The original recipe says pecans or walnuts, but I am from Louisiana. There never was a praline without pecans.)

Method
Preheat oven to 350°F or 180°C degrees. Put your pecans in a 9 X 13 in pan and pop them in the preheating oven. Set a timer for five minutes. As the oven heats, give the pan a shake and toss the pecans around. Keep setting your timer because we are going to move on to other steps and you DO NOT want to forget about your pecans and let them burn.

I toasted mine for around 20-25 minutes in total but only the last five to seven minutes were in a hot oven. (My oven heats up pretty slowly.) As your oven heats, you may want to shake them around more often to prevent one side from scorching.


Once the pecans are sufficiently toasted, tip them out onto a cutting board and dust out your baking pan with a paper towel. Let it cool a little and then line it with aluminum foil and butter or spray with non-stick spray.

Just a little darker, but, oh, the flavor!

Chop your chocolate into chunks and put it in a microwaveable bowl with the butter. Zap it for 30 seconds at a time, stirring well between each zap. Mine took three rounds of 30 seconds and it was completely melted through.


Stir in the sugar, vanilla, and salt. You can give it one more quick 30 seconds in the microwave at this point, if your sugar doesn’t seem to be melting quickly enough. Our sugar here in Cairo is not as fine grained as the caster sugar I can buy elsewhere so that extra 30 seconds was helpful. Give it a good stir, scraping all around the sides with a spatula to make sure there aren’t any hot spots.


Add the eggs and mix well.

Here's what happened when I tried to get fancy and crack the egg with one hand for the photo.
Eggshells. Don't let this happen to you. Man, were they a pain to fish out.

Beating in the eggs.

Add in the flour and beat vigorously until batter is smooth and glossy. A wooden spoon is probably best for this step. I removed the whisk and changed tools. The original recipe says that the batter should start to come away from the sides of the bowl, but that never happened for me.


Pour the batter into your greased, foil-lined pan. Gently spread the batter all over the pan and set the pan aside.


On to the praline topping. Combine flour and baking soda in a small bowl and mix well using a fork. Set this aside.


Coarsely chop your pecans.


Melt your butter with quick zaps in the microwave in a microwave friendly container, then mix it in another bowl with the brown sugar and salt.


Separate your egg yolks then add them in along with the vanilla.


It looks like toffee sauce or the beginning of pralines. Yum already.
Add in flour mixture and then the pecans. Mix well.


Drop by small spoonsful on top of the brownie layer. Don’t worry about any little gaps because it will spread and cover the brownies during baking.


Bake for 20-25 minutes but set your timer for 10 minutes first so you can rotate the pan for even browning. Bake until the top is completely brown and cracked. I actually ended up baking mine for closer to 30 minutes.


Cool until firm on wire rack, then lift the ends of the foil and remove from the pan. Cool completely before cutting into squares.

These fulfill every promise in Ms. Medrich’s book title. No kidding: Chewy, Gooey, Crispy, Crunchy AND Melt-in-Your-Mouth.

Food Lust People Love: These guys are called Black Bottom Pecan Praline Bars and they are a big chocolately chewy, crunchy stack of evil. Make some to take to a friend's house. You probably shouldn't be alone in your house with them. Fair warning.

Enjoy!

If you love pecans, you might also love these recipes.

My party pecan pie - best and easiest way to make enough pecan pie for a crowd!


Pecan Bundt Cake with Orange Cream Cheese Icing - it's perfect for your Thanksgiving or Christmas dessert table.


Chewy Brigadeiro Pecan Bars - these bad boys sport toasted pecans, melted chocolate, rolled oats and dulce de leche. You probably shouldn't be home alone with these either.

________

Pin it!

Food Lust People Love: These guys are called Black Bottom Pecan Praline Bars and they are a big chocolately chewy, crunchy stack of evil. Make some to take to a friend's house. You probably shouldn't be alone in your house with them. Fair warning.


.

Friday, June 24, 2011

Golden Vanilla Bean Caramels


This is the chocolate that started me off.   


Almost two months ago I had the good fortune to be invited to Geneva to take part in a meeting of company spouses.  We were also treated to some lovely meals and excursions, one of which was the Cailler chocolate factory in Gruyère.    I’ve traveled all over the world, but somehow I had never come across chocolate with caramel and SALT. Ordinarily not a sweet lover, I ate the whole bar, square by square, nibble by nibble until it was completely gone. Then I mourned. Just as well, you say, and you are correct, but that new taste sensation has stayed at the back of my mind now for weeks.
Yesterday, I came across a recipe online, originally from Pure Dessert by Alice Medrich and I knew I had to try it.

Golden Vanilla Bean Caramels
from Pure Dessert by Alice Medrich (And if you, too, love Alice Medrich, check out her blog.) 

Ingredients
1 cup Lyle’s Golden Syrup
2 cups sugar (I used only 1 3/4 cups)
3/8 teaspoon fine sea salt (I used a 1/2 teaspoon since I was trying to approximate my Swiss experience, which was definitely salty.)
2 cups heavy cream
1 1/2 teaspoons pure ground vanilla beans, purchased or ground in a coffee or spice grinders, or 1 tablespoon plus 1 teaspoon pure vanilla extract (I scraped the seeds out of one fresh bean then threw the whole pod in while heating the cream, taking it out before adding the cream to the sugar mixture as required.)
3 tablespoons unsalted butter, cut into chunks, softened

Equipment
A 9-inch square baking pan
Candy thermometer

Line the bottom and sides of the baking pan with aluminum foil and grease the foil. (Really grease it well or even the foil will stick to this caramel! Mine did in places so clearly my greasing wasn’t thick enough everywhere.) Combine the golden syrup, sugar, and salt in a heavy 3-quart saucepan and cook over medium heat, stirring with a silicone spatula or wooden spoon, until the mixture begins to simmer around the edges. Wash the sugar and syrup from the sides of the pan with a pastry brush dipped in water. Cover and cook for about 3 minutes. (Meanwhile, rinse the spatula or spoon before using it again later.) Uncover the pan and wash down the sides once more. Attach the candy thermometer to the pan, without letting it touch the bottom of the pan, and cook, uncovered (without stirring) until the mixture reaches 305°F. 


Meanwhile, combine the cream and ground vanilla beans (not the extract) in a small saucepan and heat until tiny bubbles form around the edges of the pan. Turn off the heat and cover the pan to keep the cream hot.

When the sugar mixture reaches 305°F, turn off the heat and stir in the butter chunks. Gradually stir in the hot cream; it will bubble up and steam dramatically, so be careful. 


Turn the burner back on and adjust it so that the mixture boils energetically but not violently  Stir until any thickened syrup at the bottom of the pan is dissolved and the mixture is smooth. Continue to cook, stirring occasionally, to about 245°F. (This part seemed to take forever. I had my fire rather low because I didn’t want the mixture to burn but it didn’t seem to go above 225 °F for the LONGEST time, so I raised the flame and the temperature finally began to climb.) Then cook, stirring constantly, to 260°F for soft, chewy caramels or 265°F; for firmer chewy caramels. (Took mine out at 260°F and they are soft and chewy and are a danger to dental fillings for sure!)

Remove the pan from the heat and stir in the vanilla extract, if using it. (I skipped this step since the whole pot was filled with little bitty vanilla seeds and that seemed like enough vanilla.) Pour the caramel into the lined pan. Let set for four to five hours, or overnight until firm.

Lift the pan liner from the pan and invert the sheet of caramel onto a sheet of parchment paper. Peel off the liner. Cut the caramels with an oiled knife. (This DID NOT work very well for me. My well-oiled knife still stuck to the caramels. My kitchen scissors were much more effective in cutting the caramel into squares.) 

Wrap each caramel individually in wax paper or cellophane.  (I used cling film, cutting off a wide strip and lining the squares up in the middle with an inch or two in between each one. I folded the cling film over from the top and then the bottom, pressing a finger down between each caramel. Then I cut the cling film where I had pressed my finger, to separate them.)

  
These caramels are delicious. If I would do anything different next time, it would be to add even more salt flakes to the top. I mashed a lot of them off as I was trying to separate the caramels into squares.

Enjoy!