Showing posts with label baked recipes. Show all posts

Sunday, November 7, 2021

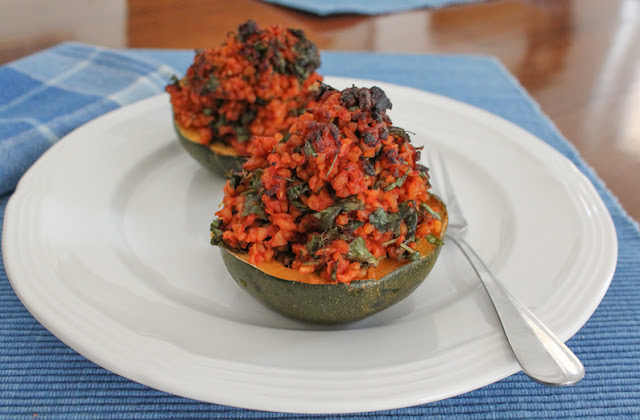
Stuffed Gem Squash

Roasted Stuffed Gem Squash filled with herby, tomato-ey bulgur wheat is a thing of beauty and deliciousness but you can also kick it up a notch with the addition of Italian sausage. 

Food Lust People Love: Roasted Stuffed Gem Squash filled with herby, tomato-ey bulgur wheat is a thing of beauty and deliciousness but you can also kick it up a notch with the addition of Italian sausage.

Gem squash is a South African heirloom squash that has gained popularity in many other countries. In its native land, it is considered a summer squash but in the United States, it falls into the winter squash category. It’s a descendant of a Central American squash that made its way across the sea and is a must-have in South Africa. 

If you’d like to learn more about them and where to find gem squash, this post on Cook Sister is very informative: https://www.cooksister.com/2010/10/gem-squash-central-finding-them-growing-them-and-eating-them.html

Stuffed Gem Squash  - Two Ways

In the following recipe, we will make a base stuffing with onions, tomatoes, bulgur and herbs, which is delicious on its own for half the gem squash. The other half, we’ll fill with a mixture of the base stuffing with added Italian sausage. By adjusting your filling amounts, you can make all vegetarian, leaving out the sausage altogether or add another link or two of sausage to stuff all the gem squash with a meaty mixture. If you can't find gem squash, substitute small acorn squash which are of a similar size. 
 
Ingredients
4 gem (or acorn) squash 

For the stuffing:
1/4 cup or 60ml olive oil, plus more for sautéing the onion and drizzling on the squash before roasting
1 large or 2 medium onions, minced (Mine weighed 7 oz or almost 200g)
1 cup or 210g medium coarse bulgur wheat
1.1 lbs or 500g tomato passata aka tomato puree
1 teaspoon fine sea salt or to taste
1 vegetable stock cube 
1/4 teaspoon freshly ground black pepper
1 teaspoon crushed red pepper
Small bunch fresh parsley
Large bunch fresh cilantro

4 spicy Italian sausages – approx. weight 11 1/3 oz or 320g

Method
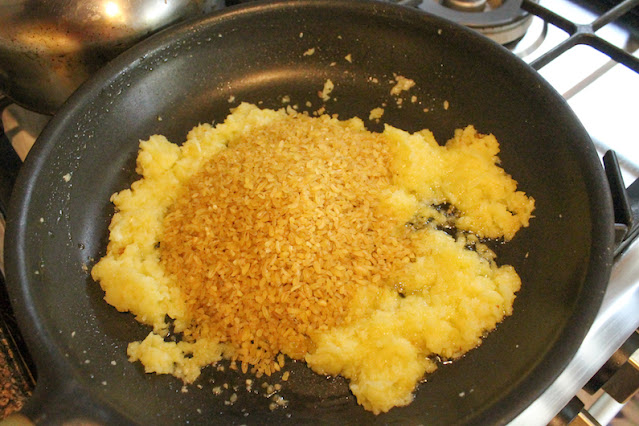
Sauté the onion in a drizzle of olive oil until softened and translucent. Tip in the bulgur wheat and give the whole thing a good stir so the bulgur is coated with the oil and onions. 

Tip in the bulgur wheat and give the whole thing a good stir so the bulgur is coated with the oil and onions.

Add in the tomato passata or puree, the stock cube and the black pepper. 

Add in the tomato passata or puree, the stock cube and the black pepper.

Add 1 cup or 240ml water and the crushed red pepper to the mixture and, over a medium heat, bring it up to a slow simmer. 

Add 1 cup or 240ml water and the crushed red pepper to the mixture and, over a medium heat, bring it up to a slow simmer.

Put a lid on the pan and leave to simmer for about 10-15 minutes or until the bulgur wheat is al dente.  Test it occasionally, as you don’t want it to overcook and turn to mush. 

While the stuffing simmers, remove the sausage from its skin and pan-fry it in a skillet, breaking it apart into crumbles. You want it well-browned and crispy in places. Remove from the heat and drain. 

While the stuffing simmers, remove the sausage from its skin and pan-fry it in a skillet, breaking it apart into crumbles. You want it well-browned and crispy in places

When the bulgur wheat is done, stir in the 1/4 cup or 60ml olive oil and taste for salt. Add salt as needed. I rarely do as the stock cubes has enough salt for us.  

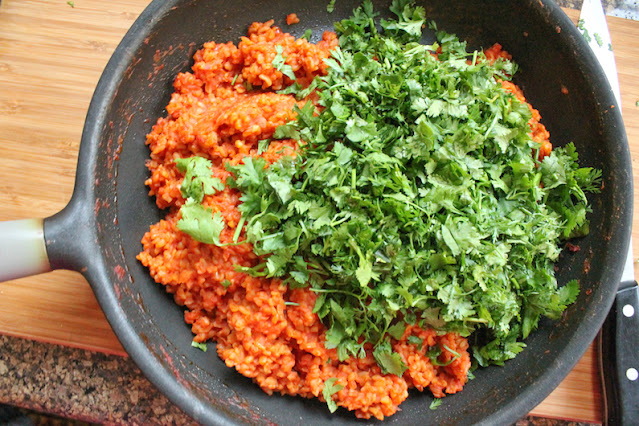
Mince the stems of your parsley and cilantro and chop the leaves. Add both to the stuffing and stir well.  

Mince the stems of your parsley and cilantro and chop the leaves. Add both to the stuffing and stir well.

Cut the gem squash in halves and scoop the seeds out. 

Cut the gem squash in halves and scoop the seeds out.

Preheat your oven to 350°F or 180°C. (Or at this point, the filled squash can be kept in the refrigerator until you are ready to roast them.)

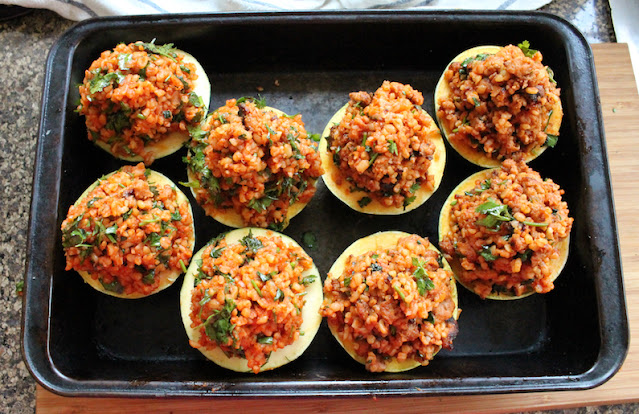
Put the gem squash in a tight fitting pan. Fill four of the gem squash halves with the bulgur wheat stuffing.
 
Put the gem squash in a tight fitting pan. Fill four of the gem squash halves with the bulgur wheat stuffing.

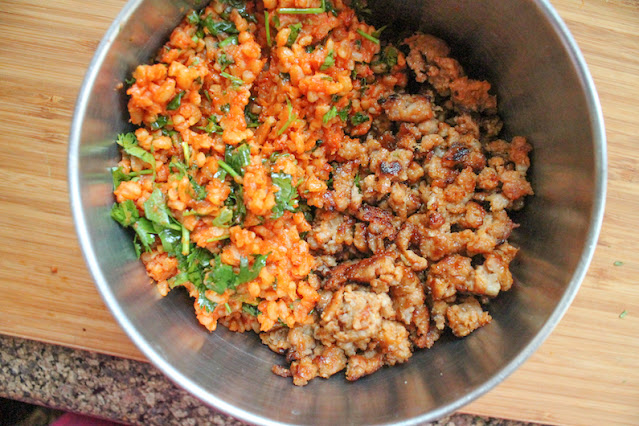
Mix the balance of the stuffing with the browned Italian sausage crumbles. 

Mix the balance of the stuffing with the browned Italian sausage crumbles.

Fill the other four squash halves with the mixture. 

Fill the other four squash halves with the mixture.

Drizzle on a little olive oil and roast the stuffed squash in your preheated oven for about one hour or until the squash are softened enough for your liking. Check part way through and cover the tops with foil if they are browning too much.

Depending on how old your gem squash are, you might be able to eat the skin. If not, serve each with a spoon so your diners can scoop the flesh out with bites of the stuffing. Delicious! 

Food Lust People Love: Roasted Stuffed Gem Squash filled with herby, tomato-ey bulgur wheat is a thing of beauty and deliciousness but you can also kick it up a notch with the addition of Italian sausage.

Enjoy!

It’s Sunday FunDay and today, as I’m sure you can guess from the list below, we are all sharing winter squash recipes. Many thanks to our host, Wendy from A Day in the Life on the Farm


We are a group of food bloggers who believe that Sunday should be a family fun day, so every Sunday we share recipes that will help you to enjoy your day. If you're a blogger interested in joining us, just visit our Facebook group and request to join.

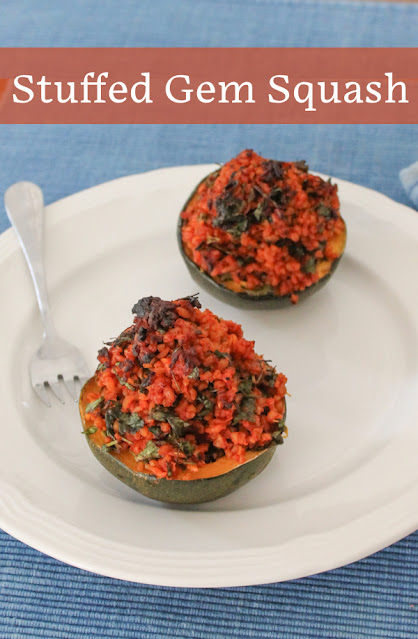
Pin these Stuffed Gem Squash! 

Food Lust People Love: Roasted Stuffed Gem Squash filled with herby, tomato-ey bulgur wheat is a thing of beauty and deliciousness but you can also kick it up a notch with the addition of Italian sausage.
 
.

Monday, January 11, 2021

Sticky Jammy Hot Wings

Sticky jammy hot wings are sweet and savory and spicy, not to mention finger-licking good! And, even better for you, they are baked, not fried!

Food Lust People Love: Sticky jammy hot wings are sweet and savory and spicy, not to mention finger-licking good! And, even better for you, they are baked, not fried!

I absolutely love chicken wings. They are hands down my favorite part and possibly in my top five favorite things to cook and eat. For all the many years we lived in Dubai, I made my spicy sticky wings every single Friday when the weather was conducive to sailing. Sitting in the shallows of the bright blue Arabian Gulf, we ate wings to our hearts content, threw the bones farther out for the sea creatures and rinsed our sticky fingers in the salty sea. Idyllic. 

Now that we are back in the States, especially since we’ve been stuck home in a small family unit, we haven’t felt much like party wings. But I gotta tell ya, these wings helped lift my mood considerably. Something about the tangy, spicy, sweet glaze made me smile a little. Perhaps they’ll lift your spirits too. 

Sticky Jammy Hot Wings

I used homemade three-berry jam for these delicious wings but you can use your favorite fruit jam or even marmalade. If you warm the jam slightly, it is easier to mix into the glaze. This recipe is adapted from one on Love and Olive Oil.

Ingredients
2 1/2 lbs or 1142g chicken wings (weight without tips – about 12 wings)
1 tablespoon olive oil
1/2 teaspoon fine sea salt
1/2 teaspoon cayenne
freshly ground black pepper

For the glaze:
1 garlic clove
1 hot red chili pepper
1 tablespoon rice vinegar
2 teaspoons soy sauce (I used low sodium.)
1 tablespoon olive oil
1/3 cup or 110g jam of your choice

Optional for garnish: chopped cilantro 

Method
If your wings are still in one piece, use a sharp knife to divide them into three pieces. Put the wing tips in a bag and freeze them to use later when making chicken stock. I happened to buy mine in Costco where they were already separated and someone else somewhere kept the tips. I hope they did something useful with them.  

Preheat oven to 425°F or 218°C. For easier clean up, you might want to line your pan with aluminum foil or a silicone liner.

In a large bowl, put the wing pieces in a single layer. Drizzle on the olive oil, then sprinkle on the sea salt and cayenne. Give them all few generous grinds of black pepper. 


Use a wooden spoon or spatula to toss the wings to distribute the seasonings and oil to all sides of the chicken. 


Bake the pieces for 40 minutes on the middle rack of your preheated oven, turning them over once halfway through cooking, until the wings are golden brown.


Meanwhile to prepare glaze, mince the garlic and chili pepper. 


Put them both in a small bowl with the rice vinegar and set aside for about 10 minutes. This helps mellow the sharpness of the garlic somewhat. Next add in the soy sauce, olive oil and the jam. If the jam is fairly stiff, warm the whole bowl in the microwave for about 10-15 seconds then stir well to combine. 


Pour any chicken grease out of the baking pan and discard. Put the wings in a clean bowl, again single file. Spoon the glaze on to distribute it evenly.


Use a spatula or wooden spoon to toss the wings to coat them with the glaze. 

Put the chicken back in the baking pan and spoon any glaze left in the bowl on top of the pieces. 

Food Lust People Love: Sticky jammy hot wings are sweet and savory and spicy, not to mention finger-licking good! And, even better for you, they are baked, not fried!

Turn your oven to broil. Return the pan to the oven, still on the middle rack. 

Broil the wings for about 5 minutes or until the glaze has started to bubble and caramelize. Do not walk away from the oven as they can burn really quickly if you aren’t watchful. 

Food Lust People Love: Sticky jammy hot wings are sweet and savory and spicy, not to mention finger-licking good! And, even better for you, they are baked, not fried!

Garnish with some chopped cilantro, if desired. 

Food Lust People Love: Sticky jammy hot wings are sweet and savory and spicy, not to mention finger-licking good! And, even better for you, they are baked, not fried!

Enjoy! 

Food Lust People Love: Sticky jammy hot wings are sweet and savory and spicy, not to mention finger-licking good! And, even better for you, they are baked, not fried!

This month my Baking Blogger friends are sharing recipes using jam and preserves. Check them all out below. Many thanks to our leader and host, Sue of Palatable Pastime
Baking Bloggers is a friendly group of food bloggers who vote on a shared theme and then post recipes to fit that theme one the second Monday of each month. If you are a food blogger interested in joining in, inquire at our Baking Bloggers Facebook group. We'd be honored if you would join us in our baking adventures.

Pin these Sticky Jammy Hot Wings!

Food Lust People Love: Sticky jammy hot wings are sweet and savory and spicy, not to mention finger-licking good! And, even better for you, they are baked, not fried!
.
 

Thursday, July 16, 2020

Sourdough Chocolate Bundt Cake #BundtBakers

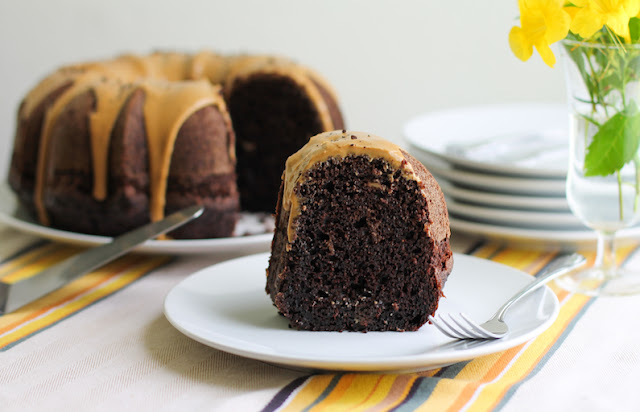
The sourdough starter isn’t an obvious flavor in this sourdough chocolate Bundt cake but the moisture it adds makes this the most tender and light – yet so rich! – chocolate cake I’ve ever tasted.

Food Lust People Love: The sourdough starter isn’t an obvious flavor in this sourdough chocolate Bundt cake but the moisture it adds makes this the most tender and light – yet so rich! – chocolate cake I’ve ever tasted.


A couple of years back when I was still living in Dubai, I succumbed to the lure of the sourdough starter. I had just gotten it up and running when a family emergency called me out of the country. I tried to revive it when I arrived back home but, frankly, I had lost the enthusiasm.

Like almost everyone else who has been in lockdown, I thought housebound pandemic mode would be the perfect time to try again, especially when I found instructions on the King Arthur Flour website on how to maintain a tiny starter with fewer discards.

That said, I am often still looking for uses for sourdough discard. Again the King Arthur Flour website came through. I can highly recommend their sourdough crumpets made entirely of discard, a little sugar, salt and baking soda, and their chocolate cake, which I’ve adapted from this recipe.

Sourdough Chocolate Bundt Cake

Sourdough in a cake was a revelation! As they say on the KA website, you don’t taste any sourness, just deep rich chocolate. I added a simple coffee glaze that was absolutely perfect poured on top and sprinkled on a few espresso granules for a lovely contrast in color.

Ingredients
For the cake batter:
1 cup or 227g sourdough starter, ripe (fed) or discard
1 cup or 240ml milk (Do not use skim milk!)
2 cups or 250g unbleached all-purpose flour, plus extra for the pan
1 tablespoon butter (for preparing the pan)
1 1/2 cups or 300g granulated sugar
1 cup or 240ml vegetable oil
2 teaspoons vanilla extract
1/2 cup or 60g Dutch process cocoa powder
1 1/2 teaspoons baking soda
1 teaspoon salt
1 teaspoon baking powder
1 teaspoon instant espresso granules
2 large eggs

For the coffee glaze:
1 tablespoon hot water
2 teaspoons instant espresso granules
1 cup or 125g icing sugar
3-4 teaspoons heavy cream

Optional for decorating: instant espresso granules

Method
In a large bowl, mix together the sourdough starter, milk, and flour. Cover with cling film and leave to rest at room temperature for 2 to 3 hours. It will rise ever so slightly and maybe get a few bubbles.


Preheat the oven to 350°F or 180°C and prepare a 12-cup Bundt pan by greasing it with the butter and flouring it thoroughly.

In a separate bowl, beat together the sugar, oil, vanilla, salt, baking soda, cocoa and espresso powder. I used my stand mixer for this but you could just use a whisk as well. The sugar won't dissolve so it's going to be grainy. All good.


Scrape down the bowl with a rubber spatula and add the eggs one at a time, beating well and scraping the bowl down again after each addition.


Pour the chocolate mixture into the mixing bowl with the starter mixture.

Use a rubber spatula to fold the chocolate into the starter mixture until well combined.


Pour the batter into your prepared pan.


Bake the cake for 45-50 minutes, until a wooden skewer inserted into the center comes out clean. If you are a instant read thermometer using person, (and I highly recommend you become one if you are not) the ideal internal temperature is 210°F or 99°C.


Remove the cake from the oven, and set it on a rack to cool for about 10 minutes, then use a toothpick to loosen the sides and middle and invert the Bundt onto the wire rack. Leave it to cool completely before glazing.


To make the coffee glaze, dissolve the espresso granules in the hot water then sift your icing sugar into the same bowl. Stir until completely smooth, adding the cream a teaspoon at a time till you are happy with the consistency. I like it quite thick but still pourable. Spoon the glaze over the top of the Bundt.


If desired, sprinkle on some of the espresso granules quickly so they will stick before the glaze surface dries.

Food Lust People Love: The sourdough starter isn’t an obvious flavor in this sourdough chocolate Bundt cake but the moisture it adds makes this the most tender and light – yet so rich! – chocolate cake I’ve ever tasted.


Cut in slices to serve.

Food Lust People Love: The sourdough starter isn’t an obvious flavor in this sourdough chocolate Bundt cake but the moisture it adds makes this the most tender and light – yet so rich! – chocolate cake I’ve ever tasted.


Enjoy!

This month my Bundt Bakers are feeling the freedom! Our host Sue of Palatable Pastime chose a very expansive theme: Bake whatever Bundt cake you want and I quote: "Any kind will  do - as long as you think it is delicious!" I am grateful for such an inclusive theme and Sue's behind the scenes work. Check out the wide variety of Bundt cakes we’ve baked for you, guaranteed to be delicious!
BundtBakers

#BundtBakers is a group of Bundt loving bakers who get together once a month to bake Bundts with a common ingredient or theme. You can see all of our lovely Bundts by following our Pinterest board. We take turns hosting each month and choosing the theme/ingredient. Updated links for all of our past events and more information about BundtBakers can be found on our home page.

Pin this Sourdough Chocolate Bundt Cake!

Food Lust People Love: The sourdough starter isn’t an obvious flavor in this sourdough chocolate Bundt cake but the moisture it adds makes this the most tender and light – yet so rich! – chocolate cake I’ve ever tasted.
 .

Tuesday, November 13, 2018

Cranberry Lardy Cake #BreadBakers

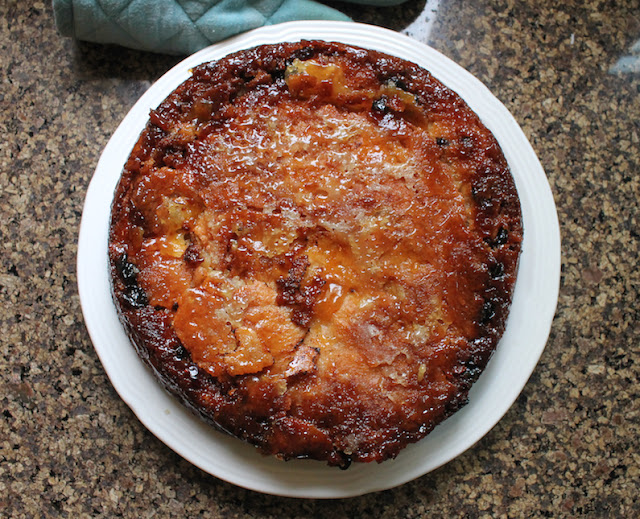
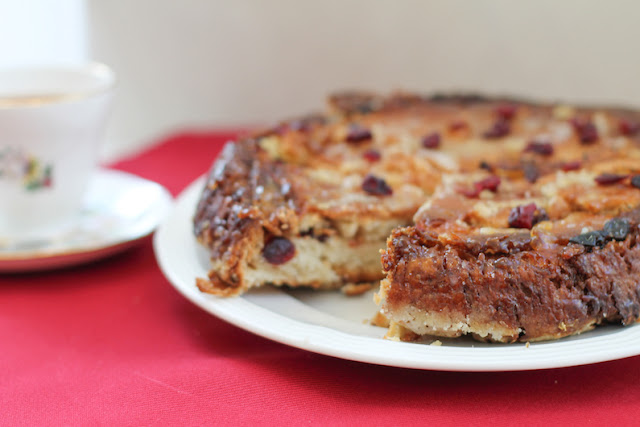
Traditionally, this British afternoon teacake is made with raisins, sultanas and/or currants. My cranberry lardy cake is studded with dried cranberries, but fear not, it is amply filled with the requisite lard and sugar, for a properly respectable British teatime treat.
Food Lust People Love: Traditionally, this British afternoon teacake is made with raisin, sultanas and/or currants. My cranberry lardy cake is studded with dried cranberries, but fear not, it is amply filled with the requisite lard and sugar, for a properly respectable teatime treat.


This month my Bread Bakers are baking up yeast cakes, a subject that required some research on my part. I came up with a list of possibilities, mostly from old English recipes, to be honest. Before the days of chemical rising agents, like baking powder, the most reliable ways to get a cake to rise was either to add eggs or yeast.

Lardy cake caught my fancy because, as previously mentioned here, I have a weakness for caramel. When baked up properly - that is with plenty of lard and sugar! - the bottom turns into a crunchy caramel. As the cake is flipped for serving, you end up with a gorgeous caramel top. Who can resist that?

Cranberry Lardy Cake

My recipe below is a combination of a couple I found on the internet from The Happy Foodie and Hobb House Bakery. Check out this YouTube video to watch one of the Baker Brothers make their version. That first link is actually the one that gave me the idea to add cranberries. The recipe called for crimson grapes, which I’d never heard of. Cranberries, on the other hand, I keep always on hand.

Ingredients
For the dough:
3/4 cup or 175ml warm water
1 teaspoon sugar
1/4 oz or 7g dried yeast
2 1/4 cups or 285g strong white bread flour plus extra for kneading
Scant 1/4 cup or 50g lard
Pinch flaky sea salt

For the lard and sugar filling:
1 cup or 225g caster (very fine) sugar, plus extra for the pan
1 cup or 200g lard, at room temperature
1/2 cup or 65g dried cranberries, plus extra for decorating, if desired

Method
Mix the yeast into the warm water with one teaspoon of the sugar. Set aside.

Measure the flour, salt and lard into a big bowl and use a pastry cutter to cut the lard into the flour.


When the yeast mixture has started to bubble up, pour it into the flour bowl and mix all the ingredients together.


If you are using an electric mixer with a bread hook, knead the dough for 10 minutes. If not, sprinkle a little flour onto a clean work surface and tip the dough out of the bowl onto it. Knead the dough for 15 minutes. Once you have a smooth and elastic dough, pop it back into the bowl and cover it with cling film.

Leave the bowl in a warm place for the dough to rise to twice its size or for 1 hour, whichever comes first.


Meanwhile make the lard and sugar mix by creaming them together in a mixer or with a wooden spoon.

Prepare your 8 in or 20cm round nonstick baking pan by coating it with 1/3 cup or 87g of the lard sugar mixture. Use a rubber spatula to spread it over the bottom and up the sides. Sprinkle an extra tablespoon of sugar over the bottom.


When it’s risen, gently press the air out of the dough and form it into a ball. Pop it on a well-floured work surface and use a rolling pin to roll it into a circle about 15 in or 38cm across.

Divide the remaining lard/sugar paste in half. Use a spoon to distribute one half over the dough circle. Use a rubber spatula to spread the paste over the dough, leaving a small margin of dough around the sides uncovered.

Starting on one side, fold the dough towards the middle. Continue until till all the sides are folded over. (See the first five photos below.) Again, this video shows the method so much better than words can explain.


Let the dough rest for a few minutes, then roll it out again to a 15 in or 38cm circle. Spoon the other half of the lard mixture over the dough circle. (Photo 6 above) Spread it with the rubber spatula. Now sprinkle on the cranberries.


Repeat the folding process till all of the sides have been folded in again. Place the dough in the prepared pan.


Cover loosely with cling film and leave the cranberry lardy cake to rest and rise for two hours. It doesn’t really rise very high but it does fill the pan.


When your two hours are almost up, preheat your oven to 375°F or 190°C.

Bake the lardy cake for 45 minutes, covering the top with foil if it starts to get too brown. Remove the pan from the oven and leave to cool for just a few minutes.

Leave it any longer and you may find that the caramel will stick to your pan, even it it’s nonstick. If this happens to you, use a blunt knife to ease it off the pan so the whole cake will come out in one piece.

Food Lust People Love: Traditionally, this British afternoon teacake is made with raisin, sultanas and/or currants. My cranberry lardy cake is studded with dried cranberries, but fear not, it is amply filled with the requisite lard and sugar, for a properly respectable teatime treat.
If necessary, return any pieces that stayed in the pan to the top of the cake. Or just eat them. I cannot tell you how wonderful this crunchy caramel is! It's the perfect topping for the yeast cake underneath.

Food Lust People Love: Traditionally, this British afternoon teacake is made with raisin, sultanas and/or currants. My cranberry lardy cake is studded with dried cranberries, but fear not, it is amply filled with the requisite lard and sugar, for a properly respectable teatime treat.


Sprinkle with tablespoon or two dried cranberries to decorate, if desired. Enjoy!

Food Lust People Love: Traditionally, this British afternoon teacake is made with raisin, sultanas and/or currants. My cranberry lardy cake is studded with dried cranberries, but fear not, it is amply filled with the requisite lard and sugar, for a properly respectable teatime treat.

Many thanks to this month's Bread Bakers host, Archana from The Mad Scientist Kitchen. Check out the other recipes our fellow bakers made for the yeasted cake challenge:

#BreadBakers is a group of bread loving bakers who get together once a month to bake bread with a common ingredient or theme. Follow our Pinterest board right here. Links are also updated each month on this home page.

We take turns hosting each month and choosing the theme/ingredient.

Pin it! 

Food Lust People Love: Traditionally, this British afternoon teacake is made with raisin, sultanas and/or currants. My cranberry lardy cake is studded with dried cranberries, but fear not, it is amply filled with the requisite lard and sugar, for a properly respectable teatime treat.
 .