Showing posts with label easy recipes. Show all posts

Sunday, July 28, 2024

Fresh Blackberry Tarts

Sweet summer berries are the star in these fresh blackberry tarts baked in puff pastry with a hint of balsamic, honey and sea salt. Treat yourself and serve them with thick pouring cream or a scoop of vanilla ice cream.

Food Lust People Love: Sweet summer berries are the star in these fresh blackberry tarts baked in puff pastry with a hint of balsamic, honey and sea salt. Treat yourself and serve them with thick pouring cream or a scoop of vanilla ice cream.

The best thing about summer is all of the fresh produce that is suddenly available from either local sources or at least ones that don’t add airmiles to the price. I think we can all agree that anything picked nearby tastes more like it should since it’s allowed to ripen on the vine or bush instead of in the hold of a truck or airplane.

In the Channel Islands, there are blackberry bushes growing wild! Here they are called brambles and despite the vicious thorns, we wait eagerly for the berries to ripen so we can pick them. Nothing beats free fruit, am I right?

Fresh Blackberry Tarts

Pepperidge Farm frozen puff pastry sheets come in a box of two with a total weight of 1.1 lbs or 490g. I used only one sheet for these four tarts.

Ingredients for four individual tarts
1 sheet puff pastry, thawed but chilled (I used Pepperidge Farm, see note above)
12 oz or 340g fresh blackberries
2 tablespoons cornstarch
2 tablespoons honey
1 tablespoon balsamic vinegar
1 tablespoon sugar
1/4 teaspoon fine sea salt
2 teaspoons butter

Optional to serve: thick pouring cream or vanilla ice cream.

Method
In a mixing bowl, toss the blackberries and the cornstarch together. 


Add in the honey, vinegar, sugar and salt. Stir gently to combine. Set aside to macerate for 10 minutes.


Preheat your oven to 400°F or 200°C and prepare a baking pan by lining it with baking parchment or a silicone liner. 

Gently unroll the puff pastry and cut it into four equal pieces. Place them in the prepared pan. Fold the sides up slightly, pinching them together to form an outside crust. If the sides don’t want to stick together, wet them with just a drop or two of water to help them adhere to each other.  


Give the blackberry bowl a good stir then divide the mixture between the four crusts. 


Top with 1/2 teaspoon butter each, cut into little bits.


Bake in your preheated oven for 18-20 minutes or until the crusts are puffed and browned.

Remove from the oven and leave to cool. As you can see, some of the juice ran out but the tarts were still juicy and the blackberries were soft.


Transfer to a wire rack to cool. 


Serve with fresh cream or a scoop of vanilla ice cream. 

Food Lust People Love: Sweet summer berries are the star in these fresh blackberry tarts baked in puff pastry with a hint of balsamic, honey and sea salt. Treat yourself and serve them with thick pouring cream or a scoop of vanilla ice cream.

Enjoy! 

It’s Sunday FunDay and today we are sharing recipes with blackberries! Check out the links below. 


We are a group of food bloggers who believe that Sunday should be a family fun day, so every Sunday we share recipes that will help you to enjoy your day. If you're a blogger interested in joining us, just visit our Facebook group and request to join.


Pin these Fresh Blackberry Tarts!

Food Lust People Love: Sweet summer berries are the star in these fresh blackberry tarts baked in puff pastry with a hint of balsamic, honey and sea salt. Treat yourself and serve them with thick pouring cream or a scoop of vanilla ice cream.

 .


Sunday, January 22, 2023

Passion Fruit Posset

Made with only four main ingredients, there is no simpler or more delicious dessert than a passion fruit posset. It’s tart, sweet and creamy!

Food Lust People Love: Made with only four main ingredients, there is no simpler or more delicious dessert than a passion fruit posset. It’s tart, sweet and creamy!

Last year around this time, just before my birthday in fact, a package arrived on my porch. When I opened it, I found 10 gorgeous passion fruit. No idea where they came from. 

I posted to social media in the hopes that someone would enlighten me and it turns out they were a birthday gift from my elder daughter, who knows I LOVE PASSION FRUIT. 


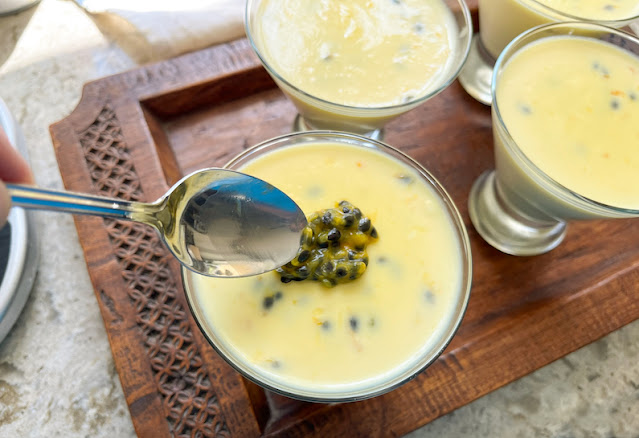
I’m not much of a cake lover so for my birthday, I made passion fruit posset just like this, except in one big bowl. I served it with a spoon into smaller bowls once it had set. We all enjoyed it thoroughly and so not too many days later, I made it again and poured it into pretty glasses to chill and serve. 

Since I have some passion fruit pulp in the freezer, I’ve decided to continue birthday tradition and make this again. This year it’s just two of us at home so I’ll probably halve the recipe.

Passion Fruit Posset

If you can’t find fresh passion fruit, check the freezer section in your nearby grocery stores, especially if you have ones that cater to Asian or Latin clientele. They often sell frozen pulp. Whenever I see the fresh ones at a reasonable price, I freeze my own as well. 

Ingredients – to serve four 
5 large passion fruit, halved and pulp scooped out
1/4 cup or 60ml fresh lemon juice
2 1/2 cups or 590ml double cream
1/2 cup or 113g caster sugar
pinch fine sea salt

Method
Strain the seeds out of the passion fruit, extracting as much juice as possible. I find it helpful to vigorously whisk the whole mess which loosens the seeds from the pulp. I got about 1/3 cup or 80ml of juice.


Pour the juice into a measuring vessel then add some seeds back till you reach the 1/2 cup or 120ml mark. Reserve the rest of the seeds for topping. 


Add the lemon juice to the passion fruit juice, stir, then set aside. 


Combine the cream and sugar in a medium saucepan set over a low heat and stir for 2 mins to dissolve the sugar. 


Turn the heat up to medium and bring to the boil. Simmer for 2 mins (set a timer) then remove from the heat and immediately stir in the passion fruit and lemon juice mixture. 


Divide evenly between four (8 oz or 240ml) cups or glasses - do this quickly, as the mixture will start to thicken. Since I was using glasses, I put a small teaspoon in each to make sure the heat didn’t break the glass. 


I removed the teaspoons before chilling. 


Leave to cool for 10 mins, then chill for at least 4 hours or overnight. The posset can be made up to three days ahead and chilled.

Once set, add the reserved passion fruit pulp to the top.

Food Lust People Love: Made with only four main ingredients, there is no simpler or more delicious dessert than a passion fruit posset. It’s tart, sweet and creamy!

And serve. 

Food Lust People Love: Made with only four main ingredients, there is no simpler or more delicious dessert than a passion fruit posset. It’s tart, sweet and creamy!

Enjoy! 

It’s Sunday FunDay and today we are sharing recipes that we make in our families for special occasions like birthdays. Check out all the links below! 

 
We are a group of food bloggers who believe that Sunday should be a family fun day, so every Sunday we share recipes that will help you to enjoy your day. If you're a blogger interested in joining us, just visit our Facebook group and request to join.


Pin this Passion Fruit Posset!

Food Lust People Love: Made with only four main ingredients, there is no simpler or more delicious dessert than a passion fruit posset. It’s tart, sweet and creamy!

 .

Wednesday, October 5, 2022

Clementine Pistachio Upside Down Cake

Take your dessert to a beautiful new level with this clementine pistachio upside down cake, baked with pomegranate arils. Easy to make but pretty enough for company. Lots of color and flavor, like a party on a plate. 

Food Lust People Love: Take your dessert to a beautiful new level with this clementine pistachio upside down cake baked with pomegranate arils. Easy to make but pretty enough for company. Lots of color and flavor, like a party on a plate.

I am a huge fan of upside down cakes. First of all, they are super easy to make. The cake batter itself is a quick one bowl recipe – no creaming butter and sugar first – just pile all the ingredients in the mixing bowl and beat. 

The fruit or nuts at the bottom (and then, of course, the top when it’s flipped) can be varied by what you have on hand and the season. I’ve even used canned fruit too, with great success. Drained canned apricots are particularly pretty if you take the care to place them all rounded side down.

Clementine Pistachio Upside Down Cake

This upside down cake features beautiful orange clementines. Mine were quite large, but if all you can find are smaller ones, that works too. Just use a few more to make sure the bottom of your pan is covered in slices before spooning in the batter.

Ingredients
For the upside down part:
2 large clementines (zest one for the batter!)
1⁄8 cup or 20g pomegranate arils, some reserved for garnish 
1⁄4 cup or 30g slivered pistachios, some reserved for garnish 
1⁄3 cup or 75g butter, plus extra for buttering the pan
1⁄2 cup, packed, or 100g light brown sugar

For the cake batter:
1 1⁄2 cups or 190g flour
1 cup or 200g sugar
1⁄2 cup or 113g butter, at room temperature 
1⁄2 cup or 120ml milk
2 eggs
3⁄4 teaspoon salt
2 teaspoons baking powder
Zest 1 large clementine

Method
Preheat your oven to 350°F or 180°C. Prepare a springform baking pan (about 10in or 25cm diameter) by buttering it liberally and then lining it with parchment paper cut to the exact size of the bottom. You can take your chances and not line it if you have a non­stick pan but sometimes caramelizing sugar will stick. And that is one of the risks of upside down cakes. 

Melt your butter and allow it to cool slightly. Add in the brown sugar and stir well. Pour this mixture into the baking pan. It should spread right out and cover the bottom.

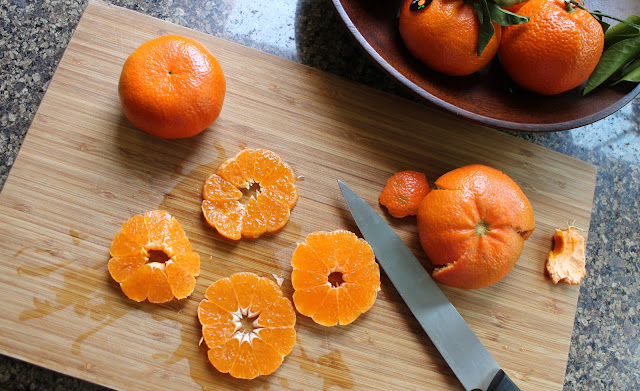
Peel your clementines and cut them into about four or five slices each. Remove any seeds.


Arrange them side by side over the sugar/butter mixture, making sure to put all the cut sides down, because those will be up when we turn the cake over. Sprinkle the pomegranate arils and pistachios all in and around the clementines, saving some for garnish.


In a large mixing bowl, beat all of the cake batter ingredients at low speed until well mixed, scraping down the sides of the bowl frequently with a rubber spatula.

Increase the beater speed to medium and beat for five minutes, stopping every couple of minutes to scrape down the sides and bottom of the bowl.

Slowly spoon the batter over the clementine slices in your baking pan. Smooth out the top with your rubber spatula.


Bake for 45-50 minutes or until golden on top and a toothpick inserted comes out clean.


Remove from the oven and cool for about 10 minutes. The cake should begin pulling away from the sides of the pan.

Remove the sides of the springform pan. 


Invert your serving plate on the top of your wire rack and turn both over quickly and decisively. Lift the bottom of the springform cake pan off. 

Gently peel the parchment paper off of the cake. If any bits have stuck to the parchment, ease them carefully off with the tip of a knife as you peel back the parchment. Use a spatula to scrape up any syrup left in the pan and drizzle it over the cake.


Leave to cool completely then sprinkle on the reserved pistachios and pomegranate arils.

Food Lust People Love: Take your dessert to a beautiful new level with this clementine pistachio upside down cake baked with pomegranate arils. Easy to make but pretty enough for company. Lots of color and flavor, like a party on a plate.

Cut in 8-10 slices to serve.

Food Lust People Love: Take your dessert to a beautiful new level with this clementine pistachio upside down cake baked with pomegranate arils. Easy to make but pretty enough for company. Lots of color and flavor, like a party on a plate.

Enjoy!

It’s the first Wednesday of the month so that means it’s time for my Foodie Extravaganza friends to share recipes in celebration of October being National Dessert Month.  Check out the links below. Many thanks to our host, Radha of Magical Ingredients.


Foodie Extravaganza is where we celebrate obscure food holidays by cooking and baking together with the same ingredient or theme each month. Posting day is always the first Wednesday of each month. If you are a blogger and would like to join our group and blog along with us, come join our Facebook page Foodie Extravaganza. We would love to have you! If you're a spectator looking for delicious tid-bits check out our Foodie Extravaganza Pinterest Board.


Pin this Clementine Pistachio Upside Down Cake!

Food Lust People Love: Take your dessert to a beautiful new level with this clementine pistachio upside down cake baked with pomegranate arils. Easy to make but pretty enough for company. Lots of color and flavor, like a party on a plate.

 .

Friday, July 15, 2022

Spicy Honey Baked Steelhead Trout

This spicy honey baked steelhead trout is topped with mustard, chili garlic sauce, sesame oil and, of course, honey, before baking in foil for a delightful, easy dish everyone will love, especially the clean up crew. 

Food Lust People Love: This spicy honey baked steelhead trout is topped with mustard, chili garlic sauce, sesame oil and, of course, honey, before baking in foil for a delightful, easy dish everyone will love, especially the clean up crew.

Occasionally I have a specific recipe in mind when I go to the grocery store but most often, I just let what is fresh and/or a good deal determine what goes in the shopping cart. 

In the case of this dish, I was actually hoping for decent salmon but the specimens on display were sad and old looking. Fortunately, the steelhead trout was not only bright and fresh looking; it was also a better price!

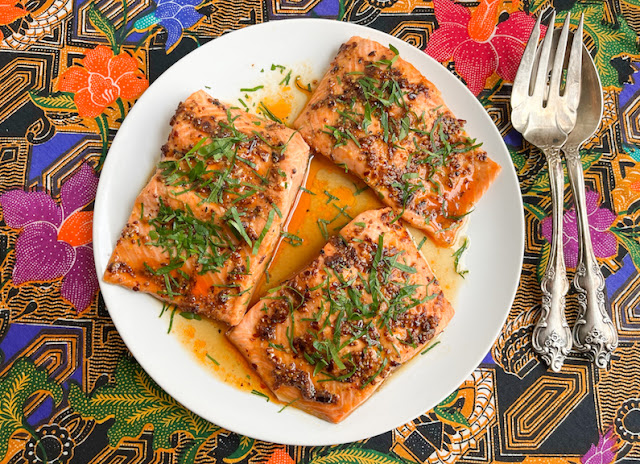
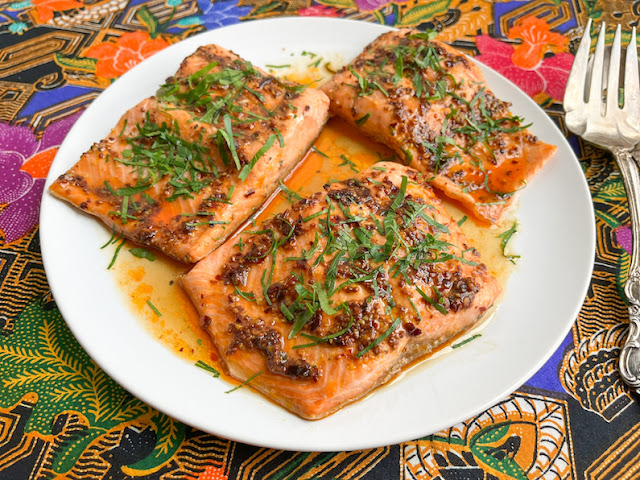
The flavors of the toppings complement the tender fish so nicely and since we are baking in foil, clean up could not be easier. I removed the fillets from the foil for photos but feel free to serve these just as they bake, allowing each person to carefully open a foil packet. Let the steam out first, then enjoy!

Spicy Honey Baked Steelhead Trout

Use farmed salmon or steelhead trout, whichever is available to you. You can also use wild salmon but keep in mind that it’s a much leaner fish and so it is easily overcooked. Adjust the baking time down accordingly. This recipe is easily scaled up or down to feed one or a crowd. 

Ingredients 
Steelhead trout fillets (each about 6 oz or 170g)
fine sea salt
freshly ground black pepper

For each foil packet:
1/2 teaspoon whole grain Dijon mustard
1/2 teaspoon chili garlic sauce or sambal
1/2 teaspoon cider vinegar
1/2 teaspoon sesame oil
1 1/2 teaspoons honey

Optional to garnish: 
chopped parsley

Method
Preheat your oven to 400°F or 200°C and cut large rectangles of foil for each fillet.

Rinse the fillets with water and pat dry with paper towels. Transfer each fillet to a sheet of the foil. Season lightly with salt and freshly ground black pepper.


Spread the fillets with the whole grain mustard and the chili garlic sauce or sambal. Drizzle them each with the honey, vinegar and sesame oil. 


Crimp and fold the foil lightly around the fillets and place the packets on a baking pan.  


Bake in the oven for about 15-20 minutes (depending on the thickness of your fish). The internal temperature of cooked fish is ideally 145°F or 62.8°C.

Carefully open the foil packets so you don’t get burnt by the steam.


Garnish with parsley and serve immediately hot or cool the fillets and serve at room temperature. 

This lovely fish goes well with just about any vegetable or starch but we love it with green salad, dressed lightly with a complementary vinaigrette made with whole grain mustard, cider vinegar and a bit of honey. 

Enjoy! 

Food Lust People Love: This spicy honey baked steelhead trout is topped with mustard, chili garlic sauce, sesame oil and, of course, honey, before baking in foil for a delightful, easy dish everyone will love, especially the clean up crew.

It’s time for my Fish Friday Foodie friends to share seafood recipes. This month our theme is “seafood foil packets.” Many thanks to our host Sue of Palatable Pastime. Check out all the links below.


Would you like to join Fish Friday Foodies? We post and share new seafood/fish recipes on the third Friday of the month. To join our group please email Wendy at wendyklik1517 (at) gmail.com. Visit our Facebook page and Pinterest page for more wonderful fish and seafood recipe ideas.


Pin this Spicy Honey Baked Steelhead Trout!

Food Lust People Love: This spicy honey baked steelhead trout is topped with mustard, chili garlic sauce, sesame oil and, of course, honey, before baking in foil for a delightful, easy dish everyone will love, especially the clean up crew.
 .

Wednesday, October 6, 2021

Creamy Lima Beans with Bacon and Mustard

Posh beans on toast! These Lima Beans with Bacon and Mustard are creamy and soft and utterly more-ish. Plus they take hardly any time at all to make. 

Food Lust People Love: Bacon and Mustard are creamy and soft and utterly more-ish. Plus they take hardly any time at all to make.

Do you write in cookbooks or is writing in books verboten in your house? I must confess that while I wouldn’t write in a novel, I do make notes in my cookbooks, in pencil. How else am I going to remember what I actually did since I have a hard time following a recipe word for word? 

Cookbooks, even my favorite ones by my favorite authors, are jumping off points to improving a dish and making it suit our palates and available ingredients. 

Case in point is the recipe I’m sharing today, adapted from Nigel Slater’s The 30-Minute Cook. The first time I made it, I added the following pencil scrawl to the bottom:

“Very good over crusty bread. Next time: add more wine & cream. Serve over rice.” 

And the next time, I did just that! And it was so good! The orange on top is my homemade habanero sauce and extra Parmesan was also a good decision. If you don’t have this cookbook, I can highly recommend looking for a secondhand copy online

Food Lust People Love: Bacon and Mustard are creamy and soft and utterly more-ish. Plus they take hardly any time at all to make.

Creamy Lima Beans with Bacon and Mustard

This recipe serves two but is easily scaled up for more. It’s perfect for a weeknight or a light lunch, on its own or with a small salad on the side. 

Ingredients
1 can (14 oz or 400g) lima beans
4 slices smoked bacon
1 tablespoon canola or other light oil
1 shallot or small onion
1/2 cup or 120ml dry white wine
1/4 cup or 60m heavy cream
1 tablespoon wholegrain mustard
1 tablespoon Dijon mustard
2 1/2 oz or 70g extra sharp cheddar, grated

To serve: 2 slices crusty bread, toasted (and buttered, if desired)

Method
Pour out the liquid from the can of lima beans and rinse them with cool water. Set them aside in the sieve to drain. 

Cut the bacon into small strips and finely dice the onion. 


In a large frying pan, cook the bacon in the oil until the bits are crispy. Add the onion and cook, stirring often, until it softens and turns translucent. 


Spoon out any excess fat and add the beans to the pan, along with the white wine. 


Bring the liquid to a boil and then turn the heat down to simmer. Simmer until the liquid has reduced by half. 

Add in the cream and the mustards. Give it a good stir and turn the heat back up to get it just boiling again.


Then simmer for a couple of minutes. Stir in the grated cheese and simmer till it melts into the sauce. 


To serve, spoon over toasted crusty bread, buttered, if desired. 

Food Lust People Love: Bacon and Mustard are creamy and soft and utterly more-ish. Plus they take hardly any time at all to make.

Enjoy!

Today I’m joining my Festive Foodie friends to celebrate National Cookbook Month by sharing recipes from our favorites. Check out the links below. Many thanks to our host, Jolene of Jolene’s Recipe Journal.

Pin these Lima Beans with Bacon and Mustard!

Food Lust People Love: Bacon and Mustard are creamy and soft and utterly more-ish. Plus they take hardly any time at all to make.
 .