Showing posts with label pizza recipes. Show all posts

Tuesday, May 14, 2024

Parbaked Gluten Free Pizza Crust #BreadBakers

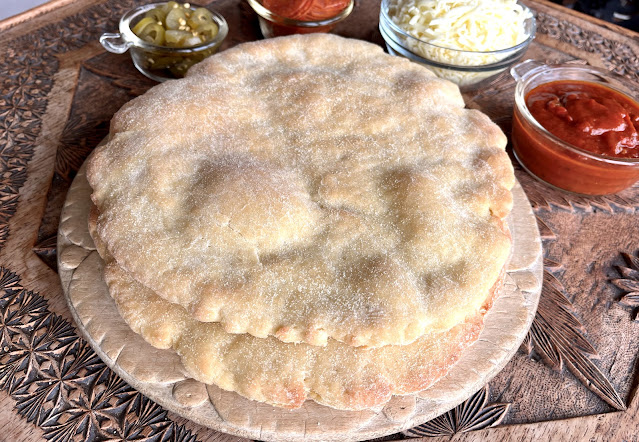
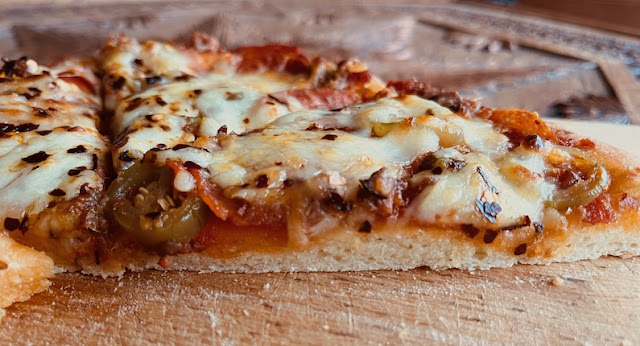
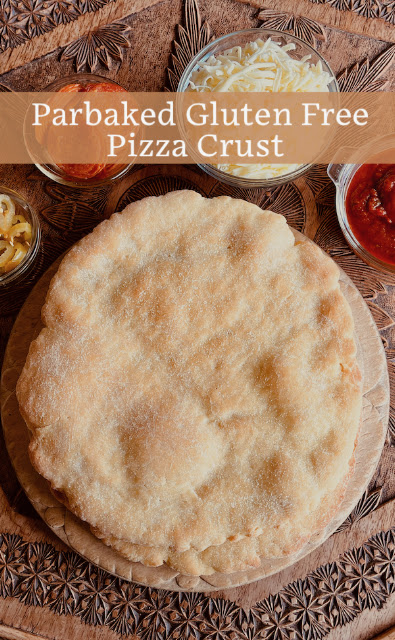
Long proofing and the addition of baking powder ensure that this parbaked gluten free pizza crust is chewy, crunchy and able to support all the toppings you love.

Food Lust People Love: Long proofing and the addition of baking powder ensure that this parbaked gluten free pizza crust is chewy, crunchy and able to support all the toppings you love.

Gluten free dough for something quick-baked like pizza is a challenge when regular pizza dough sets such a high standard of crunch, chewiness and texture. I like to add a little cornmeal to the dough – and use it when rolling it out to bake – which helps a lot. 

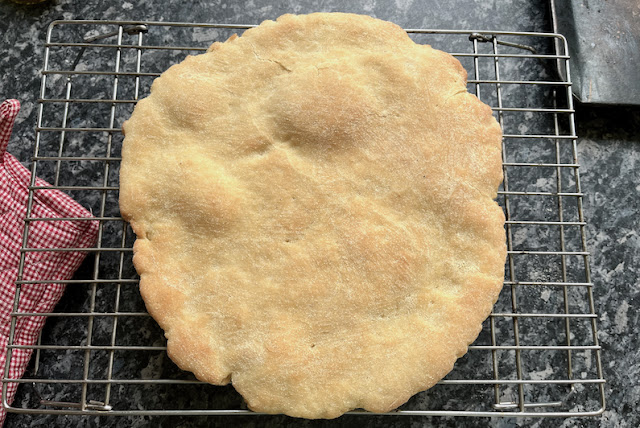
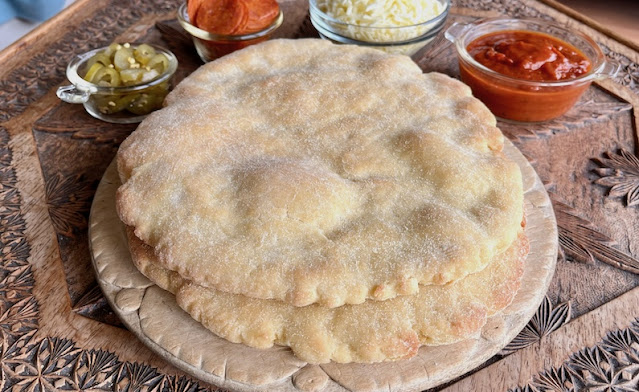
Is this the same as your favorite gluten-full pizza crust? Not exactly. But it’s darn close. The secret is partially baking it just so it rises but doesn’t really brown much. Parbaking the crust means that it retains its shape and texture, even when toppings are added. Best of all, parbaked crusts can be frozen or refrigerated for future pizza nights. 

Parbaked Gluten Free Pizza Crust

As per Serious Eats, 95°F or 35°C is the best temperature for yeast to multiply, but that's not quite warm enough for proofing active dry yeast. It needs the extra warmth to dissolve and become active. If you have a thermometer, employ it when warming your water to the specified temperature range.

Ingredients
2 ¼ teaspoons or 7g active dry yeast
1 cup or 240ml warm water (between 105-110°F or 40-43°C)
1 tablespoon sugar
2 ½ cups or 400g gluten free bread flour (with xanthan gum) plus extra for kneading (I used Freee White Bread Flour.) 
1/4 cup or 60g cornmeal plus extra for rolling out the pizza crust
1 teaspoon fine sea salt
1 teaspoon baking powder
1 egg
5 tablespoons olive oil, plus extra for brushing on when baking
1 teaspoon apple cider vinegar

Method
Warm the water to the correct temperature range. I like to use a microwaveable measuring vessel with quick zaps of the microwave but a small pot over a low flame will also work. 


Stir in the sugar and the yeast and leave to prove for five minutes. Your yeast should start frothing up, showing that it has been activated by the warm water. 

In a large mixing bowl, whisk together the flour, baking powder and salt. 


In another mixing bowl, whisk together the egg, vinegar and olive oil. 


Stir in the water/yeast mixture.


Add in the wet ingredients to the dry ingredients bowl.


 Mix them together with a wooden spoon or Danish whisk until a sticky dough forms. 


Cover with cling film or a shower cap and place somewhere warm for 2-3 hours. 


After the rising time is up, preheat your oven to 425°F or 218°C and put the dough in fridge for 15 minutes to rest. This will make it easier to roll out.


Lightly flour a clean work surface and knead the dough with a good sprinkling of flour until it forms into a smooth ball. 


Avoid adding too much flour, just enough until a ball dough forms and the dough isn't as sticky.


Divide the dough into two even pieces. 

Sprinkle your work surface lightly with cornmeal and use a floured rolling pin to roll each piece of dough into a roughly 10 in or 25cm circle. 


Sprinkle a little more cornmeal on your baking pan and transfer the pizza crusts to a pan. Generously brush the top of the crusts with olive oil and bake for 12 minutes in the preheated oven.


Remove from the oven. Leave to cool completely and then store in a refrigerator or freezer, well wrapped, until you are ready to add toppings and bake again. 

Food Lust People Love: Long proofing and the addition of baking powder ensure that this parbaked gluten free pizza crust is chewy, crunchy and able to support all the toppings you love.

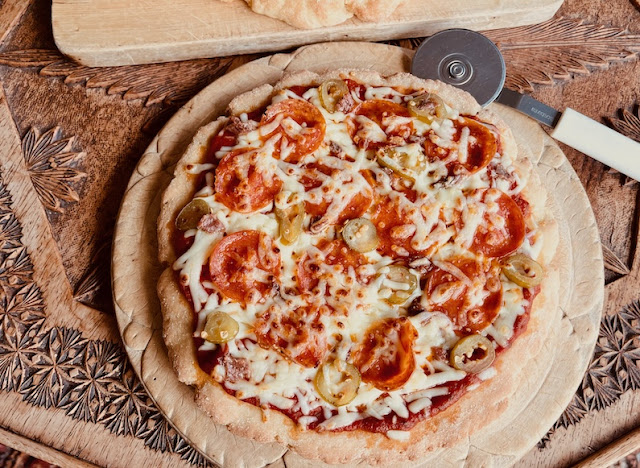
When ready to bake as pizza, add your favorite sauce and desired toppings. 

Leave to cool completely and then store in a refrigerator or freezer, well wrapped, until you are ready to add toppings and bake again.

Bake in an oven preheated to 425°F or 218°C for about 8-12 minutes, perhaps just a little longer if your crust was in the freezer. 

Remove from the oven and leave to cool for a few minutes. 

Food Lust People Love: Long proofing and the addition of baking powder ensure that this parbaked gluten free pizza crust is chewy, crunchy and able to support all the toppings you love.

Cut in slices to serve.

#BreadBakers is a group of bread loving bakers who get together once a month to bake bread with a common ingredient or theme. Follow our Pinterest board right here. Links are also updated each month on this home page. We take turns hosting each month and choosing the theme/ingredient.

Enjoy!

It's the second Tuesday of the month which means it's time for my fellow Bread Bakers to share their recipes. Our theme today is gluten free pizza. Many thanks to our host, Renu of Cook with Renu. Check out the links:

#BreadBakers is a group of bread loving bakers who get together once a month to bake bread with a common ingredient or theme. Follow our Pinterest board right here. Links are also updated each month on this home page. We take turns hosting each month and choosing the theme/ingredient.


Pin this Parbaked Gluten Free Pizza Crust!

Food Lust People Love: Long proofing and the addition of baking powder ensure that this parbaked gluten free pizza crust is chewy, crunchy and able to support all the toppings you love.

 .

Wednesday, February 28, 2024

Everything Pizza Tartin

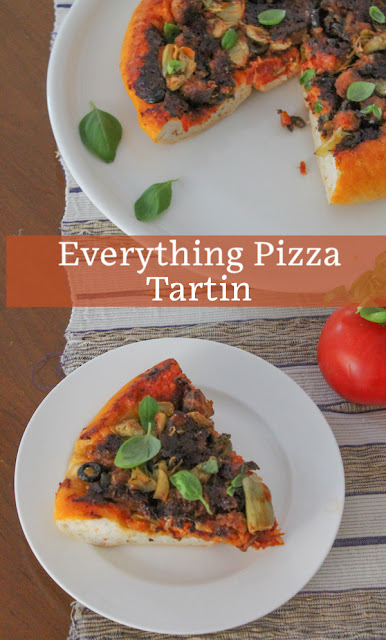
This Everything Pizza Tartin aka Upside Down Pizza is baked with the crust on top, so you can load up on "toppings" like Italian sausage, onion, artichokes, jalapeños and olives and still have a crunchy crust. 

Food Lust People Love: This Everything Pizza Tartin aka Upside Down Pizza is baked with the crust on top, so you can load up on "toppings" like Italian sausage, onion, artichokes, jalapeños and olives and still have a crunchy crust.

Back when I had an oven heated by bottled gas, I struggled to get it hot enough to bake a loaded pizza crust crunchy on the bottom. Putting too many toppings – a particular problem I have – meant my crust was often soggy. Sure, I could put fewer toppings but no one wants a skimpily topped pizza, do they? 

Then suddenly a solution occurred to me. Everything Pizza Tartin is baked upside down, French apple pie style, with ALL of my favorite ingredients, so the thick crust is still extra crunchy. Just flip to serve!
 
Here it is, straight out of the oven, before flipping. 


I use this particular pan because it can go from stovetop to oven. I brown the Italian sausage, then I take it off the heat to layer on the rest of the ingredients, finally tucking the dough in on top.

But you can cook the sausage then bake your everything pizza tartin in a large pie plate or a well-seasoned cast iron skillet. You do not want a pan that sticks. And don’t forget to cut some slits in your crust to let the steam escape. No soggy tops, or rather, bottoms!

I cannot tell you how pleased with myself I was when I figured this out!

Everything Pizza Tartin – Upside Down Everything Pizza 

You do have to be careful to cook it just long enough so the crust is golden brown but the bottom doesn’t burn. When it’s starting to get just a little bit dark in places, it’s absolutely perfect. I figure about 25-30 minutes, depending on how many toppings you’ve added.

Ingredients

For the 10in or 26cm round thick crust:
2 1⁄4 cups or 280g flour

1 rounded teaspoon active yeast – about 4g 
3⁄4 cup or 180ml warm water

1⁄2 teaspoon salt

1 teaspoon olive oil 

For the topping: 
2 links Italian sausage, approximate weight 4 3⁄4 oz or 135g 
Olive oil

Generous handful sliced pepperoni – say 10 or 12 slices

1 cup or 110g grated mozzarella cheese 
1⁄2 cup or 120ml pizza sauce


Other possible toppings:

Small artichoke hearts, well drained and halved

Sliced jalapeños, pickled or fresh

Finely sliced onion

Black olives

Your favorite pizza topping -­ no need to limit your toppings! 

Recommended: Fresh basil leaves for serving 

Method
To make the crust, mix 1 cup or 125g flour with the yeast and add in the warm water. Leave to prove for about 5 minutes. You should see some bubbling. 


Add the salt then the rest of the flour, a little at a time, mixing continuously until you have a soft dough. You might not use quite all of the flour. Knead for about five minutes or until the ball of dough is smooth and elastic. 


Leave to prove in a warm place, covered with cling film or a damp towel, for about 45 minutes or until doubled in size. (Pizza dough can be prepared one day ahead. Leave to rise, covered, in the refrigerator. Allow to come to room temperature before rolling out and baking. You can also substitute store-­bought pizza dough.)

Preheat your oven to 400°F or 200°C when the dough has about 15 minutes rising time left. 


Meanwhile, prepare your toppings. In the bottom of your ovenproof skillet, brown the sausage in small balls, adding a drizzle of olive oil. 


Remove from the heat once browned and spoon off some of the excess fat cooking the sausages might have created. 


Sprinkle in the finely sliced onion, the artichokes, jalapeños, olives and other toppings, distributing them evenly. Top these with the pepperoni slices. 


Sprinkle on the mozzarella cheese. Spoon on the pizza sauce, spreading it around gently with the back of the spoon.


Roll or press your crust out so that it’s just a bit larger than the
diameter of your fillings in the pan. Cut three slits to allow steam to escape while it’s baking. 


Fit the crust over the fillings and tuck it in all around the sides. Use a pastry brush to brush olive oil over the top of the crust and down the tucked sides. 

Bake the pizza tartin in your preheated oven for about 25­-30 minutes or until the crust is a lovely golden color and quite crisp on the outside. When you tap it, it should sound hollow. 


Leave the pizza tartin to cool for about 5­-7 minutes then invert it carefully onto a serving plate. 


If any of the bits do stick, just scoop them off the pan and replace on the pizza tartin. 

Sprinkle with fresh basil leaves and cut in wedges and serve hot. 


Food Lust People Love: This Everything Pizza Tartin aka Upside Down Pizza is baked with the crust on top, so you can load up on "toppings" like Italian sausage, onion, artichokes, jalapeños and olives and still have a crunchy crust.

Enjoy!

Welcome to the fifth installment of our Alphabet Challenge for 2024. Today’s recipes are brought to you by the letter E. Many thanks to our challenge creator, Wendy of A Day in the Life on a Farm

Check out all the recipes brought to you by the letter E. 

Here are my posts for the alphabet challenge, thus far: 
E: today's post! Everything Pizza Tartin

Pin this Everything Pizza Tartin! 

Food Lust People Love: This Everything Pizza Tartin aka Upside Down Pizza is baked with the crust on top, so you can load up on "toppings" like Italian sausage, onion, artichokes, jalapeños and olives and still have a crunchy crust.

.

Monday, July 12, 2021

Toasted Eggplant Crust Mini Pizzas

These Toasted Eggplant Crust Mini Pizzas are as delicious as they are adorable with quick tomato sauce and toppings baked on toasted eggplant slices.

Food Lust People Love: These Toasted Eggplant Crust Mini Pizzas are as delicious as they are adorable with quick tomato sauce and toppings baked on toasted eggplant slices.

We went through a phase a while back of attempting to eat keto, that is to say, without carbs or very low carb. It did not go well. I didn’t lose any weight, for one, and I can’t imagine the increased fat in the cheese, meat and bacon I consumed did my cholesterol any good. Nevertheless, I did create a couple of recipes we loved so I’ll call that part of the experiment a win. 

The first used leftover pork roast slices and eggplant to make stuffed cheesy rolls covered in a rich tomato sauce then baked. Seriously, so good! Most canned tomatoes are not considered keto because of the added sugar so the secret appears to be making your sauce from scratch with fresh tomatoes. 

The second recipe was for rice-free cabbage rolls made with both beef and smoked sausage. I don't know that I'll ever make traditional cabbage rolls again because the smoked sausage adds so much flavor and who needs the rice really?

These toasted eggplant mini pizzas were the third keeper. They kind of remind us of our favorite eggplant Parmigiana but with a lot less trouble. Also: pepperoni - always a welcome addition in my book. 

Toasted Eggplant Crust Mini Pizzas

These would be a great appetizer for any crowd, with the added bonus of being naturally gluten free and keto-friendly.

Ingredients
1 large eggplant (about 19 oz or 535g, but a little bigger or smaller won't matter too much.)
fine sea salt

For the fresh tomato sauce:
2 ripe medium sized tomatoes
2 cloves garlic, minced
1 teaspoon dried oregano
1/4 teaspoon baking soda
1/8 teaspoon fine sea salt 

Suggested toppings:
Mozzarella or your favorite pizza cheese, shredded
Pepperoni (get the mini ones if you can, so cute!)
Black olives, pitted and sliced
Sliced jalapeños
Anchovies
Crushed red pepper 

To garnish after baking: fresh basil

Method
Trim the stem of your eggplant and cut it into 1/2 in or 1 cm slices (I got 16.) If you look closely, you'll see the little pokes of the knife I made at the appropriate intervals using a measuring tape because I'm anal like that. Eyeball it if you want to. 


Sprinkle the eggplant slices lightly with salt and stack them in a colander and set aside in your sink or on a plate to catch any liquid that drips out so it doesn't make a big mess.


Peel your tomatoes. I find the easiest way to peel tomatoes is to cut a cross in the skin with a sharp knife and then use a fork to dip the tomato into just boiled water for about 10-15 seconds. The skin will then slip off easily. 


Core and finely chop the peeled tomatoes.


Combine them in a pan with the minced garlic, oregano, baking soda and salt. 


Cook over medium heat for about 17-20 minutes, or until the tomatoes and garlic are softened and most of the liquid has evaporated. Set aside to cool. 


By this time, your eggplant should have released some juice. Dry the slices off with a tea cloth or paper towels. 

Toast them on a non-stick griddle pan over a medium high heat until they are browned on both sides. This takes just 4-5 minutes a side. Unless you’ve got a really large pan, this is going to have to be done in batches. 

Keep a careful eye on the eggplant slices so they don’t burn, especially if you’ve cut some of them a bit unevenly and some edges are thinner than others. I use a spatula to press them down occasionally, to make sure the eggplant and the pan are making a good connection and shift them around the griddle so they brown evenly. 

When one batch is golden on both sides, remove it to a dry tea cloth or layer of paper towels on a clean work surface. The slices should be laid on in a single layer. If you stack the eggplant slices, they’ll continue cooking and steaming. We want them to cool off once they are toasted. 


At this point, if you are ready to bake the mini pizzas, preheat your oven to 400°F or 200°C.

Place your toasted eggplant circles on a baking pan lined with baking parchment or a silicone liner and top them with a small spoon of the tomato sauce, cheese and your favorite other toppings. I made one pan of 12 and the other of four.

Food Lust People Love: These Toasted Eggplant Crust Mini Pizzas are as delicious as they are adorable with quick tomato sauce and toppings baked on toasted eggplant slices.

Bake in the preheated oven until the cheese is melted and bubbling, just 6 -7 minutes. 

Food Lust People Love: These Toasted Eggplant Crust Mini Pizzas are as delicious as they are adorable with quick tomato sauce and toppings baked on toasted eggplant slices.

Garnish with fresh basil leaves and serve with extra crushed red pepper, if desired. Enjoy!

Food Lust People Love: These Toasted Eggplant Crust Mini Pizzas are as delicious as they are adorable with quick tomato sauce and toppings baked on toasted eggplant slices.

It’s high summer now in the northern hemisphere so tomatoes and basil are flourishing in gardens everywhere. To celebrate the season, my Baking Blogger group has chosen to showcase tomatoes and basil for today’s theme. Check out all the recipes below. Many thanks to our organizer and host, Sue of Palatable Pastime

Baking Bloggers is a friendly group of food bloggers who vote on a shared theme and then post recipes to fit that theme one the second Monday of each month. If you are a food blogger interested in joining in, inquire at our Baking Bloggers Facebook group. We'd be honored if you would join us in our baking adventures.

Pin these Toasted Eggplant Crust Mini Pizzas!

Food Lust People Love: These Toasted Eggplant Crust Mini Pizzas are as delicious as they are adorable with quick tomato sauce and toppings baked on toasted eggplant slices.
 .


Tuesday, February 9, 2021

Quattro Stagioni Sourdough Pizza #BreadBakers

Artichokes, tomato sauce, basil, mushrooms, ham and olives represent all four seasons in this Quattro Stagioni Sourdough Pizza, with fresh mozzarella.
 
Food Lust People Love: Artichokes, tomato sauce, basil, mushrooms, ham and olives represent all four seasons in this Quattro Stagioni Sourdough Pizza, with fresh mozzarella.

Over the years, we’ve enjoyed pizza in a lot of locations but our favorites are always thin flavorful crusts, baked in coal fired brick pizza ovens. Most of these were in Italian restaurants purporting to make authentic Neapolitan-style pizza. Unfortunately, that enviable crust is hard to recreate at home in a normal oven. 

I was intrigued by a recipe I read recently in Super Sourdough (<Amazon affiliate link) by James Morton. where he actually cooks the pizza in a super hot cast iron skillet on the stovetop, then pops it in the oven under the broiler to melt the cheese and finish it off. I couldn't wait to see if it was the crust of my dreams. 

Spoiler alert: It was! OMG. It was so good with amazing flavor and a wonderful crunchy chewiness. 

Artichokes represent spring, tomatoes and basil represent summer, mushrooms represent autumn and the ham or olives represent winter. We love both ham and olives so I refused to choose just one. It is winter right now after all so that’s how I justify emphasizing it with two ingredients. 

Quattro Stagioni Sourdough Pizza

It’s best to make your dough at least 24 hours before you plan to make pizza. This gives the sourdough starter plenty of time to work and for flavor to develop in the dough. The topping ingredients below are what are typical for a four seasons or quattro stagioni pizza. I’ve shared the amounts I used in parentheses as a guideline, but I know some people love their pizzas heaped with toppings and others prefer a sparser pie. You do you. 

Ingredients
For 3 dinner plate-sized pizzas:
3 1/4 cups or 413g strong white flour plus extra for dusting
1 teaspoon fine sea salt
9 fl oz or 266ml tepid water
1/2 cup or 120g fed sourdough starter
plenty of cornmeal or semolina, for dusting 
1 cup or 240ml of your favorite pizza sauce or make mine with the ingredients below. This makes 1 2/3 cups so you’ll have some leftover for other projects.

For the sauce:
3 garlic cloves
1 tablespoon good olive oil
1 can (14.5oz or 411g) petite diced tomatoes, no salt added 
1 tablespoon tomato paste 
1/2 teaspoon baking soda
sea salt to taste

For the quattro stagioni toppings:
canned artichoke hearts, drained and quartered (8 1/2 oz or 240g)
oil cured black olives (20 – about 2 oz or 60g)
fresh mushrooms (6 oz or 170g)
thin sliced smoked ham (7 oz or 200g)
fresh buffalo mozzarella balls (2 – 4 oz each)

For serving:
handful fresh basil leaves (I like to use the tiny ones that grow at the top of the stems. 
drizzle olive oil
crushed red pepper

Method
In a large bowl, mix the flour and salt together. Add the tepid water and the sourdough starter. 


Use a wooden spoon or a Danish dough whisk to combine everything into a wet and sticky dough. Cover the bowl with a damp towel or cling film and then leave it at room temperature for 6-8 hours.


Stretch it and fold it over several times during the rising time to develop the gluten. 


After the 6-8 hours, cover it again and put it in the refrigerator. James Morton says it can be left in the fridge for 3-4 days but it’s best used between 24 and 48 hours. 

Meanwhile, if you are making your own sauce, mince your garlic and place it in a small pot with the olive oil. Cook it gently, being careful not the let it color or, god forbid, burn. 

Pour the canned tomatoes in along with the tomato paste. 


Simmer for about 15-20 minutes, stirring occasionally. Add in the baking soda and stir well. It will bubble up as the baking soda reacts with and neutralizes some of the natural acid in the tomatoes. Taste the sauce and add a little fine sea salt, if needed. Remove the sauce from the stove and leave to cool. Store in an airtight container in the refrigerator until ready to assemble the pizzas. 

Next we’ll prep the toppings. Drain and quarter the canned artichoke hearts. Smash the olives with the broad side of a knife and discard the pits. 


Clean the mushrooms and cut off any hard stems. Slice the mushrooms. 


When you are ready to bake pizza, divide the dough into three equal pieces. My dough weighed 786g so each of the small pieces weighed 262g. If you don’t have a scale, just eyeball it but if you bake a lot, you’ll find an electronic scale very useful, I promise.


Preheat your broiler (grill) as hot as it goes with the oven door closed or as close to closed as possible, and then start heating a large cast-iron skillet on your stovetop.

I have a pizza peel but if you don’t, use a flat pan without sides (turn a pan over and use the back if you don’t have one without sides) and cover it liberally with cornmeal. Add one of dough balls and use your hands, and extra cornmeal, to stretch the dough into something resembling a roundish pizza crust. 


Add the tomato sauce and then the toppings. Artichokes in one quarter. 


Mushrooms and olives in two other quarters and finally, tear the ham into big bits and drape them in the fourth quarter. Jiggle the pizza peel or pan occasionally to see if the pizza can still move. If not, lift the sides and add more cornmeal till it shifts freely.


Carefully slide the pizza into your screaming hot cast iron skillet. My first pizza tried to fold under on one side so it turned out kind of a wonky shape but it still tasted delicious so who cares, right? 


Cook the pizza on the stovetop for a minute or two, checking the bottom of the crust occasionally by lifting it up. You want brown and crusty, even a little scorching in places but not burnt.

Use your clean hands to tear off pieces of the mozzarella and place them about on the pizza. Turn the stove off. 

Food Lust People Love: Artichokes, tomato sauce, basil, mushrooms, ham and olives represent all four seasons in this Quattro Stagioni Sourdough Pizza, with fresh mozzarella.

Using thick oven mitts, transfer the iron skillet to the oven and place it under the preheated broiler (grill.) Close the oven as much as possible and cook the pizza for a few minutes or until the mozzarella is melted and the top of the pizza is browning. 

Food Lust People Love: Artichokes, tomato sauce, basil, mushrooms, ham and olives represent all four seasons in this Quattro Stagioni Sourdough Pizza, with fresh mozzarella.

Remove the skillet from the oven and slide the pizza on a serving plate and hand it to the first lucky recipient. 

Food Lust People Love: Artichokes, tomato sauce, basil, mushrooms, ham and olives represent all four seasons in this Quattro Stagioni Sourdough Pizza, with fresh mozzarella.

Let them add some fresh basil leaves, a drizzle of good olive oil and some crushed red pepper, as desired, while you get on with cooking the other two pizzas, following the previous instructions again. 

As James Morton says, “It takes the sacrifice of one person to make the family’s pizza, but it’s so worth it. Between each pizza, get your surface back on the stove to heat up to frightening levels again before you slide your next pizza on top.”

Of course, if you have more than one cast iron skillet big enough, you can get this job done much more quickly than I did! 

Food Lust People Love: Artichokes, tomato sauce, basil, mushrooms, ham and olives represent all four seasons in this Quattro Stagioni Sourdough Pizza, with fresh mozzarella.

Enjoy! 

This month my Bread Bakers are all sharing pizza recipes. Check out the list of beauties below! Many thanks to our host, Karen of Karen’s Kitchen Stories
BreadBakers
#BreadBakers is a group of bread loving bakers who get together once a month to bake bread with a common ingredient or theme. You can see all our lovely bread by following our Pinterest board right here. Links are also updated after each event on the #BreadBakers home page. We take turns hosting each month and choosing the theme/ingredient.

Pin this Quattro Stagioni Sourdough Pizza!

Food Lust People Love: Artichokes, tomato sauce, basil, mushrooms, ham and olives represent all four seasons in this Quattro Stagioni Sourdough Pizza, with fresh mozzarella.
 .