Tuesday, December 18, 2018

Cinnamon Chocolate Shortbread #CreativeCookieExchange

Cinnamon Chocolate Shortbread is the perfect cookie for your holiday table or cookie exchange. The rich buttery shortbread is enhanced by cinnamon and cocoa for a delightful treat that keeps well in a tin for days.

Food Lust People Love: Cinnamon Chocolate Shortbread is the perfect cookie for your holiday table or cookie exchange. The rich buttery shortbread is enhanced by cinnamon and cocoa for a delightful treat that keeps well in a tin for days.


Six years ago, when I first moved to Dubai, I was invited to a cookie exchange. The hostess was a friend of a friend who lived on Palm Jumeirah so I was most excited to go. If you’ve ever looked up Dubai, you have no doubt seen photos of the Palm. In an aerial view, it looks like a great big palm tree, with multiple fronds arcing gracefully out in the Arabian Gulf. Each frond is a gated community of homes so without an invitation, the best one can do is to drive up the “trunk” to the hotel at the top of the palm tree.

The house was beautifully decorated for Christmas and because the weather at this time of year is lovely, we were able to sit outside overlooking the sea. Gorgeous! But the very best part was getting to meet some wonderful ladies and munch on cookies together.

This month my Creative Cookie Exchange group is sharing cookies that last well in a tin, which I translate to mean, would also be perfect for gifting to neighbors and friends or bringing to a cookie exchange. These cinnamon chocolate shortbread cookies fit the bill.

Cinnamon Chocolate Shortbread

This recipe is adapted from two I found on the internet, from the BBC Good Food site and Country Living. I topped mine with amber sugar crystals for a more festive look plus added sweetness and crunch. You can find them on Amazon if your local shops don't carry them. <affiliate link

Ingredients
3/4 cup or 170g butter, softened
1/2 cup or 100g sugar
1 2/3 cups or 200g plain flour
2 tablespoons cocoa powder
2 teaspoons ground cinnamon
1/2 teaspoon salt
3 1/2 oz or 100g good quality dark chocolate, cut into small chunks (I used Lindt.)

Optional for decoration:
2-3 tablespoons amber sugar crystals (26-42g)

Method
In a large bowl, beat the butter and sugar together with electric beaters or, if you are feeling energetic, use a wooden spoon.

Sift in the flour, cocoa, cinnamon and salt.


Mix well until you have a thick dough. Add in the chocolate bits and mix again.

Roll the dough into log about 2 inches or 5cm thick. Wrap the log in cling film and chill for at least 1 hour or for several days. This dough can also be frozen for up to 1 month.


Preheat your oven to 350°F or 180°C and line two baking sheets with baking parchment or silicone mats.

Slice the log into 1/2 in or 1cm-thick rounds.

Transfer the cookies to your prepared baking pans.


Top with amber sugar crystals, if desired. Press them in gently to stop them falling off and then bake for 10-12 minutes in your preheated oven.


Cool on the pan completely before transferring the shortbread cookies to a serving plate or a cookie tin.

Food Lust People Love: Cinnamon Chocolate Shortbread is the perfect cookie for your holiday table or cookie exchange. The rich buttery shortbread is enhanced by cinnamon and cocoa for a delightful treat that keeps well in a tin for days.


Enjoy!

Food Lust People Love: Cinnamon Chocolate Shortbread is the perfect cookie for your holiday table or cookie exchange. The rich buttery shortbread is enhanced by cinnamon and cocoa for a delightful treat that keeps well in a tin for days.


Check out all of the lovely cookies that last in a tin! Many thanks to Holly of A Baker's House for hosting the group this month.


You can also use us as a great resource for cookie recipes. Be sure to check out our Pinterest Board and our monthly posts (you can find all of them here at The Spiced Life). You will be able to find them the first Tuesday after the 15th of each month! If you are a blogger and want to join in the fun, contact Laura at thespicedlife AT gmail DOT com and she will get you added to our Facebook group, where we discuss our cookies and share links.


Pin this Cinnamon Chocolate Shortbread!

Food Lust People Love: Cinnamon Chocolate Shortbread is the perfect cookie for your holiday table or cookie exchange. The rich buttery shortbread is enhanced by cinnamon and cocoa for a delightful treat that keeps well in a tin for days.

 .

Tuesday, December 11, 2018

Blackberry Blue Cheese Walnut Loaf #BreadBakers

Slightly sweet with a good dollop of honey, each bite of this blackberry walnut blue cheese loaf is delightful mix of salty and fruity and nutty. It’s especially lovely toasted.

Food Lust People Love: Slightly sweet with a just touch of honey, each bite of this blackberry walnut blue cheese loaf is delightful mix of salty and fruity and nutty. It’s especially lovely toasted.


This month our Bread Bakers host is Renu, the author and recipe creator behind Cook with Renu. She challenged us to create a bread with fresh fruit, sweetened without white sugar. I cannot tell you how long I agonized over this one, until it suddenly occurred to me that Renu never said it had to be a very sweet bread!

Blackberry Walnut Blue Cheese Loaf

I am a fan of sweet and salty together and, when I can, I also love to add a bit of crunch, so nuts were essential. This lovely loaf was inspired by a muffin I baked a few years ago with thyme, goat cheese and blackberries.

Ingredients
1/4 cup or 60ml honey
1/4 cup butter or 56g
3/4 cup or 180ml milk
2 eggs
2 1/2 cups or 315g flour
1 tablespoon baking powder
1 teaspoon flakey sea salt or 1/2 teaspoon fine sea salt
3 1/2 oz or 100g blue cheese
6 oz or 170g fresh blackberries
1/2 cup or g roughly chopped walnut, plus extra for decoration, if desired

Method
Preheat your oven to 350°F or 180°C and prepare your loaf by lightly rubbing it with oil or lining it with baking parchment.

Crumble the blue cheese and set aside. Reserve some cheese for topping the loaf before baking.

Measure your milk and honey into a microwaveable vessel then warm in the microwave. Add in the butter, cut into cubes and set aside so the butter melts and the mixture cools.

Cut the large blackberries in half or thirds, leaving the little ones whole. When the butter mixture is just slightly warm, whisk in the eggs.


In a large mixing bowl, whisk together your flour, salt and baking powder. Add the blackberries to the dry ingredients and stir to coat and separate the pieces.


Pour your wet ingredients into your dry ones and stir a couple of times.


Add in the blue cheese and walnuts and fold gently to combine.


Spoon the batter into your prepared loaf pan and top with the reserved cheese and walnuts.


Bake in your preheated oven for about 35-40 minutes or until the loaf is golden and a toothpick inserted comes out clean.

Food Lust People Love: Slightly sweet with a just touch of honey, each bite of this blackberry walnut blue cheese loaf is delightful mix of salty and fruity and nutty. It’s especially lovely toasted.


Allow the loaf to cool for about 10 minutes in the pan then remove it to a wire rack to cool completely before slicing.

Enjoy!

Food Lust People Love: Slightly sweet with a just touch of honey, each bite of this blackberry walnut blue cheese loaf is delightful mix of salty and fruity and nutty. It’s especially lovely toasted.


Many thanks to this month’s Bread Bakers host Renu from Cooking with Renu for the fun challenge! Check out all the other lovely no-white-sugar breads with fresh fruit we've baked for you this month:

#BreadBakers is a group of bread loving bakers who get together once a month to bake bread with a common ingredient or theme. Follow our Pinterest board right here. Links are also updated each month on this home page.

We take turns hosting each month and choosing the theme/ingredient.

Pin this Blackberry Blue Cheese Walnut Loaf!

Food Lust People Love: Slightly sweet with a just touch of honey, each bite of this blackberry walnut blue cheese loaf is delightful mix of salty and fruity and nutty. It’s especially lovely toasted.
 .

Monday, December 10, 2018

Orange Cranberry Gingerbread #BakingBloggers

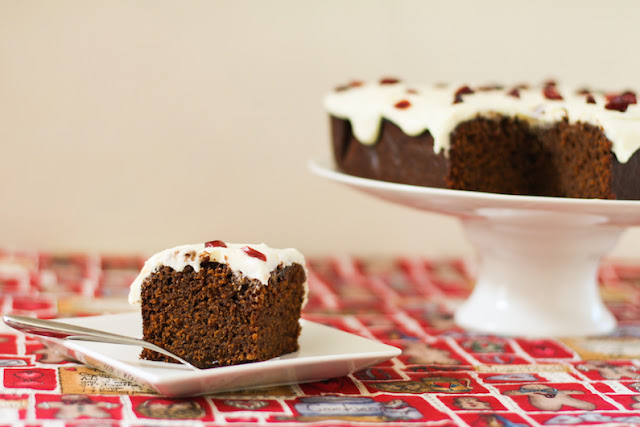
Satisfy your gingerbread cravings this year with my pumped up orange cranberry gingerbread. Cover it with orange cream cheese icing or just a sprinkle of powdered sugar. Gorgeous, either way.

Food Lust People Love: Satisfy your gingerbread cravings this year with my pumped up orange cranberry gingerbread. Cover it with orange cream cheese icing or just a sprinkle of powdered sugar. Gorgeous, either way.


When my girls were little, we loved baking gingerbread as an afterschool snack, especially in the weeks leading up to the Christmas holidays. It wasn’t just that we liked eating gingerbread, well, maybe that’s why the girls liked baking it, but my favorite part, not being much of a sweet eater, was the delightful aroma that filled the house.

Ginger, cinnamon and deep rich molasses baking smell absolutely fabulous in the oven. If you’ve never baked gingerbread, you don’t know what you are missing.

Orange Cranberry Gingerbread

I’ve adapted this recipe from one on the lovely blog Indigo Scones, but if you read Ellen’s post, she got the original recipe from Joy the Baker so I must give both credit for the inspiration.

Ingredients
For the cake:
2 1/4 cups or 280g all-purpose flour
2 teaspoons ground ginger
1 teaspoon ground cinnamon
1 1/2 teaspoons baking soda
1/2 teaspoon salt
3/4 cup or 180ml canola or other light oil
3/4 cup or 150g granulated sugar
3 medium (or 2 large) eggs
3/4 cup or 180ml fresh orange juice
1/2 cup or 65g dried cranberries
3/4 cup or 180ml unsulphured molasses
1/4 cup or 60ml honey
zest from 1 large orange (mine weighed about 10.5 oz or 300g - big guy, lots of zest!)

To serve: powdered sugar or orange cream cheese icing

Optional but highly recommended – For cream cheese icing
8 oz or 227g cream cheese
1 lb or 450g powdered sugar
Zest 1/2 large orange
Pinch sea salt
3-4 teaspoons fresh orange juice

Method
Preheat your oven to 350°F or 180°C and prepare your 9×9-inch or 23cm baking pan by lining it with baking parchment paper. As you’ll see from the photos, mine turned out quite thick so if you couldn’t probably use an even wider pan.

In a medium bowl, whisk together flour, spices, baking soda, and salt.  Set aside.


In a large bowl whisk together the oil, sugar, and eggs until they turn thick and pale. I used my stand mixer because I already did my upper body exercises for the day swimming laps but you can certainly use a handheld whisk.

Heat your orange juice up in a small pot on the stove or in a microwaveable vessel until it is quite hot but not quite boiling. Add in the dried cranberries and set aside to soften.


Stir the molasses, honey, and orange zest in the bowl with the sugar, oil and eggs.


Now add the dry ingredients, all at once, to the wet ingredients. Stir together until entirely incorporated.


Remove a tablespoon or so of the cranberries from the orange juice (to use for decoration) and put them between two paper towels to dry.

Add the warm orange juice and the balance of the cranberries to the mixing bowl and gently stir until the batter is smooth, not counting the cranberries. Those will all sink to the bottom so keep that in mind as you pour the batter into your pan.


Pour the batter into your prepared pan. Try to distribute those cranberries at the bottom as evenly as you can.

Bake in the preheated oven for 35-45 minutes, or until a cake tester inserted into the center of the cake comes out clean. I made the mistake of trying to turn my pan halfway though and the middle sunk a little bit. Just leave it alone and yours should be fine.


Cool completely on a wire rack. Sprinkle with the reserved cranberries and powdered sugar to serve or if you want to push the boat out, make the orange cream cheese icing.

In the bowl of your stand mixer or with electric beaters in another mixing bowl, beat the cream cheese, sugar and salt, along with the orange zest, until it is all well combined and lump-free.

Add just enough fresh orange juice, beating well in between additions, until you reach spreading consistency. Mine took about 3 teaspoons.

Spoon the icing on top of the gingerbread and spread it to the edges, letting just a little bit hang down the sides. Sprinkle on the reserved cranberries.

Food Lust People Love: Satisfy your gingerbread cravings this year with my pumped up orange cranberry gingerbread. Cover it with orange cream cheese icing or just a sprinkle of powdered sugar. Gorgeous, either way.
Cut into squares to serve.

Food Lust People Love: Satisfy your gingerbread cravings this year with my pumped up orange cranberry gingerbread. Cover it with orange cream cheese icing or just a sprinkle of powdered sugar. Gorgeous, either way.


Enjoy!

This month's Baking Bloggers theme is, I'm sure can guess by the list below: Gingerbread! Many thanks to our host Sue from Palatable Pastime and her able co-manager, Wendy of A Day in the Life on the Farm.


Baking Bloggers is a friendly group of food bloggers who vote on a shared theme and then post recipes to fit that theme one the second Monday of each month. If you are a food blogger interesting in joining in, inquire at our Baking Bloggers Facebook group. We'd be honored if you would join us in our baking adventures.


Pin Orange Cranberry Gingerbread!

Food Lust People Love: Satisfy your gingerbread cravings this year with my pumped up orange cranberry gingerbread. Cover it with orange cream cheese icing or just a sprinkle of powdered sugar. Gorgeous, either way.
 .

Wednesday, December 5, 2018

Cheesy Asparagus Potato Tart #FoodieExtravaganza

This cheesy asparagus potato tart takes three of my favorite things – crisp puff pastry, cheesy mashed potatoes made with creamy yogurt, and fresh asparagus – and turns them into so much more than the sum of three parts.

Food Lust People Love: This cheesy asparagus potato tart takes three of my favorite things – crisp puff pastry, cheesy mashed potatoes made with creamy yogurt, and fresh asparagus – and turns them into so much more than the sum of three tasty parts.

I’ve been making variations on this recipe since Jamie Oliver’s Jamie at Home* was first published in the UK, circa 2008. If I remember correctly, his tart calls for cream and is baked up in a shortcrust. Or  maybe phyllo pastry. Possibly it had different cheeses. It’s been a long time!

But like any good quiche recipe, this cheesy asparagus potato tart can also be adapted to use what you have on hand. As long as there are potatoes and cheese, it’s all good. And I prefer yogurt or sour cream in place of the rich cream anyway. Those add a little welcome tang.

Cheesy Asparagus Potato Tart

Adapted from Jamie at Home* this cheesy asparagus potato tart has been a family favorite for years with its puff pastry crust, savory potato filling and fresh asparagus topping.

If you can’t find nice asparagus in your local market, substitute green beans, preferable those fine green beans they call haricots verts très fine in France. I’ve used them instead of asparagus a couple of times and the tart is just as pretty and still fabulously tasty. Failing that, use normal green beans and cut them on an angle before blanching.

Ingredients
1 1/2 lbs or 675g potatoes
Sea salt 1/2 lb or 225g asparagus spears
1 round pre-rolled puff pastry sheet (about 11 1⁄4 oz or 320g)
5 1/2 oz or 155g freshly grated extra sharp cheddar
3 large eggs
1 cup or 240g whole fat plain yogurt, cold
Freshly ground black pepper

Method
Bring a pot of water to the boil and add a teaspoon of fine sea salt. Fill a bowl with cold water and some ice and set aside. Cut the woody ends off of the asparagus with a sharp knife and pop them into the boiling water and set a timer for 3 or 4 minutes. Three if the asparagus are thin ones, four if they are thicker.

Peel your potatoes and cut them into chunks.

When the time goes off, remove the asparagus from the pot with a slotted spoon and put them in a colander. Rinse them with cool tap water then tip them into the ice water bowl. Once they are well chilled, drain and dry the asparagus on a clean towel or paper towels.

Gently lower your potatoes into the pot of salted water and bring it back to a low boil. Cook the potatoes for about 15 minutes or until tender.

Preheat your oven to 400°F or 200°C and line the bottom of your 9 in or 23cm tart pan with a circle of baking parchment. Unroll your puff pastry and line the tart pan with it. Put the tart pan in the refrigerator to chill until you are ready to fill it.

When the potatoes are done, mash them until they are relatively lump-free. Fold in the cold yogurt and stir till combined.

Now add in the cheese and stir well again. Taste the potatoes and sprinkle on a little more salt if needed, along with a few generous grinds of fresh black pepper. I usually add about a 1/2 teaspoon fine sea salt but if your cheese is pretty salty, that might not be necessary.

By this time your potatoes should have cooled off considerably from all the additions and the stirring. We don’t want them to be so hot because then they would cook the eggs on contact. If they are just warm, proceed. Otherwise stir a few more times to help them cool.

Add the eggs one at time, stirring till well combined with each addition.

Spoon the filling into the chilled puff pastry crust and smooth out the top.

Cover the top of the cheesy potato filling with the blanched asparagus. Fold the edge of the crust under itself, if there is any hanging out.

If your tart pan has a removable bottom, put the tart pan on larger pan and put them both into the oven. If not, put the tart pan straight into the preheated oven. I like to use one with a removable bottom because it's prettier on the serving platter without the pan.

Turn the oven down to 375°F or 190°C. Bake the tart for about 30-35 minutes or until the crust is puffy and golden and the center is just set. A tiny wiggle is okay as that will set when it cools.

Food Lust People Love: This cheesy asparagus potato tart takes three of my favorite things – crisp puff pastry, cheesy mashed potatoes made with creamy yogurt, and fresh asparagus – and turns them into so much more than the sum of three tasty parts.
Leave to rest on a wire rack for about 10-15 minutes before cutting and serving. Use a serrated knife or even some kitchen scissors to cut through the asparagus on top before cutting down through the tart below. A dull knife will just push the asparagus into the cheesy potato filling.

Food Lust People Love: This cheesy asparagus potato tart takes three of my favorite things – crisp puff pastry, cheesy mashed potatoes made with creamy yogurt, and fresh asparagus – and turns them into so much more than the sum of three tasty parts.
This cheesy asparagus potato tart can also be served at room temperature.

Food Lust People Love: This cheesy asparagus potato tart takes three of my favorite things – crisp puff pastry, cheesy mashed potatoes made with creamy yogurt, and fresh asparagus – and turns them into so much more than the sum of three tasty parts.
Enjoy!

This month my Foodie Extravaganza group is sharing recipes with pastry. Many thanks to our host, Caroline from Caroline's Cooking for the theme and her behind the scenes work. Check out all the great recipes below:

Foodie Extravaganza celebrates obscure food holidays by posting delicious recipes your family will love. Posting day is always the first Wednesday of each month. If you are a blogger and would like to join our group and blog along with us, come join our Facebook page Foodie Extravaganza. We would love to have you! If you're a home cook looking for tasty recipes, check out our Foodie Extravaganza Pinterest Board!

Pin this Cheesy Asparagus Potato Tart! 

Food Lust People Love: This cheesy asparagus potato tart takes three of my favorite things – crisp puff pastry, cheesy mashed potatoes made with creamy yogurt, and fresh asparagus – and turns them into so much more than the sum of three tasty parts.


*Amazon affiliate link - If you buy Jamie at Home by following this link, I earn a very small percentage, at no extra cost to you.

Monday, November 26, 2018

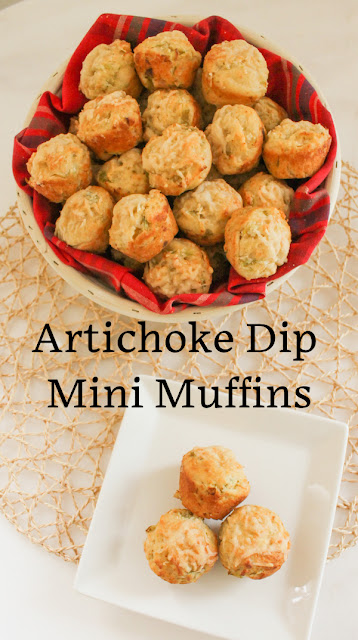
Artichoke Dip Mini Muffins #MuffinMonday

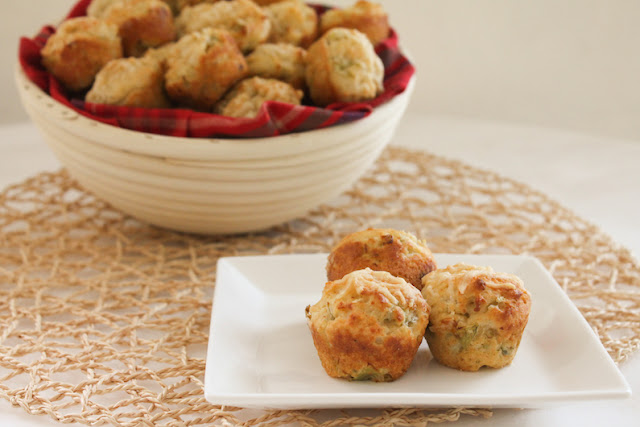
Cheesy artichoke dip mini muffins are made with all of the wonderful ingredients of our favorite hot baked dip: artichokes, of course, along with Parmesan cheese, mayonnaise and green chiles.

Food Lust People Love: Cheesy artichoke dip mini muffins are made with all of the wonderful ingredients of our favorite hot baked dip: artichokes, of course, along with Parmesan cheese, mayonnaise and green chiles.


Every Christmas Eve, our dinner menu is appetizers only:  Smoked salmon or home-cured salmon, angels on horseback, caviar, deviled eggs, potato latkes, a variety of stinky cheese and sometimes bruschetta. But artichoke dip always makes an appearance. As good as it is the day it is baked, it’s also wonderful as leftovers, stirred through some hot pasta or stuffed into a baked potato. (I’ve even used it as stuffing for puff pastry tarts!)

Here I recreate our favorite dip in muffin form. Bake some up and pour yourself a drink! And make sure to scroll down to the bottom to see the other Muffin Monday recipes I'm sharing.

Artichoke Dip Mini Muffins

To get most of the packing liquid out of the artichokes, give each one a gentle squeeze then place them bottom up in a sieve so they can continue draining. To completely drain the green chiles, put them in a sieve and press down with the back of a spoon.

Ingredients - Makes 34 mini muffins
2 cups or 250g flour
1 cup or 100g finely grated Parmesan
2 teaspoons baking powder
1/2 teaspoon cayenne (optional)
1⁄2 cup or 115g mayonnaise
3/4 cup or 180ml milk
1 can or jar artichoke hearts, drained weight 7.9oz or 225g*
1 small can (4.5 oz or 127g) chopped peeled green chiles, drained well
Canola or other light oil for greasing muffin pan

Optional for decoration: coarsely grated Parmesan

*Do not use marinated artichokes as those, even well drained, will add unnecessary oil to the muffins.

Method
Preheat your oven to 375°F or 190°C and brush your mini muffin pans with oil.

In a large mixing bowl, combine the flour, finely grated Parmesan and baking powder.


In another mixing bowl, whisk together the mayonnaise and milk.

Chop the well-drained artichoke hearts roughly and add them to the mayo/milk bowl, along with the drained green chiles. Stir well.


Pour the wet ingredients into the dry ones and fold just until the flour is moistened.


Use a tablespoon or scoop to fill the prepared muffin pan. My scoop is 2 tablespoons. Using it, the batter made 34 mini muffins.


Top with some extra grated Parmesan, if desired.


Bake in the preheated oven for 12-15 minutes, or until the muffins are golden and a toothpick inserted in the middle comes out clean.

Food Lust People Love: Cheesy artichoke dip mini muffins are made with all of the wonderful ingredients of our favorite hot baked dip: artichokes, of course, along with Parmesan cheese, mayonnaise and green chiles.


These delightful savory morsels are excellent served with cold beer, a crisp dry white wine or a full-bodied red.

Enjoy!

Food Lust People Love: Cheesy artichoke dip mini muffins are made with all of the wonderful ingredients of our favorite hot baked dip: artichokes, of course, along with Parmesan cheese, mayonnaise and green chiles.


This month my Muffin Monday group is sharing five wonderful recipes. Get baking!

Muffin Monday
#MuffinMonday is a group of muffin loving bakers who get together once a month to bake muffins. You can see all our of lovely muffins by following our Pinterest board.
Updated links for all of our past events and more information about Muffin Monday, can be found on our home page.

Pin it!

Food Lust People Love: Cheesy artichoke dip mini muffins are made with all of the wonderful ingredients of our favorite hot baked dip: artichokes, of course, along with Parmesan cheese, mayonnaise and green chiles.
 .