One of my favorite things about belonging to food blogger groups is learning about new ingredients or techniques. This month Bread Bakers’ host is Sue of Palatable Pastime and she chose sprouted flour as our theme.
I had never heard of sprouted flour but Sue provided a couple of links to clarify. Apparently sprouted flour is made by allowing grains to germinate aka sprout. The results are then dried and ground into flour. The thought is that sprouted flours are more nutritious, because, according to the Penn State Extension website: “Carbohydrates are converted into simple sugars, proteins are broken down into amino acids, and fats are broken into the component fatty acids. These conversions make the food easier for the plant and humans to digest.”
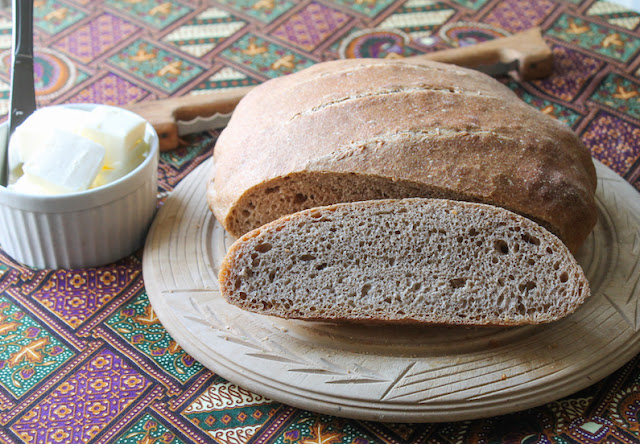
That said, more study is needed to determine if it’s healthier or actually more digestible than regular flour. What I can tell you is that the sprouted spelt makes a lovely nutty tasting loaf and I am looking forward to using it again in other baked goods. Not only that but the folks at The Kitchn agree with me! You can learn more about sprouted flours there as well.
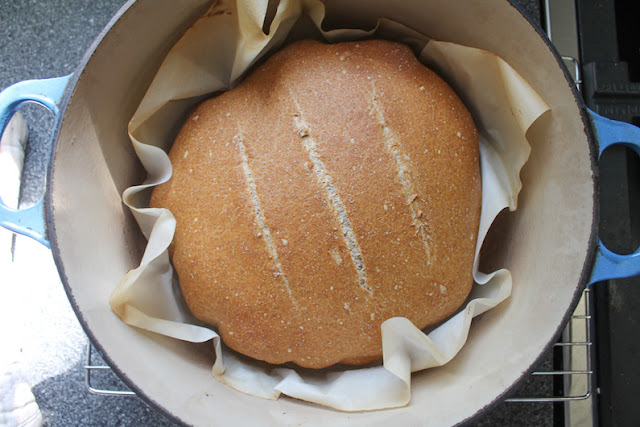
Artisan Sprouted Spelt Boule
My recipe is adapted from one of the One Degree Organics website, which was also the brand of sprouted spelt flour I used. My first attempt was completely flat and clearly had too much liquid. Rather than dialing back on the water for the second go, I decided to add more sprouted flour. Take two resulted in a wet sticky dough that could hold its shape a bit better when kneaded for a bit after the first rise. The original recipe could work better for a focaccia rather than a boule.Ingredients
1 1/2 cups or 355ml warm water
1 teaspoon sugar
1/4 teaspoon instant yeast
3 cups or 360g sprouted spelt flour
1 cup or 125g bread flour
1 1/4 teaspoons salt
Essential equipment:
5.5 qt or 5.3L Dutch oven with ovenproof lid
Dough scraper
Method
Stir the sugar into the water to dissolve it, then sprinkle the yeast in as well. It’ll just float on the top but that’s fine. Set aside for five or so minutes. The yeast should start getting foamy, which means it has been activated and is alive.
Meanwhile in a large bowl, combine the flours and salt. When the yeast has proved, pour the mixture into the flour bowl and mix well.
It’s going to be quite a soft dough. Just make sure everything is completely blended. Use a rubber spatula to scrape the sides of the bowl, making sure all the flour has been incorporated.
Cover the bowl with cling film or a damp teacloth. Let sit at room temperature for 8-12 hours. The longer the better, in my opinion. You can also pop the covered bowl in the refrigerator overnight, after the room temperature rise.
After the first rising time has elapsed, gently fold the dough over on itself in the bowl with a spatula and tip it out onto a well-floured work surface. Knead for several minutes, until the dough isn’t quite as sticky and you can form it, with the help of a dough scraper, into a ball.
Prepare a greased square of baking parchment on plate and transfer the ball onto it. The parchment isn’t strictly necessary but it will make transferring the risen dough to the Dutch oven easier later.
Cover with a loose towel or oiled cling film and let rise for 1-2 hours. If it’s cold at your house, like it is at mine right now, follow these instructions for proofing in the microwave. Because the rising environment is humid, you don’t have to cover the dough. Works a treat!
When your dough has almost doubled in size, preheat oven to 500°F or 260°C WITH THE COVERED DUTCH OVEN INSIDE.
It's such a soft dough that it spreads out as much as it does up!
Once the Dutch oven is fully heated and the dough is done rising, hold the edges of the parchment paper and carefully place the loaf inside. Cut a few slashes in the dough to allow it to rise further as it bakes and to give it a decorative finish. (I really need a sharper knife. My bread lame has gone missing in the move.)
Depending on your oven, let the bread bake with the lid of the Dutch oven ON for about 20-25 minutes. Remove the lid and bake for another 10-15 minutes or until golden brown. If you are a thermometer-using baker, fully baked, the boule should have an internal temperature of about 190°F or 88°C.
Remove the boule from the oven and let it cool completely on a wire rack before slicing.
Enjoy!
Check all of the other sprouted flour recipes my Bread Baker friends are sharing today! Many thanks to Sue of Palatable Pastime for hosting!
- Artisan Sprouted Spelt Boule from Food Lust People Love
- Seeded Sprouted Wheat Loaf from A Messy Kitchen
- Sprouted Wheat Flour No Knead Bread from Cook with Renu
- Sprouted Wheat Green Chile Pretzel Braid from Amandie Bakes
- Sprouted Wheat Pain de Mie Sandwich Bread from Karen's Kitchen Stories
- Sprouted Wheat Waffles from A Day in the Life on the Farm
- Sprouted Whole Wheat Flour Mini Rolls from Sneha's Recipe
#BreadBakers is a group of bread loving bakers who get together once a month to bake bread with a common ingredient or theme. You can see all of our lovely bread by following our Pinterest board right here. Links are also updated after each event on the BreadBakers home page. We take turns hosting each month and choosing the theme/ingredient.


