Monday, April 12, 2021

Chicken Chili Tortilla Casserole

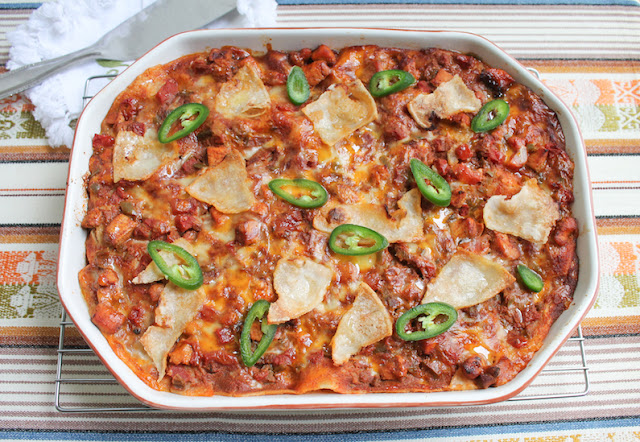
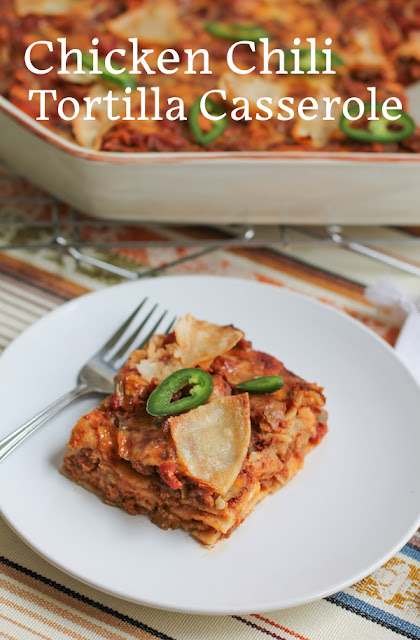
This chicken chili tortilla casserole is like enchiladas made easier by layering the “filling” with corn tortillas and topping each layer with cheese. It is assembled, with apologies to all Italians: lasagna style. 

Food Lust People Love: This chicken chili tortilla casserole is like enchiladas made easier by layering the “filling” with corn tortillas and topping each layer with cheese. It is assembled, with apologies to all Italians: lasagna style.

We love enchiladas at our house so I’ve been known to make ones with beef, chicken with chorizo and even a mix of chicken and black beans. If you need a vegetarian version, I can highly recommend my cheesy bean enchilada recipe made with pintos and vegetarian refried beans. Topped with jalapeños and black olives it is as pretty as it is tasty. You won’t even miss the meat, I promise. 

The only reason I don’t make enchiladas more is the messy hassle of saucing the tortillas to soften and then filling them. This casserole avoids that whole palaver.

That said, the chicken chili is also delicious on its own. :) 

Chicken Chili Tortilla Casserole

In the US, unlike in most of the world where chili powder is literally just ground chili peppers, chili powder is a spice mix made with (at least in the McCormick brand powder) toasted whole ripe chili peppers, cumin, oregano, garlic and salt. To make it clear, I’m going to call it chili (seasoning) powder in the ingredients list below. 

Ingredients
1 lb or 450g trimmed chicken breasts
fine sea salt
freshly ground black pepper
2 tablespoons canola or other light oil, plus extra for the baking dish
1/2 small onion, finely chopped
1/2 green pepper, finely chopped
1-2 fresh jalapeños, finely chopped
3 tablespoons chili (seasoning) powder (see note above)
1 1/2 teaspoons ground cumin
1/2 teaspoon smoked paprika
1 can (14.5 oz or 411g) small dice tomatoes with green chili peppers
1 tablespoon tomato paste
14 fresh corn tortillas
8 oz or 225g extra sharp cheddar or a blend of cheeses, grated

Optional garnish:
sliced fresh jalapeños

Method
Cut the chicken into small pieces. I like to put my hand on the breasts and cut them in two through the middle so the pieces are thinner, then cut them into small cubes. You can just kinda chop it up with a sharp knife, if you prefer. 


Season the chicken pieces with a good sprinkle of salt and a few generous grinds of black pepper. 

Warm the oil in a large pot and then sautéed the chopped vegetables in the oil until softened, about five minutes. 


Add in the chili powder, cumin and paprika and give the whole thing a good stir. Cook for another two minutes, then add in the chicken. Stir well to coat the chicken with the seasonings. 


Cook for another few minutes then add in the canned tomatoes and the tomato paste then using the tomato can as a measuring vessel, add a full can of water. 


Bring to a slow boil then reduce the heat and simmer for 30 minutes, covered. 

Preheat your oven to 350°F or 180°C. 

Grease the bottom of a casserole dish with a little oil and cover it with a layer of corn tortillas, cutting them to make them fit. I chose this ridiculously shaped pan so it got a little more complicated than necessary. (Another wedding gift from 25 years ago, it matches the quiche dish.) 


Spoon over 1/3 third of the chicken chili and sprinkle on 1/3 of the cheese. 


Cover this with another layer of corn tortillas, another 1/3 of the chicken chili and 1/3 of the cheese. 

Repeat with another layer of tortillas, the balance of the chicken and the balance of the cheese. Rip a couple of tortillas into pieces and strew them decoratively over the casserole. (This step is not strictly necessary but I like the crunch that they add to the top.)


Cover with foil and bake in your preheated oven for 30 minutes. Remove the foil and cook for an additional 10-15 minutes or until the top is browned. 

Leave to cool for about 10 minutes before garnishing with sliced fresh jalapeños, if using, and cutting the casserole into squares to serve. 

Food Lust People Love: This chicken chili tortilla casserole is like enchiladas made easier by layering the “filling” with corn tortillas and topping each layer with cheese. It is assembled, with apologies to all Italians: lasagna style.

Enjoy!

Food Lust People Love: This chicken chili tortilla casserole is like enchiladas made easier by layering the “filling” with corn tortillas and topping each layer with cheese. It is assembled, with apologies to all Italians: lasagna style.

Today I’m joining my Baking Blogger friends who are sharing Mexican recipes. Check them out below. I know mine isn’t in any way authentically Mexican but I hope it is close enough to qualify. Many thanks to our host and organizer, Sue from Palatable Pastime
Baking Bloggers is a friendly group of food bloggers who vote on a shared theme and then post recipes to fit that theme one the second Monday of each month. If you are a food blogger interested in joining in, inquire at our Baking Bloggers Facebook group. We'd be honored if you would join us in our baking adventures.

Pin this Chicken Chili Tortilla Casserole!

Food Lust People Love: This chicken chili tortilla casserole is like enchiladas made easier by layering the “filling” with corn tortillas and topping each layer with cheese. It is assembled, with apologies to all Italians: lasagna style.

 .

Sunday, April 11, 2021

Family Secret Garlic Bread

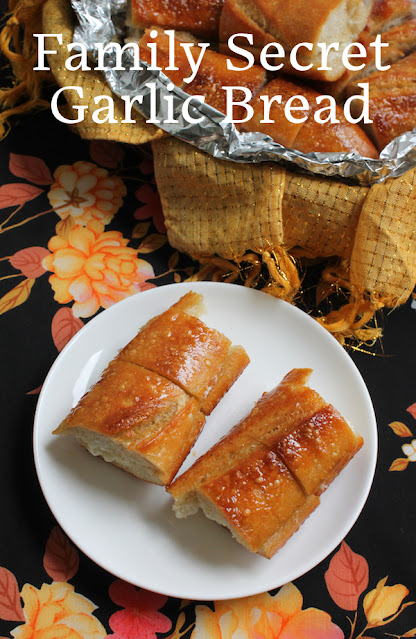
Garlic and butter and our secret ingredient, mayonnaise, makes this family secret garlic bread the best we’ve ever tasted.  

Food Lust People Love: Garlic and butter and our secret ingredient, mayonnaise, makes this family secret garlic bread the best we’ve ever tasted.

Many years ago when we were living in Brazil, our house and garden were often used for company parties because we had room enough to invite all of my husband’s colleagues along with their spouses and children. 

Caterers were hired to set up tables with tablecloths and provide glasses, plates and cutlery. Depending on the occasion, they often also brought the side dishes, using my kitchen for last minute food prep. The main course was always the ubiquitous Brazilian churrasco, that is, meat grilled over a coal or wood fire. 

One of the typical accompaniments was garlic bread, made in the traditional Brazilian way with garlic, butter and mayonnaise. We all liked it so much that we adopted that recipe and always and forever after have made our garlic bread the Brazilian way. 

I call this family secret garlic bread because when we would visit my sister in Houston, grilled steaks were often on the menu. I would offer to make salad and garlic bread. My sister detested anything creamy, including mayonnaise so we just never told her how the garlic spread was made. Sometimes it wasn’t easy to do it without her seeing the mayo going in but my daughters ran interference when needed and we managed to keep the secret from her.  

By the way, she loved my garlic bread! 

Family Secret Garlic Bread

This recipe is easily doubled or trebled or even quadrupled to make as much family secret garlic bread as you need to feed the hungry hoards. I like to use a bit more butter than mayonnaise but some Brazilians will use equal amounts of each or even all mayo. Try it my way first but then feel free to play with the ratio. 

Ingredients
1 baguette or long French bread loaf
1/2 cup or 113g butter, at room temperature
1/3 cup or 75g mayonnaise
4 cloves garlic

Method
Preheat your oven to 350°F or 180°C. 

Cut the baguette down one side to open it up like a book. Do not slice all the way through. 

Crush and mince the garlic or put it through a garlic press. Mix the butter, mayonnaise and garlic in a small bowl until well combined. 


Slather the mixture on the inside of the baguette, on both sides. 


Close the baguette to enclose the garlic butter, then turn it cut side up and carefully cut it into portions by slicing it not quite all the way through so that the pieces can be easily torn away to serve. Do not cut all the way through the “book spine.” 


Wrap the bread snugly in heavy-duty foil and pop it in the oven. I find it easier to wrap when I cut the baguette in half but you can certainly leave yours whole. 


Bake for 20-25 minutes or until the butter has well melted into the bread. Turn the oven off. Serve immediately or leave the garlic bread in the warm oven until ready to serve if the rest of the meal is almost ready. 

To serve, open the foil and let people wrest off as many pieces as they want. (Yeah, I wasn't so good at judging where to cut it in two evenly.)

Food Lust People Love: Garlic and butter and our secret ingredient, mayonnaise, makes this family secret garlic bread the best we’ve ever tasted.

Enjoy! 

Food Lust People Love: Garlic and butter and our secret ingredient, mayonnaise, makes this family secret garlic bread the best we’ve ever tasted.

It's Sunday FunDay and we are celebrating National Garlic Month by sharing garlicky recipes. Many thanks to our host, Wendy of A Day in the Life on the Farm! Check out the recipes below. 


We are a group of food bloggers who believe that Sunday should be a family fun day, so every Sunday we share recipes that will help you to enjoy your day. If you're a blogger interested in joining us, just visit our Facebook group and request to join.

Pin this Family Secret Garlic Bread!

Food Lust People Love: Garlic and butter and our secret ingredient, mayonnaise, makes this family secret garlic bread the best we’ve ever tasted.

 .

Wednesday, April 7, 2021

Duck-fat Roasted Carrots and Parsnips

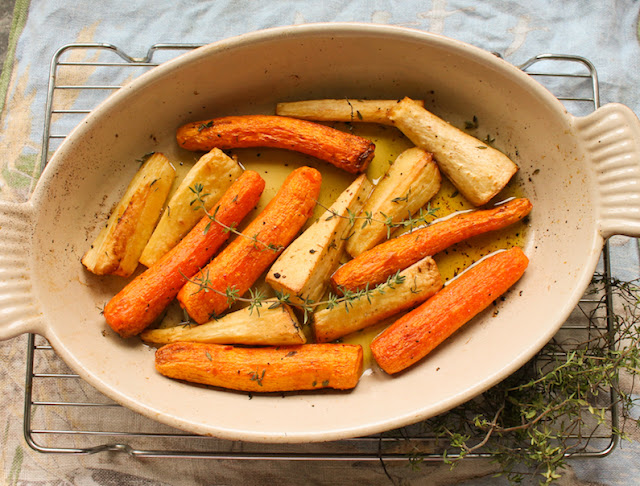
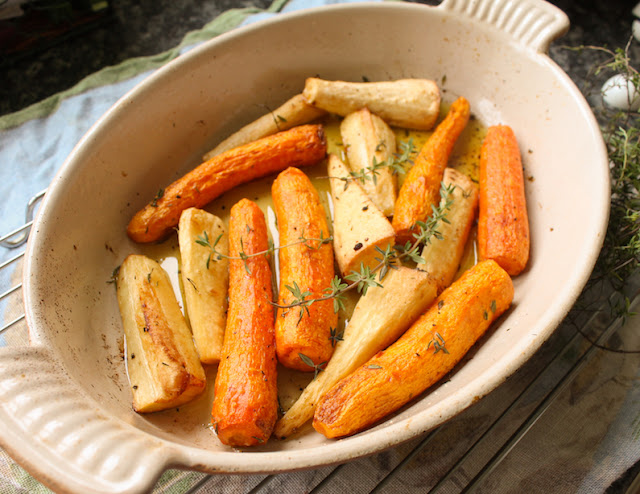
Duck-fat Roasted Carrots and Parsnips are simple yet flavorful. The duck fat adds richness and roasting brings out the natural sweetness of the vegetables. 

Food Lust People Love: Duck-fat Roasted Carrots and Parsnips are simple yet flavorful. The duck fat adds richness and roasting brings out the natural sweetness of the vegetables.

This dish can be made, in fact, with a wide variety of vegetables and lends itself particularly to those in the root vegetable category. I’ve made it with potatoes, onions, carrots, parsnips, Jerusalem artichokes and sweet potatoes, just to name a few.

I’ve also been known to throw in some non-root veggies towards the middle of the cooking time, like cauliflower, broccoli or Brussels sprouts and even wedges of cabbage. 

I would say to you in all sincerity that duck-fat, like bacon, makes everything better. 

Duck-fat Roasted Carrots and Parsnips

If you’d prefer to use all carrots or all parsnips, by all means do. Not a fan of fresh thyme? Switch it out for your favorite herb. Rosemary would also be nice. The weight of the carrots and parsnips is approximate. You want to throw a couple more in and your pan is big enough? Go for it. 

Ingredients
About 2 lbs or 907g mix of carrots and parsnips
3 tablespoons duck fat
fine sea salt
freshly ground black pepper
fresh thyme

Method
Preheat your oven to 400°F or 200°C. Put half of the duck fat in your roasting pan and pop it in the oven until it melts. Keep an eye on it because this doesn’t take long. 

Peel your carrots and parsnips and cut them into manageable lengths for your pan. Add them to the pan and roll them around in the melted duck fat. 

Distribute the rest of the duck fat around on top of the vegetables and sprinkle with salt, pepper and fresh thyme leaves. 

Food Lust People Love: Duck-fat Roasted Carrots and Parsnips are simple yet flavorful. The duck fat adds richness and roasting brings out the natural sweetness of the vegetables.

Roast in your preheated oven for 40-45 minutes or until the vegetables are lovely and golden and a fork pokes into them easily. You might want to give them a shake halfway through if your oven doesn't heat evenly all round. 

Give them another toss in the pan and garnish with extra thyme leaves, if desired. 

Food Lust People Love: Duck-fat Roasted Carrots and Parsnips are simple yet flavorful. The duck fat adds richness and roasting brings out the natural sweetness of the vegetables.

Enjoy! 

This month’s Foodie Extravaganza party celebrates International Carrot Day which happens to be April 4th. Many thanks to our host Sneha of Sneha's Recipe


Foodie Extravaganza is where we celebrate obscure food holidays by cooking and baking together with the same ingredient or theme each month. Posting day is always the first Wednesday of each month. If you are a blogger and would like to join our group and blog along with us, come join our Facebook page Foodie Extravaganza. We would love to have you! If you're a spectator looking for delicious tid-bits check out our Foodie Extravaganza Pinterest Board.


Pin these Duck-fat Roasted Carrots & Parsnips!

Food Lust People Love: Duck-fat Roasted Carrots and Parsnips are simple yet flavorful. The duck fat adds richness and roasting brings out the natural sweetness of the vegetables.

 .

Sunday, April 4, 2021

Ham and Spinach Quiche

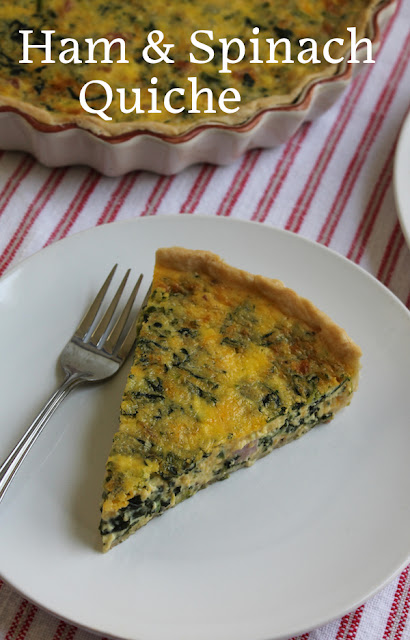
This ham and spinach quiche is a lovely dish for brunch, lunch or dinner, with cubes of leftover ham, spinach and loads of extra sharp cheddar cheese. 

Food Lust People Love: his ham and spinach quiche is a lovely dish for brunch, lunch or dinner, with cubes of leftover ham, spinach and loads of extra sharp cheddar cheese.

If you are trying to use up leftovers, you can’t beat baking quiche. Quiche is like an omelet: You can put anything and everything in it. If you have lots of leftovers, you might also want to check out my Omelets with Super Powers post.

Creating a quiche in two or three easy steps:
1. Choose a cheese (Cheddar, blue, Brie, Camembert, Gouda, Emmental, Swiss, etc.)
2. Choose a vegetable (Broccoli, tomato, cauliflower, asparagus, potato, onion, etc. Quick cooking vegetables can be added raw, for instance, tomatoes. Others, like broccoli and asparagus, should be parboiled. Still others, like potatoes or carrots, should be fully cooked.)
3. (Optional) Choose a cooked “meat” (Ham, bacon, chicken, beef, lamb, fish, shrimp, etc.)

Then, of course, you will add eggs, milk and cream.  Your quantities of everything will depend on the width and depth of your pie plate or quiche pan. 

The pie crust recipe I use is here. It is versatile and works just as well with savory and sweet fillings. It is the pie crust of my quiches, as well as my banana cream pie and apple rhubarb strawberry pie and pecan pie and so on. I am asked for the recipe often, but I cannot take credit. I come by it honestly: The Good Housekeeping Illustrated Cookbook, 1980 edition, Zoe Coulson, ed.  

This cookbook was a gift from my mother-in-law on our first married Christmas in 1986 and it has been so well-used (read: falling apart) that I am on my THIRD copy now, purchased on Ebay. I had to have the same edition! Perhaps later editions have all the same recipes. I’ll never know. But in the 1980 edition, I know where everything is.  

I could wax eloquent about the Before You Cook section, amply used by my newlywed husband to cook wonderful meals for me upon his return from offshore, with its illustrations of kitchen tools and pots and pans and equipment, essential for a newbie. Or the Color Index with photographs of every one of the more than 900 recipes. Or the illustrated, step-by-step instructions.

Suffice to say, this book is one of only two we have taken in the luggage to every new overseas posting in 35 years of marriage. The second book is a binder of photocopied and handwritten recipes I have amassed over the years from friends and family.  

Ham and Spinach Quiche

My quiche pan was a wedding gift and I’ve used it more times than I can count over the last 35 years. It measures 10.5 in or 27cm across and is 1.5 in or 4cm deep. The ingredient amounts below fill it to perfection. You can also bake this in a normal pie plate. 

Ingredients
1 unbaked pie crust (I use this recipe.)
6 oz or 170g leftover baked ham 
4 1/2 ounces or 127g extra sharp cheddar, grated
3 1/2 oz or 100g frozen spinach (thawed, then drained)
4 eggs
3/4 cup or 180ml cream 
1/2 cup or 120ml milk
1/2 teaspoon fine sea salt
freshly ground black pepper  

Method
Preheat your oven to 400°F or 200°C and fit your pie crust into your pie plate or quiche pan. Dock it with the pointy end of a knife or the tines of a fork. 


If your ham is in one big piece, cut it into smaller pieces. I think cubes are always fun but you can just chop it up. 


In a large mixing bowl, whisk together the eggs, cream and milk. Fold in the ham, cheese and spinach along with the salt. 


Give the mixture a few good grinds of black pepper and stir again. 

Pour this mixture into your pie crust and bake for 10 minutes in your preheated oven. My oven doesn't heat evenly so I like to put my quiche pan on another larger pan to make rotating it in the oven easier. 

Food Lust People Love: his ham and spinach quiche is a lovely dish for brunch, lunch or dinner, with cubes of leftover ham, spinach and loads of extra sharp cheddar cheese.

After the initial 10 minutes, turn the temperature down to 350°F or 180°C and bake for an additional 25-30 minutes or until an inserted knife comes out clean. If your oven doesn't heat evenly, gently turn the pan around about three quarters of the way through the cooking time. 

Remove the pan from the oven and leave the quiche to cool for about 10 minutes before cutting it into slices to serve. 

Food Lust People Love: his ham and spinach quiche is a lovely dish for brunch, lunch or dinner, with cubes of leftover ham, spinach and loads of extra sharp cheddar cheese.

I usually serve each slice of quiche with a tomato salad or even a green salad on the side but truly, it is a meal all by itself. 

Food Lust People Love: his ham and spinach quiche is a lovely dish for brunch, lunch or dinner, with cubes of leftover ham, spinach and loads of extra sharp cheddar cheese.

Enjoy! 

Today is Easter Sunday and if you are reading this early in the day, you probably haven’t eaten your Easter dinner yet (I mean, if you do celebrate) but my Sunday FunDay friends and I are thinking ahead! At the instigation of our host, Wendy from A Day in the Life on the Farm, we are sharing recipes designed to use up your Easter dinner leftovers! Check out all the recipes below.


We are a group of food bloggers who believe that Sunday should be a family fun day, so every Sunday we share recipes that will help you to enjoy your day. If you're a blogger interested in joining us, just visit our Facebook group and request to join.


Pin this Ham and Spinach Quiche!

Food Lust People Love: his ham and spinach quiche is a lovely dish for brunch, lunch or dinner, with cubes of leftover ham, spinach and loads of extra sharp cheddar cheese.

 .

Monday, March 29, 2021

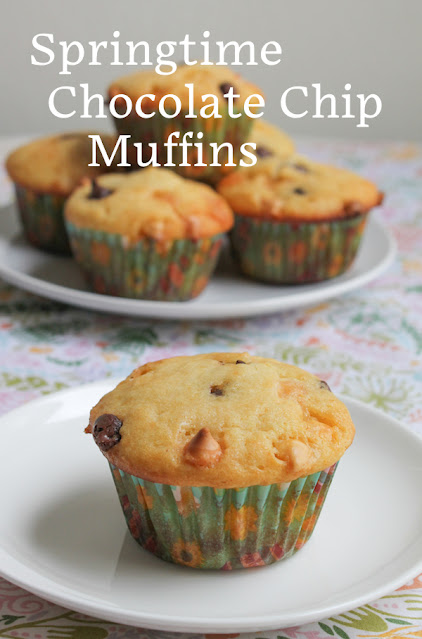
Springtime Chocolate Chip Muffins #MuffinMonday

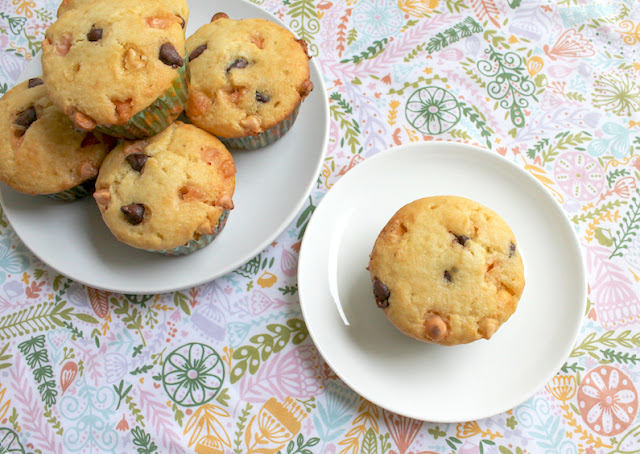
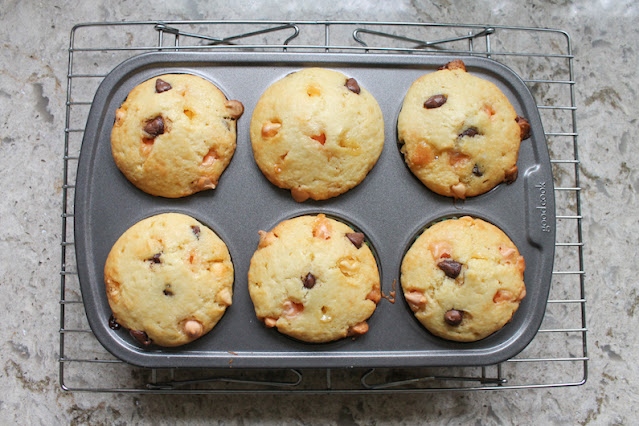
Seasonal chocolate chips are a colorful and fun way to change up a classic muffin recipe. This one is a family favorite and makes a small batch of six muffins.

Food Lust People Love: Seasonal chocolate chips are a colorful and fun way to change up a classic muffin recipe. This one is a family favorite and makes a small batch of six muffins.

It’s the last Monday of the month so that means it’s Muffin Monday! March has been a better month than February, which was a better month than January (pretty grim despite it being my birthday month) so I have even higher hopes for April. 

The brightest hope comes from the increasing number of people I love who have been able to get vaccinated against COVID-19, including yours truly.  But sadly, people are still succumbing to that terrible virus. According to my Sunday Chronicle yesterday, we’ve lost more that half a million precious lives altogether just in the United States and that breaks my heart. 

It’s small consolation but bake some muffins for someone you love. If you can’t find springtime chocolate chips, use normal ones. 

Springtime Chocolate Chip Muffins

I’ve been making this muffin recipe or adaptations thereof since 2005 because it is infinitely adaptable. This is the first time I’ve adjusted the ingredients to make only six muffins though. If you want the recipe for 12, check out my post from 2012, along with a list of possible add-ins. 

Ingredients
1 cup or 125g all purpose flour
1/3 cup or 66g sugar
1 1/2 teaspoons baking powder
1/4 teaspoon salt
1/2 cup or 120ml milk
1/4 cup or 60ml canola or another light oil
1/2 teaspoon vanilla
1 large egg
1/2 cup or about 90g springtime semi-sweet chocolate chips

 
Method
Preheat oven to 350°F or 180°C. Generously grease cups and top of 6-cup muffin pan or use paper liners. 

Whisk the flour, sugar, baking powder and salt together in a large mixing bowl. In another bowl, whisk together the milk, oil, vanilla and egg. 


Add all the milk/egg mixture to flour mixture. Gently fold just until dry ingredients are moistened.   


Then fold in most of your springtime chocolate chips. Save a small handful for decoration. 


Divide your batter relatively evenly between the 6 muffin cups. Top with the reserved chocolate chips.

Food Lust People Love: Seasonal chocolate chips are a colorful and fun way to change up a classic muffin recipe. This one is a family favorite and makes a small batch of six muffins.

Bake 20-25 minutes in your preheated oven or until the muffins are golden.

Remove from oven and leave to cool on a wire rack. 

Food Lust People Love: Seasonal chocolate chips are a colorful and fun way to change up a classic muffin recipe. This one is a family favorite and makes a small batch of six muffins.

Enjoy! 

Food Lust People Love: Seasonal chocolate chips are a colorful and fun way to change up a classic muffin recipe. This one is a family favorite and makes a small batch of six muffins.

Check out all the other lovely muffins my Muffin Monday friends are sharing today!

Muffin Monday
 

#MuffinMonday is a group of muffin loving bakers who get together once a month to bake muffins. You can see all of our lovely muffins by following our Pinterest board. Updated links for all of our past events and more information about Muffin Monday can be found on our home page.


Pin these Springtime Chocolate Chip Muffins!

Food Lust People Love: Seasonal chocolate chips are a colorful and fun way to change up a classic muffin recipe. This one is a family favorite and makes a small batch of six muffins.

 .

Sunday, March 28, 2021

Strawberry Mint Glazed Roasted Rack of Lamb

A tart and fruity strawberry and mint glaze makes a wonderful sticky topping for this strawberry mint glazed roasted rack of lamb. It’s the perfect dish for date night or the ingredients are easily doubled for a family dinner. 

Food Lust People Love: A tart and fruity strawberry and mint glaze makes a wonderful sticky topping for this strawberry mint glazed roasted rack of lamb. It’s the perfect dish for date night or the ingredients are easily doubled for a family dinner.

Years ago I discovered quite by accident that a rack of lamb takes only 45-60 minutes to roast, which is so much quicker than the leg, my usual part of a lamb to roast. As much as we love lamb chops, I had never bought them all hooked together still. 

One day I arrived home to find a care package with big prawns, some smoked salmon and a vacuum-packed rack of lamb stashed in my refrigerator. One of the catering contractors who supplied my husband’s drilling rigs had dropped it all off as a thank you for the business.

Those were the days of achingly slow dial-up internet so I consulted my trusty Good Housekeeping Illustrated Cookbook (1980 edition.) Right there on page 227, the instructions were so simple: Season with salt and pepper. Roast for 1 hour or until you reach your desired internal temperature. In the last 15-30 minutes, brush with an apricot glaze aka warmed apricot jam. Honestly, does it get easier than that? Who knew!

Good Housekeeping ended with the instructions of how to remove the back bones on one side of the rack so the chops can be easily cut apart. Let me offer you a little tip. Ask your butcher to do this before you even bring that rack of lamb home. Roasting and serving is quicker and easier without those back bones to deal with. 

Strawberry Mint Glazed Roasted Rack of Lamb

Instead of the Good Housekeeping recommendation of apricot glaze, you can use any fruit you like so this can be a wonderfully seasonal dish. This time I used strawberries and mixed them with the more traditional accompaniment to lamb, classic mint sauce. Any leftover glaze can be served with the roasted rack of lamb, to spoon over the chops. So good! 

Ingredients
For the strawberry mint glaze/sauce:
7 oz or 200g strawberries
Pinch salt
1­-2 teaspoons sugar (if needed, depending on the sweetness of your strawberries)
2 tablespoons prepared mint sauce (Not mint jelly! Proper mint sauce has a bite from the vinegar. I recommend Colman's Classic Mint Sauce.)

For the rack of lamb:
1 1/2 lbs or 680g rack of lamb, preferably with a nice layer of fat on top
1 teaspoon flakey sea salt 
1 large clove garlic
1⁄2 teaspoon peppercorns (I use mixed peppercorn but just black are fine.)

Method
Start your oven preheating to 375°F or 190°C. 

Use a sharp knife to score the fat on the top of the rack of lamb. Don't cut all the way through to the meat.


Use a mortar and pestle to crush the peppercorns, garlic and salt salt into a paste.

Rub the seasonings into the scored fat then place it on a rack in a baking pan. Set aside. 


To make the strawberry mint glaze, hull the strawberries and chop them into quarters. Cook them until soft in a small covered pot over a medium flame, with the pinch of salt and a splash of water.


Taste the strawberries and add a little sugar if they aren’t sweet. 

Mash the strawberries with a fork and cook them down until they are a thick sauce. Remove from the heat and stir in the mint sauce. Set it aside


When your oven has reached the proper temperature, put the pan in the oven and roast the rack of lamb for about 30 minutes or until the internal temperature reaches about 115°F or 46°C, for rare chops.

Remove the rack from the oven and brush it all over thickly with the strawberry mint glaze.

Food Lust People Love: A tart and fruity strawberry and mint glaze makes a wonderful sticky topping for this strawberry mint glazed roasted rack of lamb. It’s the perfect dish for date night or the ingredients are easily doubled for a family dinner.

Return the rack to the oven for another 15 minutes or until the internal temperature is about 135°F or 57°C. Remove it from the oven and tent it with foil for about 10 minutes.

Food Lust People Love: A tart and fruity strawberry and mint glaze makes a wonderful sticky topping for this strawberry mint glazed roasted rack of lamb. It’s the perfect dish for date night or the ingredients are easily doubled for a family dinner.

Slice into six chops and serve the remaining strawberry mint sauce alongside the chops.

Food Lust People Love: A tart and fruity strawberry and mint glaze makes a wonderful sticky topping for this strawberry mint glazed roasted rack of lamb. It’s the perfect dish for date night or the ingredients are easily doubled for a family dinner.

Enjoy! 

It’s Sunday FunDay again and this time I’m hosting and we are sharing lamb recipes. Check out all the delicious recipes below. 

We are a group of food bloggers who believe that Sunday should be a family fun day, so every Sunday we share recipes that will help you to enjoy your day. If you're a blogger interested in joining us, just visit our Facebook group and request to join.

Pin this Strawberry Mint Glazed 

Roasted Rack of Lamb!

Food Lust People Love: A tart and fruity strawberry and mint glaze makes a wonderful sticky topping for this strawberry mint glazed roasted rack of lamb. It’s the perfect dish for date night or the ingredients are easily doubled for a family dinner.

 .