Wednesday, May 5, 2021

Simple Strawberry Vodka

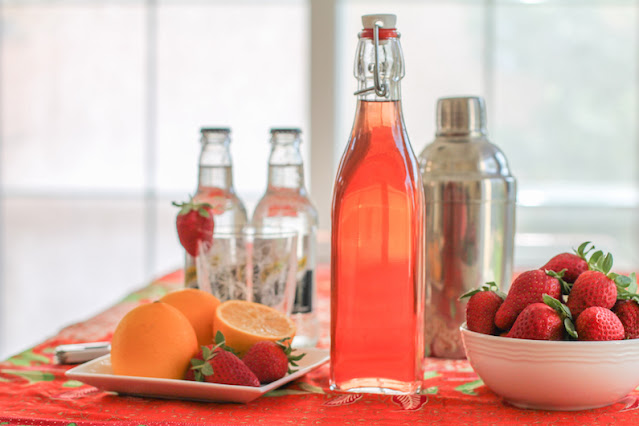
This slightly sweet simple strawberry vodka is best served well chilled in shot glasses or as a cocktail ingredient. It makes a fabulous sparkling libation with Champagne or soda. 

Food Lust People Love: This slightly sweet simple strawberry vodka is best served well chilled in shot glasses or as a cocktail ingredient. It makes a fabulous sparkling libation with Champagne or soda.

One of the easiest ways to preserve the fresh taste of strawberries is to “pickle” them in alcohol. The strawberries transfer their sweet flavor and gorgeous color to your alcohol of choice in just a couple of weeks. 

Speaking of preserving fruit, jam is one of my favorite things to make with whatever fruit is in season. And I always wash and freeze strawberries and blueberries in a single layer then pop them into a Ziploc bag to extend their seasons. But I wanted to challenge myself to do something different this time. 

I had no idea how easy it would be to make strawberry vodka!

As it turns out, it’s really not much of a challenge at all. You can make straight strawberry vodka by cutting up the strawberries and tipping them into vodka but I chose to add some sugar too so I wouldn’t have to add simple syrup for cocktails. It was a good decision.

Simple Strawberry Vodka

This fruity vodka can also be made with other berries like blackcurrants or cranberries, or any soft fruit really, come to think of it.

Ingredients
9 oz or 255g fresh strawberries
2 1/2 cups or 590ml vodka
1/2 cup or 100g sugar

Method
Hull and chop the strawberries into four or five pieces.


Put them in a sterilized jar with the sugar. Add the vodka and strawberries and shake gently till the sugar has dissolved.


Leave for at least two weeks in a cool, dark cupboard. Give the jar a gentle shake at least once a day.


Strain through several layers of cheesecloth or a single ply of paper towel and decant into a decorative bottle. Discard the poor pale strawberries which have given their all that we might have fruity vodka. 

Seal and label.


Isn’t it a beautiful color?

Food Lust People Love: This slightly sweet simple strawberry vodka is best served well chilled in shot glasses or as a cocktail ingredient. It makes a fabulous sparkling libation with Champagne or soda.

Enjoy!

It’s time for another Foodie Extravaganza party and we are celebrating National Strawberry Month with all sorts of great recipes. Check them out! Many thanks to our host Kelley of Simply Inspired Meals for the theme and to Sneha of Sneha's Recipe for her behind-the-scenes work. 


Foodie Extravaganza is where we celebrate obscure food holidays by cooking and baking together with the same ingredient or theme each month. Posting day is always the first Wednesday of each month. If you are a blogger and would like to join our group and blog along with us, come join our Facebook page Foodie Extravaganza. We would love to have you! If you're a spectator looking for delicious tid-bits check out our Foodie Extravaganza Pinterest Board.


Pin this Simple Strawberry Vodka! 

Food Lust People Love: This slightly sweet simple strawberry vodka is best served well chilled in shot glasses or as a cocktail ingredient. It makes a fabulous sparkling libation with Champagne or soda.
.

Sunday, May 2, 2021

Boozy Nectarine Crumble

Nectarines lavishly drenched in golden rum are topped with a mix of flour, sugar and butter to make this boozy nectarine crumble. 

Food Lust People Love: Nectarines lavishly drenched in golden rum are topped with a mix of flour, sugar and butter to make this boozy nectarine crumble.

When I want to recall fond memories of when we were still able to travel and visit with friends, I bake what I call Caroline’s boozy nectarine crumble, so named for the friend who showed me how to make it. 

Her recipe was simple, made with sweet ripe summer nectarines, bought at an outdoor market in southern France. They needed no sugar, except for what’s in the crumble topping. They do need, Caroline exclaimed, a lavish drenching with golden rum, as she poured it on without measuring. 

You can read more about that holiday in France on my Cheese Shallot Pie post. We ate so well and I swoon to remember it! 

Boozy Nectarine Crumble

Caroline made her crumble topping with equal parts flour and sugar and 2/3 that measure of unsalted butter. In other words, 6 oz flour, 6 oz sugar and 4 oz butter, all by weight. Or, she continued the instructions, use the same proportions for however much crumble you need. For my smaller baking dish (11 x 8 in or 28 x 20cm oval), I kept the same proportions but in a smaller amount. Caroline was, after all, feeding crowd of us.

Ingredients
1 1/2 lbs or 700g nectarines, chopped. 
1/2 cup or 120ml rum
9/10 cup or 113g flour (This is a weird measurement if you don’t have scales. Just eyeball it. A little more or a little less flour isn’t going to matter.)
Scant 2/3 cup or 113g sugar
1/3 cup or 75g butter

Method
Preheat your oven to 350°F or 180°C. Cut the flour, butter, sugar together to form a damp sandy crumble. Set aside. 


Pit the nectarines and cut them in small chunks and place in a large bowl. Caroline said, and I quote, “Drench them lavishly with rum!” so pour on at least 1/2 a cup or 120ml.


Pile the boozy nectarines in your baking dish and top with the crumble. 


Bake the crumble in your preheated oven for about 30-35 minutes or until topping is crunchy and golden and the nectarines are soft and bubbling. 

Food Lust People Love: Nectarines lavishly drenched in golden rum are topped with a mix of flour, sugar and butter to make this boozy nectarine crumble.

Spoon on plates to serve, topping with thick cream, if desired. 

Food Lust People Love: Nectarines lavishly drenched in golden rum are topped with a mix of flour, sugar and butter to make this boozy nectarine crumble.

Enjoy! 

Welcome to Sunday FunDay! Today we are sharing fruity desserts so check them out below. Many thanks to our host, Sneha of Sneha's Recipe.


We are a group of food bloggers who believe that Sunday should be a family fun day, so every Sunday we share recipes that will help you to enjoy your day. If you're a blogger interested in joining us, just visit our Facebook group and request to join.


Pin this Boozy Nectarine Crumble! 

Food Lust People Love: Nectarines lavishly drenched in golden rum are topped with a mix of flour, sugar and butter to make this boozy nectarine crumble.

 .

Tuesday, April 13, 2021

Sourdough Sprouted Spelt Blini #BreadBakers

These sourdough sprout spelt blini are flavorful and fluffy, perfect to eat with sweet or savory toppings. We love them with cream cheese and salmon!

These sourdough sprout spelt blini are flavorful and fluffy, perfect to eat with sweet or savory toppings. We love them with cream cheese and salmon!

I must confess that I didn’t know much about blini beyond how to eat them so in researching this recipe, I learned a lot. For instance, blini were traditionally prepared at the end of winter to celebrate the birth of the new sun, the round blini representing the sun. The Orthodox church adopted the pagan tradition and Maslenitsa or pancake week is still celebrated today. 

Originally blini were made with a yeasted dough and baked in an oven. In fact, even though they are pan-fried like pancakes these days, even in Russia, the Russian verb used to describe their preparation is still “bake.”

Sourdough Sprouted Spelt Blini

My recipe was adapted from one on La Recette du Jour,  using wholegrain spelt instead of the traditional buckwheat. If you don't have spelt or buckwheat whole grain wheat would also work. 

Ingredients
1 1/4 cups or 300ml milk
1/2 teaspoon active dry yeast
1 tablespoon sugar
7 oz or 200g discard sourdough starter
2/3 cup or 80g plain flour
1 cup or 120g sprouted spelt flour
1/2 teaspoon salt
2 eggs
butter for the griddle 

Method
Warm the milk slightly and add in the yeast and sugar. When the yeast is activated (that is, when the milk gets foamy on top) add it to the sourdough starter in a large mixing bowl and whisk until blended. 

Add both the flours, stir again, cover with cling film or a plastic bag, and leave to double in size. This should take 1 – 1 1/2 hours at room temperature. (If it’s chilly where you live right now, put the covered bowl in your kitchen sink filled with warm water.) 


Separate the eggs and set the whites aside in a large clean bowl. Stir the yolks into the batter with the salt and leave for about another hour.


The batter should now be spongy and bubbly.


When you are ready to cook the blini, beat the egg whites to stiff peaks and fold them gently into the batter.


Heat your pan or griddle over a low heat and smear with a little butter. 

Once it’s hot, ladle on small dollops of batter, whatever size you want your blini to be. I used a small cookie scoop but still managed to get wonky shaped blini. Mine would probably be booed out of new sun celebration for not being round. 

Never mind. Just keep telling yourself that looks don’t matter. It’s all about the taste.

These sourdough sprout spelt blini are flavorful and fluffy, perfect to eat with sweet or savory toppings. We love them with cream cheese and salmon!

When bubbles start to form and the bottom is browned, carefully turn the blini over with a spatula to cook the other side. 

These sourdough sprout spelt blini are flavorful and fluffy, perfect to eat with sweet or savory toppings. We love them with cream cheese and salmon!

When both sides are cooked, put them on a warmed plate and cover loosely with foil to keep them warm. 

Serve them with butter and jam or topped with cured salmon, cream cheese and capers. 

These sourdough sprout spelt blini are flavorful and fluffy, perfect to eat with sweet or savory toppings. We love them with cream cheese and salmon!

Enjoy! 

This month my Bread Baker friends are sharing breads made with whole grain flour. Check out the recipes below. Many thanks to our host, Wendy of A Day in the Life on the Farm. 
BreadBakers

#BreadBakers is a group of bread loving bakers who get together once a month to bake bread with a common ingredient or theme. You can see all our lovely bread by following our Pinterest board right here. Links are also updated after each event on the #BreadBakershome page. We take turns hosting each month and choosing the theme/ingredient.


Pin these Sourdough Sprouted Spelt Blini!

These sourdough sprout spelt blini are flavorful and fluffy, perfect to eat with sweet or savory toppings. We love them with cream cheese and salmon!
 .


Monday, April 12, 2021

Chicken Chili Tortilla Casserole

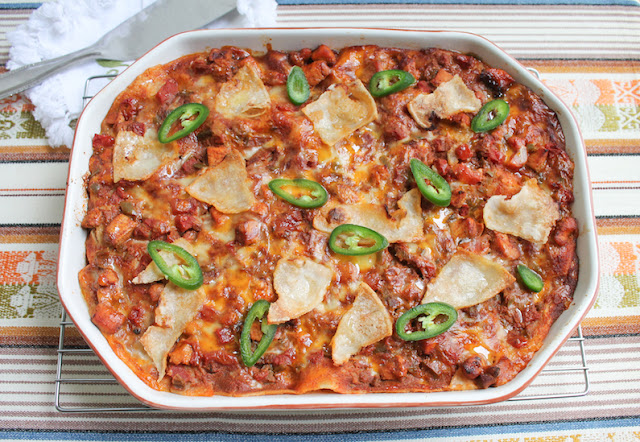
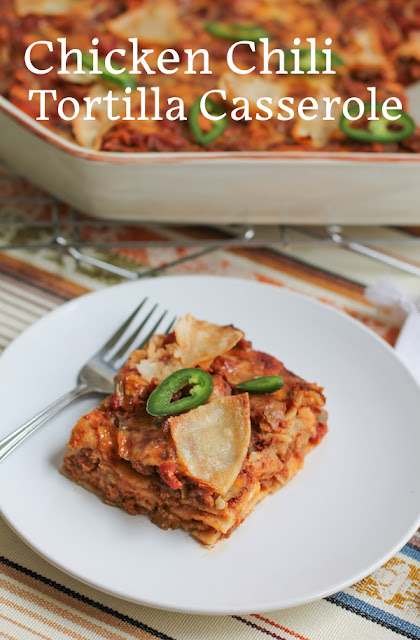
This chicken chili tortilla casserole is like enchiladas made easier by layering the “filling” with corn tortillas and topping each layer with cheese. It is assembled, with apologies to all Italians: lasagna style. 

Food Lust People Love: This chicken chili tortilla casserole is like enchiladas made easier by layering the “filling” with corn tortillas and topping each layer with cheese. It is assembled, with apologies to all Italians: lasagna style.

We love enchiladas at our house so I’ve been known to make ones with beef, chicken with chorizo and even a mix of chicken and black beans. If you need a vegetarian version, I can highly recommend my cheesy bean enchilada recipe made with pintos and vegetarian refried beans. Topped with jalapeños and black olives it is as pretty as it is tasty. You won’t even miss the meat, I promise. 

The only reason I don’t make enchiladas more is the messy hassle of saucing the tortillas to soften and then filling them. This casserole avoids that whole palaver.

That said, the chicken chili is also delicious on its own. :) 

Chicken Chili Tortilla Casserole

In the US, unlike in most of the world where chili powder is literally just ground chili peppers, chili powder is a spice mix made with (at least in the McCormick brand powder) toasted whole ripe chili peppers, cumin, oregano, garlic and salt. To make it clear, I’m going to call it chili (seasoning) powder in the ingredients list below. 

Ingredients
1 lb or 450g trimmed chicken breasts
fine sea salt
freshly ground black pepper
2 tablespoons canola or other light oil, plus extra for the baking dish
1/2 small onion, finely chopped
1/2 green pepper, finely chopped
1-2 fresh jalapeños, finely chopped
3 tablespoons chili (seasoning) powder (see note above)
1 1/2 teaspoons ground cumin
1/2 teaspoon smoked paprika
1 can (14.5 oz or 411g) small dice tomatoes with green chili peppers
1 tablespoon tomato paste
14 fresh corn tortillas
8 oz or 225g extra sharp cheddar or a blend of cheeses, grated

Optional garnish:
sliced fresh jalapeños

Method
Cut the chicken into small pieces. I like to put my hand on the breasts and cut them in two through the middle so the pieces are thinner, then cut them into small cubes. You can just kinda chop it up with a sharp knife, if you prefer. 


Season the chicken pieces with a good sprinkle of salt and a few generous grinds of black pepper. 

Warm the oil in a large pot and then sautéed the chopped vegetables in the oil until softened, about five minutes. 


Add in the chili powder, cumin and paprika and give the whole thing a good stir. Cook for another two minutes, then add in the chicken. Stir well to coat the chicken with the seasonings. 


Cook for another few minutes then add in the canned tomatoes and the tomato paste then using the tomato can as a measuring vessel, add a full can of water. 


Bring to a slow boil then reduce the heat and simmer for 30 minutes, covered. 

Preheat your oven to 350°F or 180°C. 

Grease the bottom of a casserole dish with a little oil and cover it with a layer of corn tortillas, cutting them to make them fit. I chose this ridiculously shaped pan so it got a little more complicated than necessary. (Another wedding gift from 25 years ago, it matches the quiche dish.) 


Spoon over 1/3 third of the chicken chili and sprinkle on 1/3 of the cheese. 


Cover this with another layer of corn tortillas, another 1/3 of the chicken chili and 1/3 of the cheese. 

Repeat with another layer of tortillas, the balance of the chicken and the balance of the cheese. Rip a couple of tortillas into pieces and strew them decoratively over the casserole. (This step is not strictly necessary but I like the crunch that they add to the top.)


Cover with foil and bake in your preheated oven for 30 minutes. Remove the foil and cook for an additional 10-15 minutes or until the top is browned. 

Leave to cool for about 10 minutes before garnishing with sliced fresh jalapeños, if using, and cutting the casserole into squares to serve. 

Food Lust People Love: This chicken chili tortilla casserole is like enchiladas made easier by layering the “filling” with corn tortillas and topping each layer with cheese. It is assembled, with apologies to all Italians: lasagna style.

Enjoy!

Food Lust People Love: This chicken chili tortilla casserole is like enchiladas made easier by layering the “filling” with corn tortillas and topping each layer with cheese. It is assembled, with apologies to all Italians: lasagna style.

Today I’m joining my Baking Blogger friends who are sharing Mexican recipes. Check them out below. I know mine isn’t in any way authentically Mexican but I hope it is close enough to qualify. Many thanks to our host and organizer, Sue from Palatable Pastime
Baking Bloggers is a friendly group of food bloggers who vote on a shared theme and then post recipes to fit that theme one the second Monday of each month. If you are a food blogger interested in joining in, inquire at our Baking Bloggers Facebook group. We'd be honored if you would join us in our baking adventures.

Pin this Chicken Chili Tortilla Casserole!

Food Lust People Love: This chicken chili tortilla casserole is like enchiladas made easier by layering the “filling” with corn tortillas and topping each layer with cheese. It is assembled, with apologies to all Italians: lasagna style.

 .

Sunday, April 11, 2021

Family Secret Garlic Bread

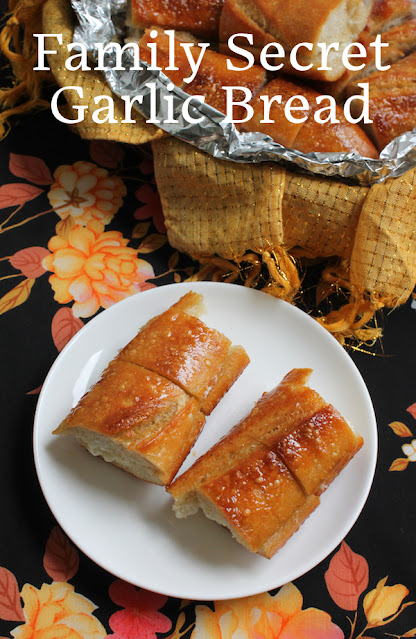
Garlic and butter and our secret ingredient, mayonnaise, makes this family secret garlic bread the best we’ve ever tasted.  

Food Lust People Love: Garlic and butter and our secret ingredient, mayonnaise, makes this family secret garlic bread the best we’ve ever tasted.

Many years ago when we were living in Brazil, our house and garden were often used for company parties because we had room enough to invite all of my husband’s colleagues along with their spouses and children. 

Caterers were hired to set up tables with tablecloths and provide glasses, plates and cutlery. Depending on the occasion, they often also brought the side dishes, using my kitchen for last minute food prep. The main course was always the ubiquitous Brazilian churrasco, that is, meat grilled over a coal or wood fire. 

One of the typical accompaniments was garlic bread, made in the traditional Brazilian way with garlic, butter and mayonnaise. We all liked it so much that we adopted that recipe and always and forever after have made our garlic bread the Brazilian way. 

I call this family secret garlic bread because when we would visit my sister in Houston, grilled steaks were often on the menu. I would offer to make salad and garlic bread. My sister detested anything creamy, including mayonnaise so we just never told her how the garlic spread was made. Sometimes it wasn’t easy to do it without her seeing the mayo going in but my daughters ran interference when needed and we managed to keep the secret from her.  

By the way, she loved my garlic bread! 

Family Secret Garlic Bread

This recipe is easily doubled or trebled or even quadrupled to make as much family secret garlic bread as you need to feed the hungry hoards. I like to use a bit more butter than mayonnaise but some Brazilians will use equal amounts of each or even all mayo. Try it my way first but then feel free to play with the ratio. 

Ingredients
1 baguette or long French bread loaf
1/2 cup or 113g butter, at room temperature
1/3 cup or 75g mayonnaise
4 cloves garlic

Method
Preheat your oven to 350°F or 180°C. 

Cut the baguette down one side to open it up like a book. Do not slice all the way through. 

Crush and mince the garlic or put it through a garlic press. Mix the butter, mayonnaise and garlic in a small bowl until well combined. 


Slather the mixture on the inside of the baguette, on both sides. 


Close the baguette to enclose the garlic butter, then turn it cut side up and carefully cut it into portions by slicing it not quite all the way through so that the pieces can be easily torn away to serve. Do not cut all the way through the “book spine.” 


Wrap the bread snugly in heavy-duty foil and pop it in the oven. I find it easier to wrap when I cut the baguette in half but you can certainly leave yours whole. 


Bake for 20-25 minutes or until the butter has well melted into the bread. Turn the oven off. Serve immediately or leave the garlic bread in the warm oven until ready to serve if the rest of the meal is almost ready. 

To serve, open the foil and let people wrest off as many pieces as they want. (Yeah, I wasn't so good at judging where to cut it in two evenly.)

Food Lust People Love: Garlic and butter and our secret ingredient, mayonnaise, makes this family secret garlic bread the best we’ve ever tasted.

Enjoy! 

Food Lust People Love: Garlic and butter and our secret ingredient, mayonnaise, makes this family secret garlic bread the best we’ve ever tasted.

It's Sunday FunDay and we are celebrating National Garlic Month by sharing garlicky recipes. Many thanks to our host, Wendy of A Day in the Life on the Farm! Check out the recipes below. 


We are a group of food bloggers who believe that Sunday should be a family fun day, so every Sunday we share recipes that will help you to enjoy your day. If you're a blogger interested in joining us, just visit our Facebook group and request to join.

Pin this Family Secret Garlic Bread!

Food Lust People Love: Garlic and butter and our secret ingredient, mayonnaise, makes this family secret garlic bread the best we’ve ever tasted.

 .

Wednesday, April 7, 2021

Duck-fat Roasted Carrots and Parsnips

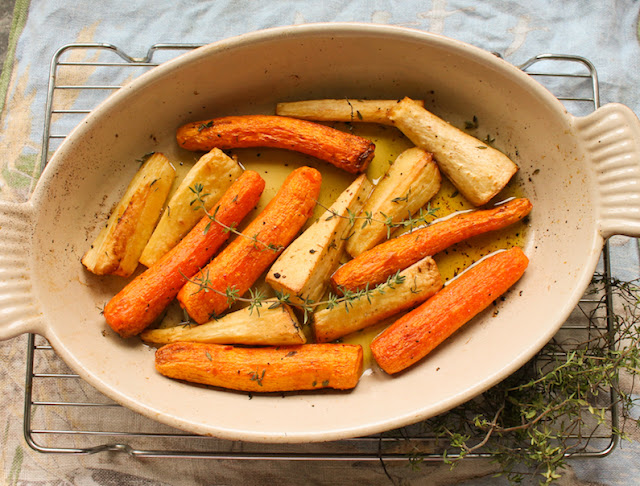
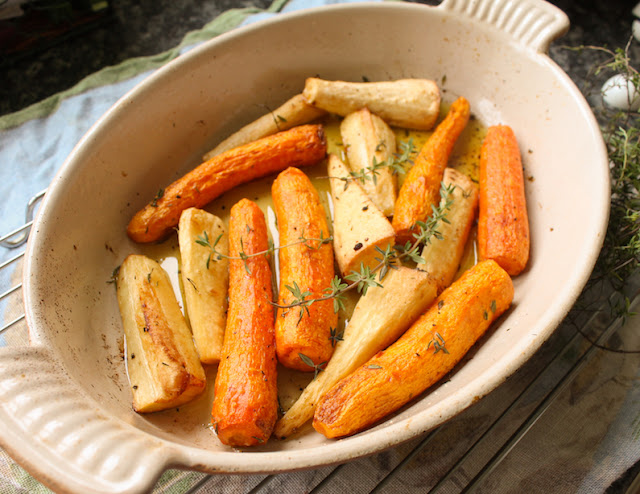
Duck-fat Roasted Carrots and Parsnips are simple yet flavorful. The duck fat adds richness and roasting brings out the natural sweetness of the vegetables. 

Food Lust People Love: Duck-fat Roasted Carrots and Parsnips are simple yet flavorful. The duck fat adds richness and roasting brings out the natural sweetness of the vegetables.

This dish can be made, in fact, with a wide variety of vegetables and lends itself particularly to those in the root vegetable category. I’ve made it with potatoes, onions, carrots, parsnips, Jerusalem artichokes and sweet potatoes, just to name a few.

I’ve also been known to throw in some non-root veggies towards the middle of the cooking time, like cauliflower, broccoli or Brussels sprouts and even wedges of cabbage. 

I would say to you in all sincerity that duck-fat, like bacon, makes everything better. 

Duck-fat Roasted Carrots and Parsnips

If you’d prefer to use all carrots or all parsnips, by all means do. Not a fan of fresh thyme? Switch it out for your favorite herb. Rosemary would also be nice. The weight of the carrots and parsnips is approximate. You want to throw a couple more in and your pan is big enough? Go for it. 

Ingredients
About 2 lbs or 907g mix of carrots and parsnips
3 tablespoons duck fat
fine sea salt
freshly ground black pepper
fresh thyme

Method
Preheat your oven to 400°F or 200°C. Put half of the duck fat in your roasting pan and pop it in the oven until it melts. Keep an eye on it because this doesn’t take long. 

Peel your carrots and parsnips and cut them into manageable lengths for your pan. Add them to the pan and roll them around in the melted duck fat. 

Distribute the rest of the duck fat around on top of the vegetables and sprinkle with salt, pepper and fresh thyme leaves. 

Food Lust People Love: Duck-fat Roasted Carrots and Parsnips are simple yet flavorful. The duck fat adds richness and roasting brings out the natural sweetness of the vegetables.

Roast in your preheated oven for 40-45 minutes or until the vegetables are lovely and golden and a fork pokes into them easily. You might want to give them a shake halfway through if your oven doesn't heat evenly all round. 

Give them another toss in the pan and garnish with extra thyme leaves, if desired. 

Food Lust People Love: Duck-fat Roasted Carrots and Parsnips are simple yet flavorful. The duck fat adds richness and roasting brings out the natural sweetness of the vegetables.

Enjoy! 

This month’s Foodie Extravaganza party celebrates International Carrot Day which happens to be April 4th. Many thanks to our host Sneha of Sneha's Recipe


Foodie Extravaganza is where we celebrate obscure food holidays by cooking and baking together with the same ingredient or theme each month. Posting day is always the first Wednesday of each month. If you are a blogger and would like to join our group and blog along with us, come join our Facebook page Foodie Extravaganza. We would love to have you! If you're a spectator looking for delicious tid-bits check out our Foodie Extravaganza Pinterest Board.


Pin these Duck-fat Roasted Carrots & Parsnips!

Food Lust People Love: Duck-fat Roasted Carrots and Parsnips are simple yet flavorful. The duck fat adds richness and roasting brings out the natural sweetness of the vegetables.

 .