Sunday, June 20, 2021

Chocolate Pixies

Chocolate Pixies are a magical combination of chewy, crunchy, chocolatey and nutty, baked with a light coating of powdered pixie dust aka icing sugar.

Food Lust People Love: Chocolate Pixies are a magical combination of chewy, crunchy, chocolatey and nutty, baked with a light coating of powdered pixie dust aka icing sugar.

Years ago I came across a recipe in Gourmet magazine for baked treats they called “chocolate crackle cookies.” The actual magazine belonged to a friend so I photocopied it and stuck it in my recipe binder. 


As you can see from the photo, that recipe has been well used over the years. It’s a fun one to make with children because they love rolling the dough into the requisite balls. Never mind that they also tend to get powdered sugar everywhere, that’s part of the sweet fun. 

Which brings me to the recipe I’m sharing today. Our Sunday FunDay host today is Sue of Palatable Pastime. She chose the theme of Midsummer Night’s Dream and encouraged us to celebrate by sharing recipes that would delight the faerie folk. 

I immediate started researching recipes online and found MANY for chocolate pixies. About 110,000,000 Google results, if you can imagine. That’s a lot of pixie cookie recipes! Turns out that I’ve been making a sort of chocolate pixie cookie for 26 years, just by another name. Who knew? 

Chocolate Pixies

This recipe makes four dozen cookies and was adapted from one on Big Oven. The dough freezes beautifully, if you don’t want to bake them all in the same day. 

Ingredients
For the cookie dough:
1/4 cup or 57g butter
4 oz or 113g unsweetened chocolate
2 cups or 250g flour
2 teaspoons baking powder
1/2 teaspoon salt
2 cups or 400g sugar
1/2 cup, finely chopped, or 53g pecans
3 eggs, lightly beaten

To coat dough before baking:
1 cup or 125g icing sugar

Method
Use a sharp knife to finely chop the pecans. 


In a microwavable bowl, melt butter and chocolate in the microwave in 15-20 seconds zaps, stirring in between, until both are completely melted and the mixture is smooth.


Sift in the flour, baking powder and salt and stir to combine.  


Add in the sugar, chopped pecans and eggs. 


Stir till well combined. It will be quite a stiff dough and a good workout for your stirring arm. 


Cover the dough with cling film and press it down to make sure no air is touching the dough and refrigerate at least 1 hour for easier handling.

When you are ready to bake, preheat your oven to 300°F or 149°C and prepare two cookie sheets by lining them with baking parchment or silicone liners. 

Use a spoon or scoop to divide the dough into small pieces, a little smaller than a ping pong ball. 


Shape each piece into a ball and roll it in the icing sugar. 


Put them on a clean plate to catch the icing sugar that inevitably falls off as you transfer them. You don’t want that much on your cookie sheet. 

Place the balls 2 inches apart on your prepared cookie sheets. Still a little sugar on the pan, just not as much.


Bake in the preheated oven for 15-18 minutes or until edges are set, rotating the cookie sheets halfway through so they cook evenly.


Remove the chocolate pixies from the cookie sheets and place on wire racks to cool completely. 

Food Lust People Love: Chocolate Pixies are a magical combination of chewy, crunchy, chocolatey and nutty, baked with a light coating of powdered pixie dust aka icing sugar.

Repeat the process until all the dough is rolled, sugared and baked into cookies.

Enjoy!

Food Lust People Love: Chocolate Pixies are a magical combination of chewy, crunchy, chocolatey and nutty, baked with a light coating of powdered pixie dust aka icing sugar.

It’s Sunday FunDay and, as previously mentioned, we are celebrating A Midsummer Night’s Dream. Check out all the recipes below. Many thanks to our host, Sue of Palatable Pastime


We are a group of food bloggers who believe that Sunday should be a family fun day, so every Sunday we share recipes that will help you to enjoy your day. If you're a blogger interested in joining us, just visit our Facebook group and request to join.

Pin these Chocolate Pixies!

Food Lust People Love: Chocolate Pixies are a magical combination of chewy, crunchy, chocolatey and nutty, baked with a light coating of powdered pixie dust aka icing sugar.

.

Friday, June 18, 2021

Red Pesto Linguine

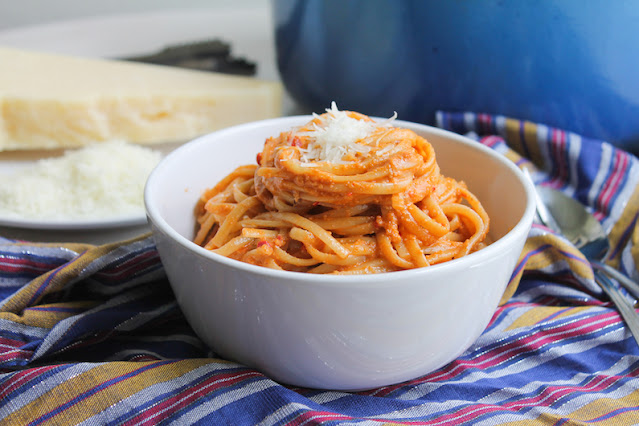
Bright in color and flavor, this red pesto linguine is a spicy bowl of deliciousness made with anchovies and Fresno peppers. It’s even great as leftovers so make the whole recipe. 

Food Lust People Love: Bright in color and flavor, this red pesto linguine is a spicy bowl of deliciousness made with anchovies and Fresno peppers. It’s even great as leftovers so make the whole recipe.

I keep a lot of pantry staples on hand but one of my favorites is anchovies. That little can adds so much flavor and salt to almost any savory dish from a classic Caesar dressing to a simple caramelized shallot tart. If you have olives and peppers as well, which I almost always do, you can make gildas, which are a Spanish appetizer that goes great with a glass of something chilled. 

I’ve also been known to add anchovies to Dauphinoise potatoes, turning those creamy spuds into a Swedish dish called Jansson’s Frestelse and I have used them, along with bacon and olives, to top a traditional Liguria pissaladière. In short, if I can work some anchovies into a recipe, I'm going to try! 

Today, anchovies are the star ingredient of this red pesto. 

Red Pesto Linguine

This recipe is adapted from one on the Bon Appetit website where they used a scant six anchovies and, it would seem, none of the good and flavorful olive oil the anchovies were packed in. This is a missed opportunity which I have rectified. You can, of course, use whatever pasta shape you prefer but in my book, linguine is the best. 
Ingredients
1 can (2 oz or 56g) olive oil-packed anchovy fillets 
4 garlic cloves
About 1/2 cup or 120ml extra-virgin olive oil
1/2 cup or 60g walnut pieces
3 tablespoons double-concentrated tomato paste
2 fresh Fresno peppers
3 tablespoons fresh lemon juice
3 oz or 85g freshly grated Parmesan, plus more for serving
1 lb or 450g linguine or your favorite pasta shape
Sea salt for the pasta water
2 tablespoons unsalted butter

Method
Tip your can of anchovies into a measuring vessel and top up with good quality olive oil until you reach 2/3 cup. Use the side of your knife to smash the garlic and then chop it roughly. 


In a small pot, cook the anchovies, oil, garlic and walnuts over a medium heat, stirring often. 

Take it off the heat as the garlic is just beginning to turn golden. This takes several minutes but don’t walk off and leave it because you do not want the garlic to burn. 
Add tomato paste.


Cook, stirring often, until the anchovies have completely broken down, if they hadn’t already, and the mixture is a deep red. Remove the pan from the heat and set aside to cool. 


Cut the stems ends off of the peppers and then cut them in half lengthwise. Use a spoon to remove the seeds, then cut the peppers into smaller pieces. 


Transfer walnut mixture to a food processor. Add chili peppers and lemon juice. Process until completely smooth. 


Add in the grated Parmesan and process again until you have a thick paste. If it’s too thick for your processor, add a tablespoon or two of warm water and process again. 


Meanwhile, cook your linguine according to package instructions until al dente, lightly salting the water. Remove and reserve 1 1/2 cups or 355ml of the pasta water with a ladle. Drain the pasta in a colander. 

Scrape the pesto into the warm pot and add the butter. 


Pour the drained linguine back in along with a 1/2 cup of the pasta water. Use tongs or two wooden spoons to toss the linguine in the pesto until the butter is melted and the linguine is covered in sauce. Add more pasta water as needed. 

Food Lust People Love: Bright in color and flavor, this red pesto linguine is a spicy bowl of deliciousness made with anchovies and Fresno peppers. It’s even great as leftovers so make the whole recipe.

Serve the linguine topped with extra Parmesan. Because the more cheese, the better. 

Food Lust People Love: Bright in color and flavor, this red pesto linguine is a spicy bowl of deliciousness made with anchovies and Fresno peppers. It’s even great as leftovers so make the whole recipe.

Enjoy! 

It’s the third Friday of the month, the day my Fish Friday Foodie friends share seafood recipes. Many thanks our host, Sid of Sid’s Sea Palm Cooking who challenged us to use canned, frozen or pouched seafood to make appetizers or a meal for a theme she named Shortcut Seafood. Special thanks to Wendy of A Day in the Life on the Farm for stepping up to help with behind the scenes work. Check out the links below. 


Are you a food blogger who would you like to join Fish Friday Foodies? We post and share new seafood/fish recipes on the third Friday of the month. To join our group please email Wendy at wendyklik1517 (at) gmail.com. Visit our Facebook page and Pinterest page for more wonderful fish and seafood recipe ideas. 

Pin this Red Pesto Linguine! 

Food Lust People Love: Bright in color and flavor, this red pesto linguine is a spicy bowl of deliciousness made with anchovies and Fresno peppers. It’s even great as leftovers so make the whole recipe.
 .

Thursday, June 17, 2021

Passionfruit Pound Cake #BundtBakers

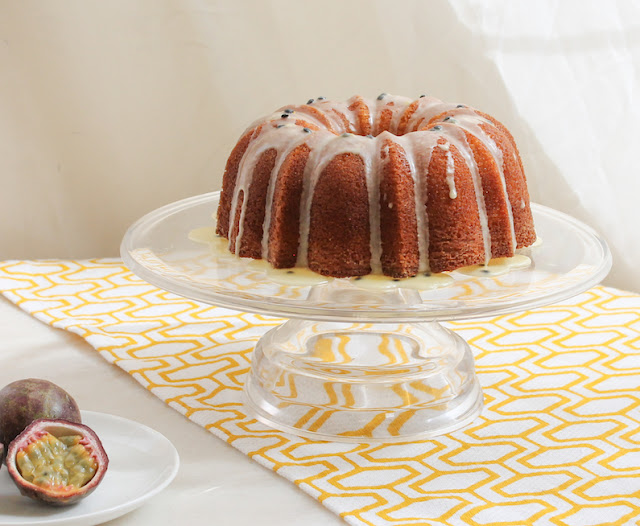
Tart and sweet with a tender crumb, this passionfruit pound cake is topped with an equally flavorful passionfruit glaze.

Food Lust People Love: Tart and sweet with a tender crumb, this passionfruit pound cake is topped with an equally flavorful passionfruit glaze. Bake in 6-cup Bundt pan.

As I said when I shared my lemon drizzle version, pound cake is one of the most dependable cakes you can make for any party or occasion. It’s simple but elegant and everybody likes it.

You can gussy it up by serving pound cake with fruit or a scoop of ice cream on the side but I think a simple glaze is perfection, especially if it complements the flavor of the cake, like this one does. 

If you are fortunate enough to find fresh passionfruit in your local market at a reasonable price, scoop the pulp out and freeze it in an ice cube tray for storage in a freeze bag or airtight container. You’ll thank me later when it’s out of season and expensive!

Passionfruit Pound Cake

I use my Nordic Ware 6-cup anniversary Bundt pan (<affiliate link) for this twist on a classic pound cake but feel free to use your favorite. 

Ingredients
For the cake batter:
1 1/2 cups or 190g all-purpose flour, plus more for dusting the pan
1/4 teaspoon salt
1/4 teaspoon baking soda
1/4 teaspoon baking powder
1/2 cup or 125g plain yogurt
1/4 cup or 60ml fresh passionfruit pulp
1 1/4 cups or 250g granulated sugar
1/2 cup or 113g unsalted butter, softened, plus more for buttering the pan
3 large eggs

For the passionfruit glaze:
3/4 cup or 95g powdered sugar
1 tablespoon fresh passionfruit pulp
1 teaspoon milk, plus a drop or two more, if the glaze is too thick

Method
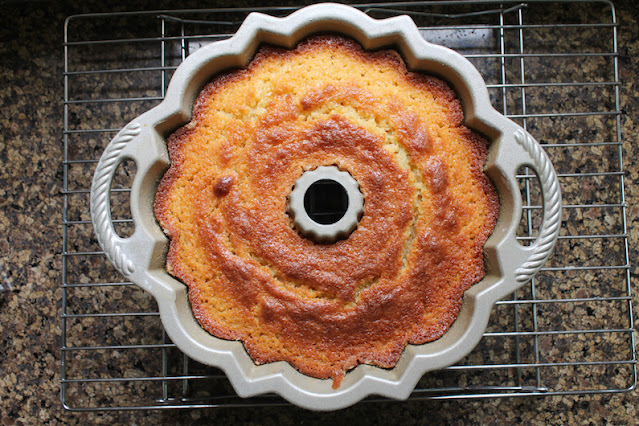
Preheat your oven to 325°F or 163°C. Lightly butter and flour a 6-cup Bundt pan. 

Scoop the seeds out of your passionfruit with a spoon. 


Strain out the seeds from your passionfruit pulp and then put a spoon or two back in. I like the look of them, but too many make their crunch unwelcome. 

Whisk together your yogurt and passionfruit pulp in a measuring bowl and set aside.


In a medium sized bowl, whisk together your flour, salt, baking soda and baking powder. This incorporates air in the mix and saves you from needing to sift the dry ingredients.


With electric beaters or in your stand mixer, beat the sugar and butter until they become pale yellow and fluffy.

Scrape down the bowl with a rubber spatula, then add in the eggs, one at time, beating briefly, until each is incorporated.


Add half of the flour mixture along with half of the yogurt mixture. Beat at low speed until just incorporated.


Scrape down the bowl with a rubber spatula then repeat the process with the other half of each mixture, beating again on low until just mixed. Pour or spoon the batter into your prepared Bundt pan and smooth out the top.


Bake in the preheated oven for about 35-40 minutes, checking it about three-quarters of the way through. If the top is browning too quickly, cover it with foil for the remaining baking time.

Food Lust People Love: Tart and sweet with a tender crumb, this passionfruit pound cake is topped with an equally flavorful passionfruit glaze. Bake in 6-cup Bundt pan.

Remove from the oven when a wooden toothpick comes out clean and the sides are pulling away from the pan slightly.

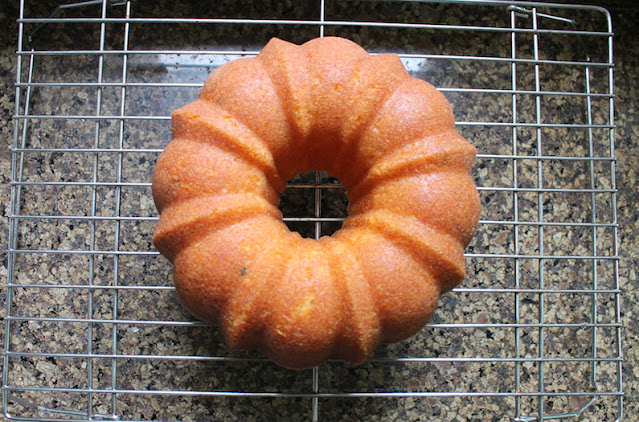
Leave to cool for about 10 minutes then invert the Bundt pan on a wire rack. 

Food Lust People Love: Tart and sweet with a tender crumb, this passionfruit pound cake is topped with an equally flavorful passionfruit glaze. Bake in 6-cup Bundt pan.

Cool completely before drizzling with glaze.

To make the passionfruit glaze, mix the powdered sugar and the passionfruit pulp until all the sugar has dissolved. Spoon on to the cooled cake. 

Food Lust People Love: Tart and sweet with a tender crumb, this passionfruit pound cake is topped with an equally flavorful passionfruit glaze. Bake in 6-cup Bundt pan.

Enjoy!

Food Lust People Love: Tart and sweet with a tender crumb, this passionfruit pound cake is topped with an equally flavorful passionfruit glaze. Bake in 6-cup Bundt pan.

This month my Bundt Baker friends are celebrating fathers everywhere with beautiful Bundts! Many thanks to our host Wendy of A Day in the Life on the Farm

BundtBakers

#BundtBakers is a group of Bundt loving bakers who get together once a month to bake Bundts with a common ingredient or theme. You can see all of our lovely Bundts by following our Pinterest board. We take turns hosting each month and choosing the theme/ingredient.
Updated links for all of our past events and more information about BundtBakers, can be found on our home page.


Pin this Passionfruit Pound Cake!

Food Lust People Love: Tart and sweet with a tender crumb, this passionfruit pound cake is topped with an equally flavorful passionfruit glaze. Bake in 6-cup Bundt pan.
.

Tuesday, June 15, 2021

Sausage Stuffed Sourdough Crescent Rolls #BreadBakers

Made one day and baked the next morning, these Sausage Stuffed Sourdough Crescent Rolls are the perfect breakfast at home or on the go.  

Food Lust People Love: Made one day and baked the next morning, these Sausage Stuffed Sourdough Crescent Rolls are the perfect breakfast at home or on the go.

I had a very different kind of breakfast bread planned for this event but for the first time in a very long time, much to my disappointment, the recipe was a complete failure. Honestly, I’m not sure where I went wrong. 

Fortunately, these guys came out so good that I ate two back to back. I’m not kidding! Smoked sausage in sourdough crescent rolls may be my new favorite breakfast.

Sausage Stuffed Sourdough Crescent Rolls

This recipe is adapted from An Italian in my Kitchen. Use your favorite cooked sausage in the rolls. Mine is smoked jalapeño sausage. 

Ingredients
3 tablespoons unfed sourdough starter (discard) 
1/4 cup or 60ml lukewarm milk, plus extra for a milk wash before baking 
1/4 teaspoon active dry yeast
2 tablespoons butter, melted and cooled
1 large egg yolk, lightly beaten
1 tablespoon granulated sugar
1 cup or 125g all purpose flour plus more for rolling out the dough 
1/4 teaspoon salt
8 cooked sausages (I used smoked jalapeño ones.)

Method
In the mixing bowl add half of the flour, the sourdough starter, milk, sugar and yeast. Whisk until combined. 


Next add the melted butter, egg yolk and beat again.


Sift in the rest of the flour and the salt. 


Knead until smooth and elastic. This is quite a sticky dough but resist the urge to add too much flour. When dough is really sticky, I use a scraper to stretch it out on a clean countertop. 


Then use the scraper again to fold it over onto itself. 


And over again. 


Repeat those three steps until the dough is smooth and elastic, about 7-10 minutes. 

Let the dough rest for 15 minutes. Line a baking pan with baking parchment or a silicone liner. 

On a lightly floured surface, roll the dough into a circle about 13 inches or 33 cm. Cut the circle into 8 triangles.


Place one sausage at the wide end, then roll up each triangle. Wet the point of the triangle with a little water if it doesn't want to stick. 


Place the sausage stuffed rolls on your prepared baking pan. Cover the rolls with greased cling film and put the rolls in the refrigerator to rise for 12-24 hours.  

Food Lust People Love: Made one day and baked the next morning, these Sausage Stuffed Sourdough Crescent Rolls are the perfect breakfast at home or on the go.

In the morning or whenever you are ready to bake, remove the crescent rolls from the refrigerator and set them aside to warm up for about an hour. When they are almost room temperature, preheat the oven to 350°F or 180°C. 

Brush the rolls with a little milk. 

Food Lust People Love: Made one day and baked the next morning, these Sausage Stuffed Sourdough Crescent Rolls are the perfect breakfast at home or on the go.

Bake the stuffed crescent rolls for 20-25 minutes or until they are golden. 

Remove them from the pan and set on a wire rack to cool. 

Food Lust People Love: Made one day and baked the next morning, these Sausage Stuffed Sourdough Crescent Rolls are the perfect breakfast at home or on the go.

We love them with mustard but you can eat these lovely sausage rolls just as they are as well. 

Food Lust People Love: Made one day and baked the next morning, these Sausage Stuffed Sourdough Crescent Rolls are the perfect breakfast at home or on the go.

Enjoy!  

Today’s Bread Bakers’ theme is breakfast breads. Check out all the great recipe links below. Many thanks to our host, Swathi of Zesty South Indian Kitchen.