Tuesday, November 9, 2021

Buttery Sourdough Dinner Rolls #BreadBakers

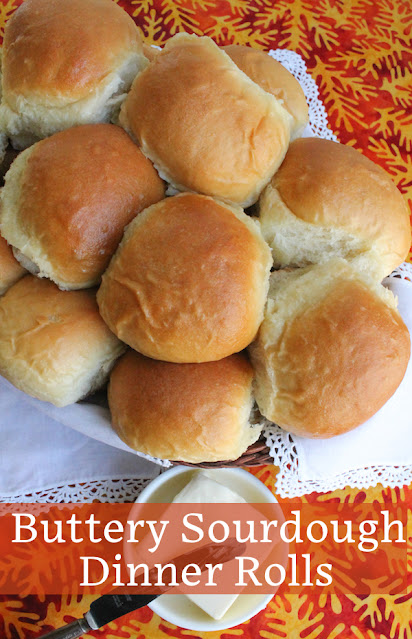
Soft, fluffy and tender, these buttery sourdough dinner rolls are perfect to accompany your holiday meal and for making leftover turkey or ham sandwiches. 

Soft, fluffy and tender, these buttery sourdough dinner rolls are perfect to accompany your holiday meal and for making leftover turkey or ham sandwiches.

The holidays are approaching quickly and my Bread Baker friends and I know that for many, a festive table is not complete without some dinner rolls. So we are here to help, sharing several wonderful recipes we hope you’ll love. Make sure to scroll down to find the links. 

My buttery sourdough dinner rolls remind me of the brown-n-serve rolls my grandmother used to buy and finish baking at home, but with a little more flavor. They are a little bit bigger than your average dinner roll which makes them great for turkey or ham sandwiches as well. 
 

Buttery Sourdough Dinner Rolls

We want lots of springy fluffiness for these soft dinner rolls so while the sourdough starter is there for flavor, I use active dry yeast as well to make sure these puff right up.

Ingredients
1 1/2 cups or 360ml milk
1/3 cup or 80g butter
1/4 oz or 7g (2 1/4 teaspoons) active dry yeast
1/2 cup or 113g sourdough fed starter 
1 egg, at room temperature
1/4 cup or 50g sugar
2 teaspoons fine sea salt
5 cups or 625g flour, plus extra for kneading and sprinkling on before baking

1/8 cup or 30g melted butter for brushing on after the rolls are baked

Method
Put the milk in a large microwaveable vessel and add in the butter. Microwave until the butter is mostly melted, about 3-4 minutes. Let cool for a few minutes.

Put the yeast in your mixing bowl and pour in about a cup or 240ml (no need to measure exactly) of the warm milk/butter mixture and set aside for about 10 minutes. You are hoping that the yeast activates and gets all bubbly. If it doesn’t, you need to buy some new yeast and start over.

Now add the rest of the milk/butter, the sourdough starter, the egg and the salt along with 3 cups or 375g of flour to your mixing bowl and mix on medium speed until all of the flour is incorporated.  


Scrape down the sides of the bowl with a spatula to mix in any flour left there. It’s a very runny batter at this point.


Continue mixing and add the remaining flour by spoonfuls until all is incorporated. Now it should be wet and soft sticky dough but that’s what is needed for soft and tender rolls.

Now mix for 3-4 minutes, changing to the dough hook, if necessary, to help develop the gluten.


Cover the bowl with cling film and allow the dough to rise in a warm place for about an hour or until it doubles in size. If it's cold in your kitchen, you can partially fill the sink with hot tap water and put the bowl in it for warmth.


Meanwhile, line your baking pan with parchment paper, a silicone mat or grease it liberally with oil or butter.

Once the first rise is done, punch the dough down and knead it briefly on a floured surface. Cut the dough ball into halves, then cut the halves into half again. Cut each piece into four to make large bread rolls or six to make more reasonably sized ones. Hint: the bigger ones are better for sandwiches.


Roll the dough pieces into balls, pinching them from underneath to stretch the tops so they are nice and round. 


Put the balls, side by side, pinched side down, in your prepared baking pan. Sprinkle the tops of the rolls with flour.


Put the whole baking pan in a clean, new garbage bag, capturing some air before you clip it shut, so that the bag doesn’t touch the top of the bread rolls. Allow the rolls to rise in a warm place for about an hour.

About 15 minutes (or however long your oven takes) before the second rise is completed, preheat your oven to 350°F or 180°C.


Bake the dinner rolls in your preheated oven for 25-30 minutes or until they are golden brown all over.


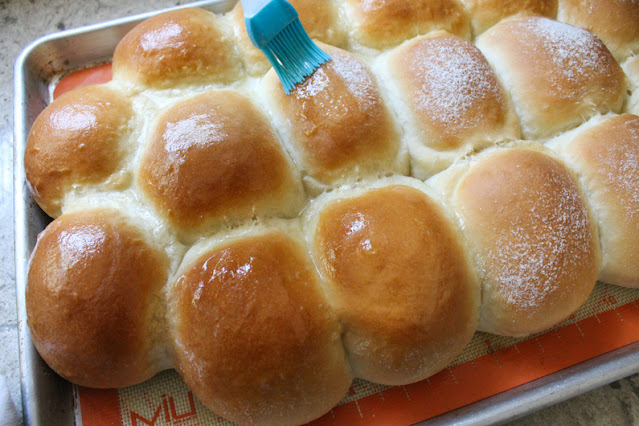
Brush with the melted butter and serve warm, if possible. 

Brushing rolls with butter

They are still great cooled but I think we can all agree that warm rolls are the best!

Enjoy!

Soft, fluffy and tender, these buttery sourdough dinner rolls are perfect to accompany your holiday meal and for making leftover turkey or ham sandwiches.

Check out all the delicious roll recipes my Bread Baker friends are sharing today! Many thanks to our host, Swathi of Zesty South Indian Kitchen.

BreadBakers
#BreadBakers is a group of bread loving bakers who get together once a month to bake bread with a common ingredient or theme. Follow our Pinterest board right here. Links are also updated each month on this home page. We take turns hosting each month and choosing the theme/ingredient.

Pin these Buttery Sourdough Dinner Rolls!

Soft, fluffy and tender, these buttery sourdough dinner rolls are perfect to accompany your holiday meal and for making leftover turkey or ham sandwiches.
 .

Sunday, November 7, 2021

Stuffed Gem Squash

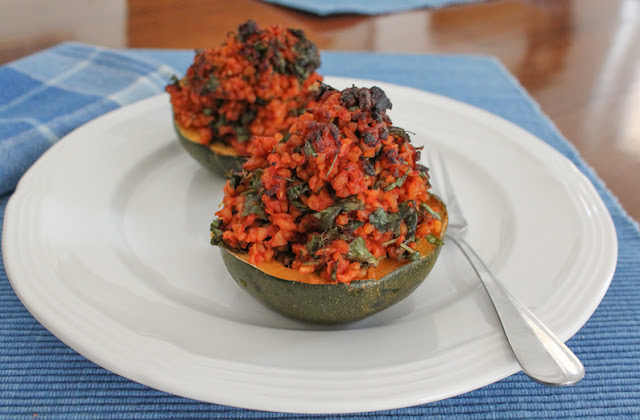
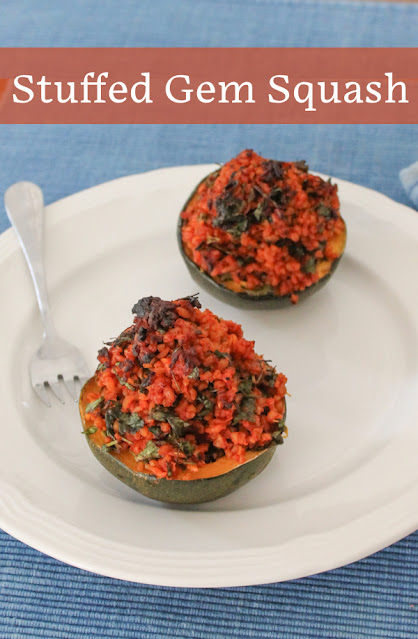
Roasted Stuffed Gem Squash filled with herby, tomato-ey bulgur wheat is a thing of beauty and deliciousness but you can also kick it up a notch with the addition of Italian sausage. 

Food Lust People Love: Roasted Stuffed Gem Squash filled with herby, tomato-ey bulgur wheat is a thing of beauty and deliciousness but you can also kick it up a notch with the addition of Italian sausage.

Gem squash is a South African heirloom squash that has gained popularity in many other countries. In its native land, it is considered a summer squash but in the United States, it falls into the winter squash category. It’s a descendant of a Central American squash that made its way across the sea and is a must-have in South Africa. 

If you’d like to learn more about them and where to find gem squash, this post on Cook Sister is very informative: https://www.cooksister.com/2010/10/gem-squash-central-finding-them-growing-them-and-eating-them.html

Stuffed Gem Squash  - Two Ways

In the following recipe, we will make a base stuffing with onions, tomatoes, bulgur and herbs, which is delicious on its own for half the gem squash. The other half, we’ll fill with a mixture of the base stuffing with added Italian sausage. By adjusting your filling amounts, you can make all vegetarian, leaving out the sausage altogether or add another link or two of sausage to stuff all the gem squash with a meaty mixture. If you can't find gem squash, substitute small acorn squash which are of a similar size. 
 
Ingredients
4 gem (or acorn) squash 

For the stuffing:
1/4 cup or 60ml olive oil, plus more for sautéing the onion and drizzling on the squash before roasting
1 large or 2 medium onions, minced (Mine weighed 7 oz or almost 200g)
1 cup or 210g medium coarse bulgur wheat
1.1 lbs or 500g tomato passata aka tomato puree
1 teaspoon fine sea salt or to taste
1 vegetable stock cube 
1/4 teaspoon freshly ground black pepper
1 teaspoon crushed red pepper
Small bunch fresh parsley
Large bunch fresh cilantro

4 spicy Italian sausages – approx. weight 11 1/3 oz or 320g

Method
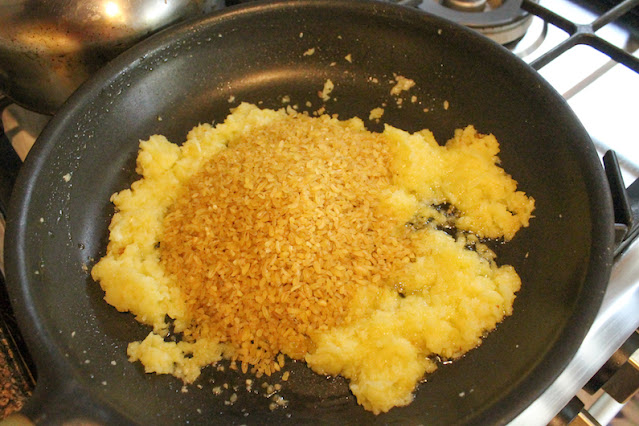
Sauté the onion in a drizzle of olive oil until softened and translucent. Tip in the bulgur wheat and give the whole thing a good stir so the bulgur is coated with the oil and onions. 
Tip in the bulgur wheat and give the whole thing a good stir so the bulgur is coated with the oil and onions.

Add in the tomato passata or puree, the stock cube and the black pepper. 

Add in the tomato passata or puree, the stock cube and the black pepper.

Add 1 cup or 240ml water and the crushed red pepper to the mixture and, over a medium heat, bring it up to a slow simmer. 

Add 1 cup or 240ml water and the crushed red pepper to the mixture and, over a medium heat, bring it up to a slow simmer.

Put a lid on the pan and leave to simmer for about 10-15 minutes or until the bulgur wheat is al dente.  Test it occasionally, as you don’t want it to overcook and turn to mush. 

While the stuffing simmers, remove the sausage from its skin and pan-fry it in a skillet, breaking it apart into crumbles. You want it well-browned and crispy in places. Remove from the heat and drain. 

While the stuffing simmers, remove the sausage from its skin and pan-fry it in a skillet, breaking it apart into crumbles. You want it well-browned and crispy in places

When the bulgur wheat is done, stir in the 1/4 cup or 60ml olive oil and taste for salt. Add salt as needed. I rarely do as the stock cubes has enough salt for us.  

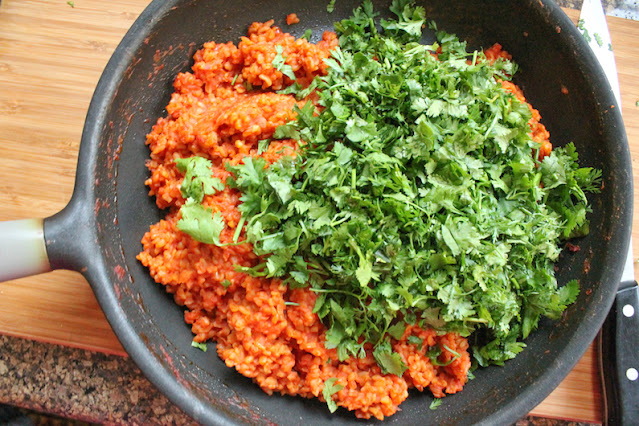
Mince the stems of your parsley and cilantro and chop the leaves. Add both to the stuffing and stir well.  

Mince the stems of your parsley and cilantro and chop the leaves. Add both to the stuffing and stir well.

Cut the gem squash in halves and scoop the seeds out. 

Cut the gem squash in halves and scoop the seeds out.

Preheat your oven to 350°F or 180°C. (Or at this point, the filled squash can be kept in the refrigerator until you are ready to roast them.)

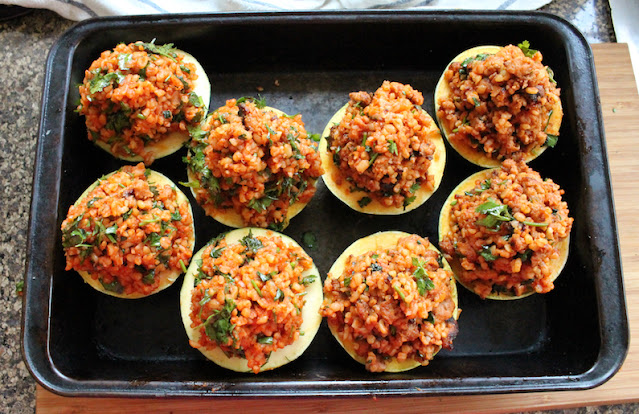
Put the gem squash in a tight fitting pan. Fill four of the gem squash halves with the bulgur wheat stuffing.
 
Put the gem squash in a tight fitting pan. Fill four of the gem squash halves with the bulgur wheat stuffing.

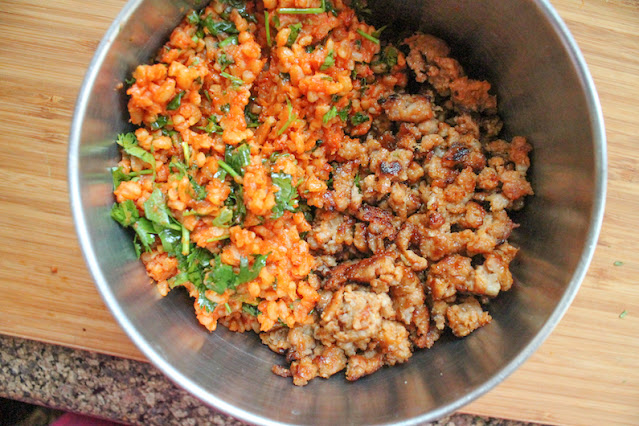
Mix the balance of the stuffing with the browned Italian sausage crumbles. 

Mix the balance of the stuffing with the browned Italian sausage crumbles.

Fill the other four squash halves with the mixture. 

Fill the other four squash halves with the mixture.

Drizzle on a little olive oil and roast the stuffed squash in your preheated oven for about one hour or until the squash are softened enough for your liking. Check part way through and cover the tops with foil if they are browning too much.

Depending on how old your gem squash are, you might be able to eat the skin. If not, serve each with a spoon so your diners can scoop the flesh out with bites of the stuffing. Delicious! 

Food Lust People Love: Roasted Stuffed Gem Squash filled with herby, tomato-ey bulgur wheat is a thing of beauty and deliciousness but you can also kick it up a notch with the addition of Italian sausage.

Enjoy!

It’s Sunday FunDay and today, as I’m sure you can guess from the list below, we are all sharing winter squash recipes. Many thanks to our host, Wendy from A Day in the Life on the Farm


We are a group of food bloggers who believe that Sunday should be a family fun day, so every Sunday we share recipes that will help you to enjoy your day. If you're a blogger interested in joining us, just visit our Facebook group and request to join.

Pin these Stuffed Gem Squash! 

Food Lust People Love: Roasted Stuffed Gem Squash filled with herby, tomato-ey bulgur wheat is a thing of beauty and deliciousness but you can also kick it up a notch with the addition of Italian sausage.
 
.

Wednesday, November 3, 2021

Jalapeño Pecan Cheese Ball

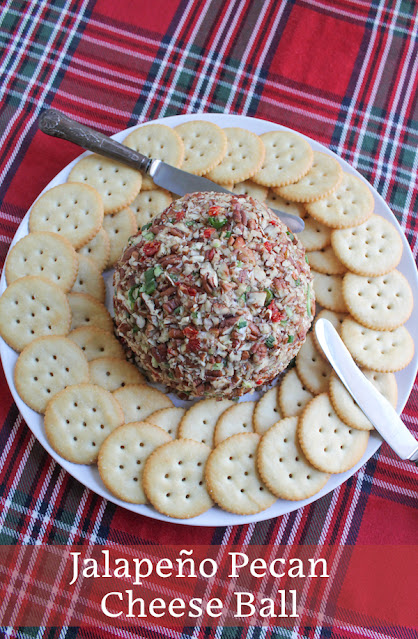
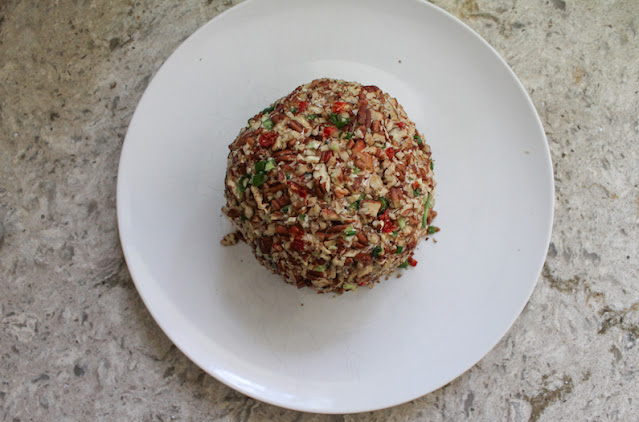
This spreadable Jalapeño Pecan Cheese Ball is made with cream cheese and cheddar. It’s a spicy, creamy, crunchy, delicious, attractive addition to your party table. Watch it disappear!

Food Lust People Love: This spreadable Jalapeño Pecan Cheese Ball is made with cream cheese and cheddar. It’s a spicy, creamy, crunchy, delicious, attractive addition to your party table. Watch it disappear!

Growing up I was not a fan of the cheese balls my paternal grandmother adored. But because she loved them, they always made an appearance at family gatherings around the holidays. I think my mom bought them for Gram from Hickory Farms but I’ll have to get back to you on that.

If you’ve been buying them too, I’m here to tell you how easy they are to make at home. The only challenging part is mixing the ingredients together since this makes a fairly firm ball. Roll up your sleeves and apply a little elbow grease to that wooden mixing spoon and you’ll be fine.

Jalapeño Pecan Cheese Ball

The ingredients below make one substantial cheese ball (about 1.1 lbs or 500g) but I can promise it will disappear in no time. We like to spread it on crackers or toast but you just might find yourself licking the knife when all of those are gone. Choose a dull one.

Ingredients
8 oz or 227g cream cheese, softened
4 oz or 113g sharp white cheddar cheese
1 1/2 cups or 150g pecans
2 green onions
1 fresh jalapeño
4 soft sun-dried tomato halves (if in oil, drain and pat completely dry with paper towels)

To serve:
Crackers or toast rounds

Method
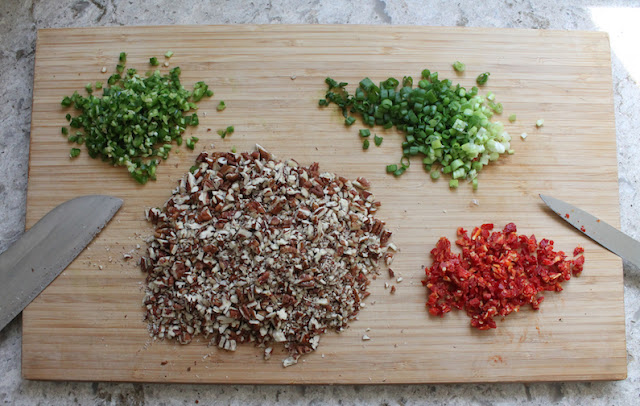
Grate the cheddar cheese. Finely mince the jalapeño, green onions and sun-dried tomatoes. Separate out about 1 tablespoon each of the vegetables to be used later when we roll the cheese ball. 

Chop the pecans finely.

Finely mince the jalapeño, green onions and sun-dried tomatoes. Separate out about 1 tablespoon each of the vegetables to be used later when we roll the cheese ball.   Chop the pecans finely.

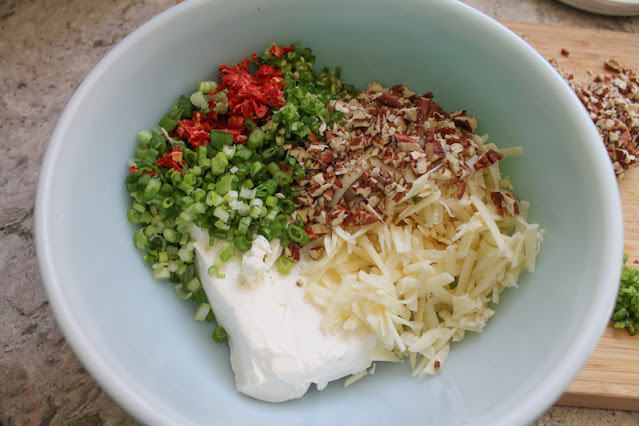
In a bowl, use a wooden spoon or stiff spatula to combine the cream cheese, cheddar cheese, one quarter of the pecans (you can just eyeball this) and the bigger piles of jalapeño, green onions and sun-dried tomatoes until thoroughly blended. 

In a bowl, use a wooden spoon or stiff spatula to combine the cream cheese, cheddar cheese, one quarter of the pecans (you can just eyeball this) and the bigger piles of jalapeño, green onions and sun-dried tomatoes until thoroughly blended.

Form the mixture into a ball.

Form the mixture into a ball.

Cover your work surface with cling film. I find this works best if I wipe the countertop with a clean damp sponge first which helps the cling film stick and stay in place. Sprinkle the reserved minced jalapeño, green onions and sun-dried tomatoes onto the cling film. 

Cover your work surface with cling film. I find this works best if I wipe the countertop with a clean damp sponge first which helps the cling film stick and stay in place. Sprinkle the reserved minced jalapeño, green onions and sun-dried tomatoes onto the cling film.

Top these with the remainder of the chopped pecans. Transfer the cheese ball to the middle. 

Top these with the remainder of the chopped pecans. Transfer the cheese ball to the middle.

Dampen your hands with a little water to stop the cheese from sticking to them and then roll the cheese ball around on the pecans and veggies until it’s completely covered. You can keep rolling it, applying gentle pressure until most of the pecans have adhered to the ball. 

Dampen your hands with a little water to stop the cheese from sticking to them and then roll the cheese ball around on the pecans and veggies until it’s completely covered. You can keep rolling it, applying gentle pressure until most of the pecans have adhered to the ball.

Pile any leftover pecan/veggie bits in the middle of your serving plate and, using your hands, pop the cheese ball on top, pressing down gently. 

Pile any leftover pecan/veggie bits in the middle of your serving plate and, using your hands, pop the cheese ball on top, pressing down gently.

Refrigerate the jalapeño pecan cheese ball, covered, for at least 1 hour to chill.

The finished cheese ball with crackers.

Serve with crackers or toasted rounds of bread.

Food Lust People Love: This spreadable Jalapeño Pecan Cheese Ball is made with cream cheese and cheddar. It’s a spicy, creamy, crunchy, delicious, attractive addition to your party table. Watch it disappear!

Enjoy!

Food Lust People Love: This spreadable Jalapeño Pecan Cheese Ball is made with cream cheese and cheddar. It’s a spicy, creamy, crunchy, delicious, attractive addition to your party table. Watch it disappear!

It’s the first Wednesday of the month so that means it’s time for my Foodie Extravaganza friends to get together to celebrate an obscure food holiday. This time it’s National Georgia Pecan Month! I can’t promise my pecans are from Georgia but this recipe certainly showcases my favorite nut. Check out the links to the other recipes below. Many thanks to our host, Wendy of A Day in the Life on the Farm


Foodie Extravaganza is where we celebrate obscure food holidays by cooking and baking together with the same ingredient or theme each month. Posting day is always the first Wednesday of each month. If you are a blogger and would like to join our group and blog along with us, come join our Facebook page Foodie Extravaganza. We would love to have you! If you're a spectator looking for delicious tid-bits check out our Foodie Extravaganza Pinterest Board.

Pin this Jalapeño Pecan Cheese Ball!

Food Lust People Love: This spreadable Jalapeño Pecan Cheese Ball is made with cream cheese and cheddar. It’s a spicy, creamy, crunchy, delicious, attractive addition to your party table. Watch it disappear!

.

Sunday, October 31, 2021

Caldo Tlalpeño

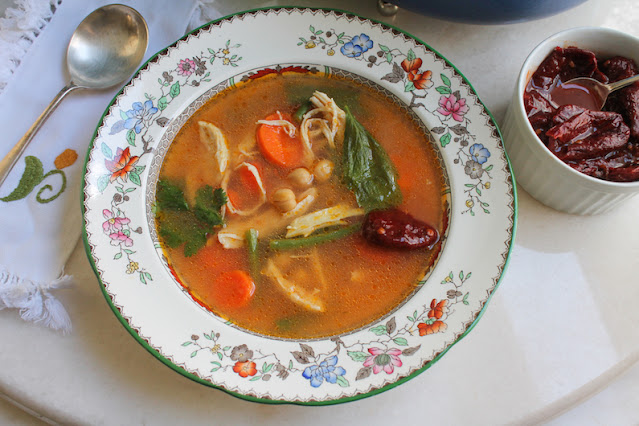
Caldo Tlalpeño is a deliciously nutritious chicken and vegetable soup, perfect for chilly days, served with fresh cheese and chipotle chili pepper on top. And avocado, if you've got some!

Food Lust People Love: Caldo Tlalpeño is a deliciously nutritious chicken and vegetable soup, perfect for chilly days, served with fresh cheese and chipotle chili peppers.

This dish is originally from Tlalpan, Mexico, one of the 16 administrative alcaldías or boroughs of Mexico City. It is the largest borough by area but most of it is forested rather than urban. According to Wikipedia, the city still boasts colonial era mansions and cobblestone streets. Frankly, it sounds lovely and totally worth putting on my list of places to visit, even if it didn’t also have a Six Flags amusement park. Which it does!

I love that this caldo is even mentioned in their tourist information. They are rightly very proud of it. What makes it so wonderful, in my opinion, is the fresh tomatoes in the broth. They give it a light, bright flavor, so much better than plain old chicken soup.

Despite photographic evidence to the contrary, I did serve this to my family with the crumbled fresh cheese as well as the required chipotle peppers in adobo sauce, I just completely forgot to put it on when taking the pictures. Some recipes mentioned adding avocados as well but I didn't have any. Add it cubed or sliced when serving, if you do.

Caldo Tlalpeño

I used unsalted homemade chicken stock for this dish so I did season the chicken with a little fine sea salt before poaching it in the stock. If you are using stock with salt, you can skip this step. I give the approximate weights for the vegetables below but know that if you have, say, a little more carrot or fewer green beans, this caldo will still be delicious. 

Ingredients
For the chicken:
1 1/2 lbs or 675g boneless, skinless chicken breast
¼ of a medium white onion
1 clove garlic
8 cups or 1.9L chicken stock 
1/2 teaspoon fine sea salt

For the caldo:
2 tablespoons canola or other light oil
4 medium carrots (about 13 oz or 370g)
1/4 white onion (
3 tomatoes (about 1 lb or 450g) 
1 clove garlic
5 oz or 142g green beans 
1 can (16 oz or 454g) chickpeas, drained and rinsed
2 sprigs coriander
4 epazote leaves (These are apparently a traditional ingredient and I was lucky enough to find some at my nearby Fiesta supermarket. If you can’t put your hands on some, just add a little more cilantro.)

To garnish:
Crumbled fresh cheese
Chipotle peppers in adobo sauce
(Avocado is also recommended but as I mentioned above, I didn't have any.)

Method
Season the chicken breasts with the salt (if using a salt free stock - see note above) and set aside for a few minutes. Cut the onion into thick slices and smash the garlic clove with the side of a large knife. 


Add the onion and garlic to a large pot along with the chicken. Pour in the stock and bring it to a soft boil over a medium flame.
 

Turn the fire down to simmer, put the lid on your pot and cook the chicken for 45 minutes. 

Remove the chicken from the pot and set aside until it is cool enough to handle. Use two forks to shred it.

Use two forks to shred the chicken.

Strain the broth into a heatproof bowl and discard the onion slices and garlic. 

Finely chop the onion and peel and slice the carrots. Core and chop the tomatoes. Cut the green beans into bite-sized pieces.

Finely chop the onion and peel and slice the carrots. Core and chop the tomatoes. Cut the green beans into bit sized pieces.

Add the oil to the pot and sauté the chopped onions and the carrots for about 10 minutes or until the onions are translucent and the carrots are starting to soften. I find the carrots cook faster if I put the lid on the pot so you might want to do the same. Just don’t forget to stir occasionally.

Add the oil to the pot and sauté the chopped onions and the carrots for about 10 minutes or until the onions are translucent and the carrots are starting to soften.

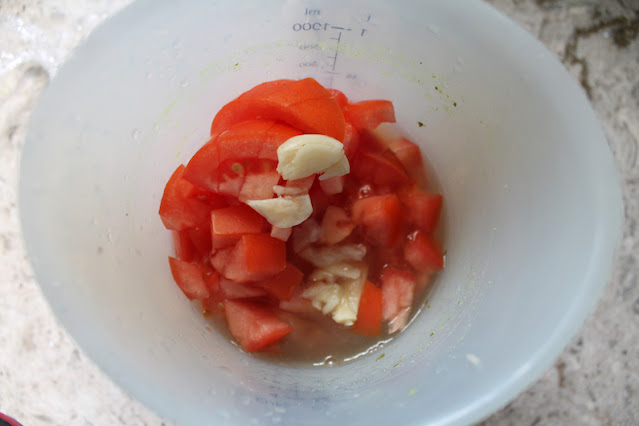
While the onion and carrots are cooking, place the tomatoes and garlic in the blender with a cup of the strained chicken broth. I have a hand blender so I popped mine in the hand blender vessel and whizzed them smooth with it. 

While the onion and carrots are cooking, place the tomatoes and garlic in the blender with a cup of the strained chicken broth. I have a hand blender so I popped mine in the hand blender vessel and whizzed them smooth with it.

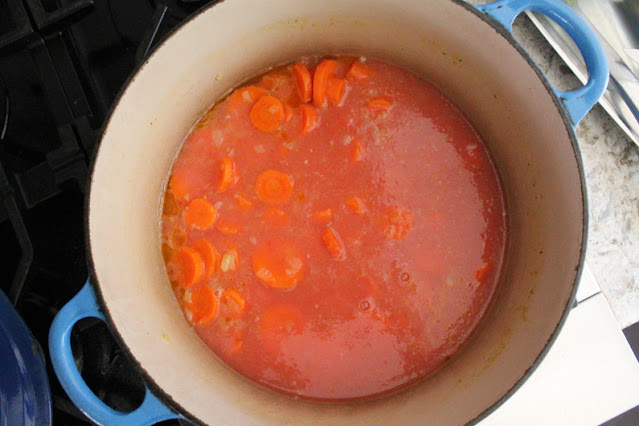
Add the tomatoes to the onion and carrots. 

Add the tomatoes to the onion and carrots.

Cook over a low heat for about 12 minutes or until the carrots are tender. At minute 8, add in the green beans. Give it a good stir. 


When the beans are just about cooked through, add the rest of the reserved chicken broth, chickpeas, epazote, cilantro, and shredded chicken. 

When the beans are just about cooked through, add the rest of the reserved chicken broth, chickpeas, epazote, cilantro, and shredded chicken.

Cook over low heat for 6 more minutes. Season with salt, if needed.

To serve, spoon the chicken and vegetables into bowls. Top with broth. Serve the cheese and chipotles in small plates at the table so that everyone can add what they’d like to their bowls. It is traditional to add one chipotle pepper to each bowl!

Food Lust People Love: Caldo Tlalpeño is a deliciously nutritious chicken and vegetable soup, perfect for chilly days, served with fresh cheese and chipotle chili peppers.

Enjoy!

It’s Sunday FunDay and my friends and I are sharing Mexican dishes to commemorate The Day of the Dead (el Día de los Muertos), a Mexican holiday where families welcome back the souls of their deceased relatives for a brief reunion that includes food, drink and celebration. Check out all the links below! Many thanks to our host, Camilla of Culinary Adventures with Camilla


We are a group of food bloggers who believe that Sunday should be a family fun day, so every Sunday we share recipes that will help you to enjoy your day. If you're a blogger interested in joining us, just visit our Facebook group and request to join.

Pin this Caldo Tlalpeño!

Food Lust People Love: Caldo Tlalpeño is a deliciously nutritious chicken and vegetable soup, perfect for chilly days, served with fresh cheese and chipotle chili peppers.

.

Monday, October 25, 2021

Lemon Poppy Seed Muffins #MuffinMonday

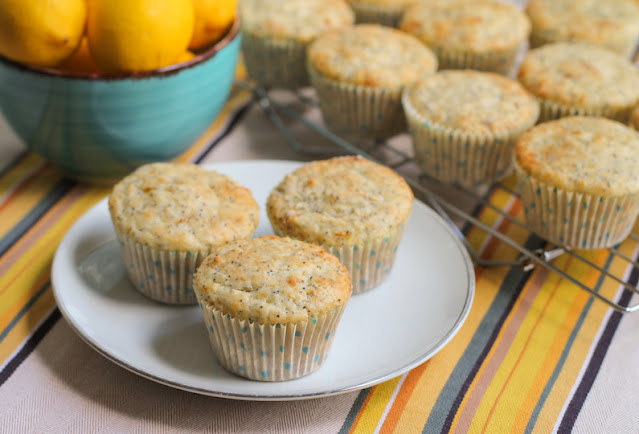
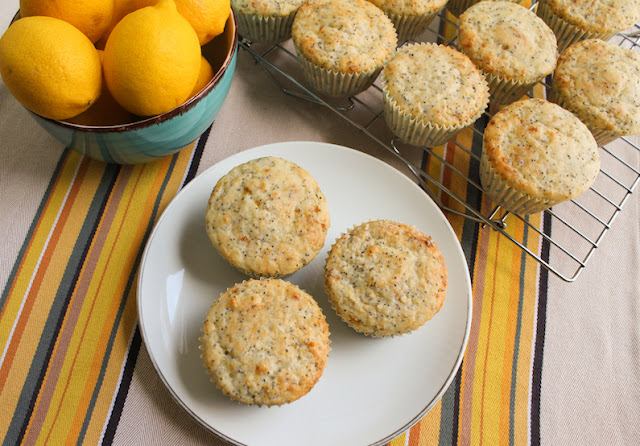
Lemon Poppy Seed Muffins are like a sweet burst of sunshine from the lemon juice and zest with the slightest crunch of the poppy seeds. 

Food Lust People Love: Lemon Poppy Seed Muffins are like a sweet burst of sunshine from the lemon juice and zest with the slightest crunch of the poppy seeds.

My younger daughter maintains that every time I ask her for muffin flavor suggestions she says lemon poppy seed. I honestly don’t think that can be true since, aside from the Meyer Lemon ones I baked back in 2014, I’ve never made plain lemon poppy seed muffins. And I’m usually pretty good about taking her suggestions.

In fairness though, I couldn’t legally own poppy seeds for the almost six years we lived in Dubai so maybe she asked me back then. Anyhoo, today I am finally fulfilling her request. These guys are just the right amount of tart and sweet.

Lemon Poppy Seed Muffins

To get more juice out of your lemon, put it in the microwave for about 15 seconds on high then roll it firmly under your hand on your kitchen counter or a cutting board. My lemon was small and I still managed to get 2 tablespoons of juice out of it!

Ingredients
For the muffins:
2 cups or 250g flour
2/3 cup or 132g sugar
2 teaspoons baking powder
1/2 teaspoon baking soda
1/4 teaspoon salt
2 tablespoons poppy seeds 
Grated zest and juice of 1 lemon (about 2 tablespoons)
3/4 cup or 184g Greek yogurt
1/4 cup or 60ml milk
2 large eggs, at room temperature
1/2 cup or 113g unsalted butter, melted and cooled, plus extra for the pan, if necessary

Method
Preheat your oven to 350°F or 180°C.  Prepare your 12-cup muffin pan by buttering it or line it with paper liners.

Add the flour, sugar, baking powder, baking soda, poppy seeds and salt to a large mixing bowl. Grate in the lemon zest and mix.


Juice your lemon into another mixing bowl. Add the eggs, milk, yogurt and melted butter to the juice bowl and whisk till well combined.


Pour the wet ingredients into the dry ones.


Stir until just mixed through.


Divide the mixture between the muffin cups in your prepared pan.


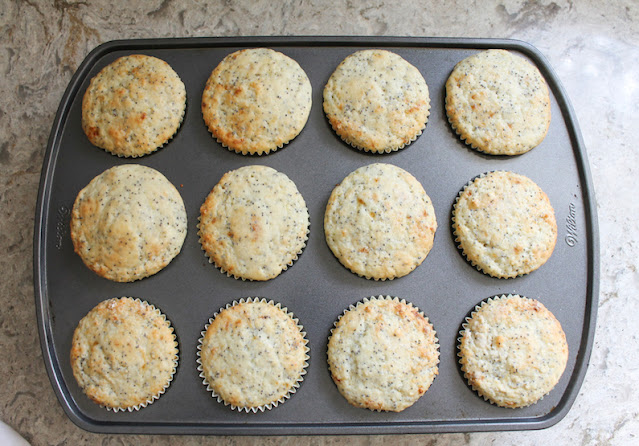
Bake in your preheated oven for 20-25 minutes or until golden. 


Allow the muffins to cool for a few minutes then remove the muffins to a wire rack to cool completely.  

Food Lust People Love: Lemon Poppy Seed Muffins are like a sweet burst of sunshine from the lemon juice and zest with the slightest crunch of the poppy seeds.

Enjoy!
Muffin Monday

#MuffinMonday is a group of muffin loving bakers who get together once a month to bake muffins. You can see all of our lovely muffins by following our Pinterest board. Updated links for all of our past events and more information about Muffin Monday can be found on our home page.


Pin these Lemon Poppy Seed Muffins!

Food Lust People Love: Lemon Poppy Seed Muffins are like a sweet burst of sunshine from the lemon juice and zest with the slightest crunch of the poppy seeds.

 .