Tuesday, November 14, 2023

Sweet Sourdough Pumpkin Buns

These sweet sourdough pumpkin buns are soft, fluffy and flavorful. Sweetened with brown sugar, they are the perfect bread to serve with to your Thanksgiving feast. 

Food Lust People Love: These sweet sourdough pumpkin buns are soft, fluffy and flavorful. Sweetened with brown sugar, they are the perfect bread to serve with to your Thanksgiving feast.

I am here to tell you that my sourdough starter, John Dough, is a survivor! I abandoned him in my Houston refrigerator in May and when I got back in September, I fed him a couple of times and he is back to normal. Go, John, go! 

I had a back up plan, though. In her fabulous book, The Sourdough Whisperer, Elaine Boddy gives useful and easy to follow instructions on how to dry out a sourdough starter for foolproof transport. I tried it with Jane Dough (my Jersey, CI starter) before I headed back here to Houston but then I didn’t need to use it when John revived.


What that means though is that I have dried sourdough starter to share, if a friend happens to need some or if John Dough gets into a slump. I can highly recommend connecting with Elaine if you love baking with sourdough and/or want to get started. Her books are great for experienced bakers and beginners alike. Plus she’s a really nice person. Tell her Stacy from the delicious. group sent you!

Sweet Sourdough Pumpkin Buns 

The dough for these sweet buns uses a fed sourdough starter. Your dough will rise nicely but there isn’t a pronounced sharpness from the starter. This recipe was adapted from one on Aberle Home.

Ingredients for 12 buns
1/2 cup or 113g FED sourdough starter (100% hydration)
1/4 cup or 60ml milk, lukewarm
1/2 cup or 120g canned pumpkin (not pumpkin pie filling!)
2/3 cup or 132g dark brown sugar
1 large egg
2 3/4 cup or 344g unbleached bread flour
1/4 cup or 56g butter, softened
3/4 teaspoon fine sea salt

Optional to finish: 2 tablespoons melted butter

Method
In a stand mixer fitted with a dough hook, mix together the fed starter, milk, canned pumpkin, brown sugar and egg until well combined. 


Sift in the flour and mix again until there is no dry flour showing. 


Cover and allow to rest for 30 minutes. Mix in the butter and salt until thoroughly combined. 


Knead on medium speed (or in the bowl by hand) for an additional 8-10 minutes or until the dough becomes very smooth and elastic. You might need to scrape the bowl down a time or two at the beginning to incorporate butter that has stuck to the sides. I did. 


This is a really soft dough. Form it into a ball as best you can in the bowl, and cover. Allow to rise at room temperature until it has doubled in volume or overnight in the refrigerator. (If you do an overnight cold prove, allow time for the dough to come back to room temperature before continuing with the next steps.) 

I did a slow overnight rise for this batch of buns because I believe that the extra time also makes the dough more manageable. 


Turn the dough out onto a clean surface and divide it into 12 pieces (weigh dough for uniform buns - my whole dough ball weighed 864g/12 = 72g for each bun.) 


Dampen your hands with a little water so the dough doesn’t stick to them then form the dough into a tight ball by pinching the sides to the bottom. Cup your hand around the dough ball and push it around gently to create a nice round ball. 


Repeat to shape remaining pieces of dough. 

Place the balls in a baking pan lined with baking parchment, leaving room for them to rise. Ideally, they will touch once they have risen. For these buns, I used a 9x13 in or 23x33cm pan. Cover them with cling film and leave to rise for about 45-55 minutes.


If it’s cold in your kitchen and you have a microwave, put water in a microwavable bowl and heat it to almost boiling. Set the pan of buns on top of the bowl and leave the microwave closed for the rising time. Works like a charm. 

Near the end of your rising time, preheat your oven to 375°F or 190°C.

Bake the buns on the center rack for 12-15 minutes or until they are lightly golden on the edges. (The centers should read 185°F or on an instant-read thermometer when done.) Cool in the baking pan on a cooling rack. 

Food Lust People Love: These sweet sourdough pumpkin buns are soft, fluffy and flavorful. Sweetened with brown sugar, they are the perfect bread to serve with to your Thanksgiving feast.

These are divine served warm. I like to brush them with some melted butter. You might like to as well. 

Food Lust People Love: These sweet sourdough pumpkin buns are soft, fluffy and flavorful. Sweetened with brown sugar, they are the perfect bread to serve with to your Thanksgiving feast.

Enjoy!

Food Lust People Love: These sweet sourdough pumpkin buns are soft, fluffy and flavorful. Sweetened with brown sugar, they are the perfect bread to serve with to your Thanksgiving feast.

It’s the second Tuesday of the month so that means it’s time for my fellow Bread Bakers to share their recipes. Since Thanksgiving is nigh, we are sharing breads that would be excellent additions to your Thanksgiving feast. Check out the list below. Many thanks to our host Swathi of Zesty South Indian Kitchen.


#BreadBakers is a group of bread loving bakers who get together once a month to bake bread with a common ingredient or theme. Follow our Pinterest board right here. Links are also updated each month on this home page. We take turns hosting each month and choosing the theme/ingredient.


Pin these Sweet Sourdough Pumpkin Buns!

Food Lust People Love: These sweet sourdough pumpkin buns are soft, fluffy and flavorful. Sweetened with brown sugar, they are the perfect bread to serve with to your Thanksgiving feast.

 .


Monday, October 30, 2023

Peach Jam Muffins

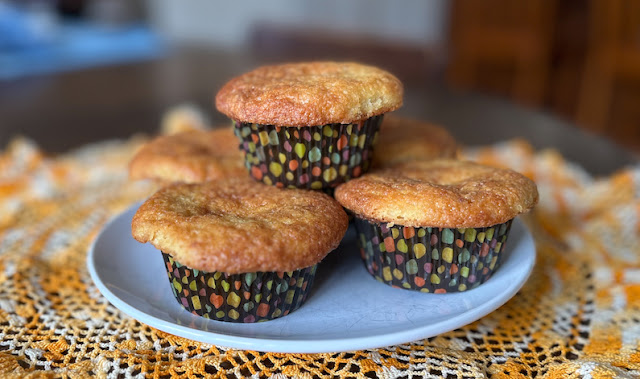
These small batch peach jam muffins are just the right amount of sweet, perfect for breakfast or snack time. Use store-bought or your homemade jam to make them!

Food Lust People Love: These small batch peach jam muffins are just the right amount of sweet, perfect for breakfast or snack time. Use store-bought or your homemade jam to make them!

Whenever I think of peaches, I can’t help but think of my mom since it’s her favorite fruit. In past years I’ve balked at paying the out of season prices for peaches but Mom is on hospice care now, living with us, and I’d pay any price to buy her favorite things for her. Her smile lightens my heart and is worth any amount of money! 

For this month’s Muffin Monday, I baked muffins I knew she’d love with peach jam I put up a while back. And she did! She still gets so much enjoyment out of eating, which I am grateful to encourage. Yesterday evening I cooked her chicken livers with smothered onions, mashed potatoes and fried okra. She was in heaven! It’s not everyone’s favorite meal but it is one of hers. 

I like to swirl the peach jam through the muffin batter rather than make a homogeneous mix but you do you. You can also mix it right in. 

Peach Jam Muffins

Combine my favorite easy quick bread breakfast muffin recipe with your homemade or favorite brand of peach jam (or any jam, to be honest) to make these delicious muffins for breakfast or snack time.

Ingredients for six muffins
1 cup or 125g all purpose flour
2/3 cup or 132g sugar
1 teaspoon baking powder
1/2 teaspoon baking soda
1/4 teaspoon fine sea salt
1/2 cup or 120ml minus 1 tablespoon milk (*instructions below)
1 tablespoon lemon juice
3 tablespoons or 45ml canola or other light oil
1 large egg
1/4 cup or 60ml peach jam

*Put your lemon juice in a measuring vessel and then add milk up to the 1/2 cup or 120ml mark. Set aside.

Method
Preheat oven to 350°F or 180°C. Generously grease cups and top of 6-cup muffin pan or line it with paper muffin cups.

Whisk your flour, sugar, baking powder, baking soda and salt together in a large bowl.


In another bowl, whisk together your soured milk, oil and egg.


All at once, add the wet ingredients to the dry. 


Gently fold just until dry ingredients are moistened. There may be little bits of flour showing and that's just fine. 

Spoon the peach jam on to the batter, then fold it in. You want ribbons of jam, not a homogenous batter. Unless you want a homogeneous batter. Again, you do you.


Divide your batter relatively evenly between the 6 muffin cups. Top with a little more jam, if you have it. Never mind if you don't. I was about at the bottom of my jar. 


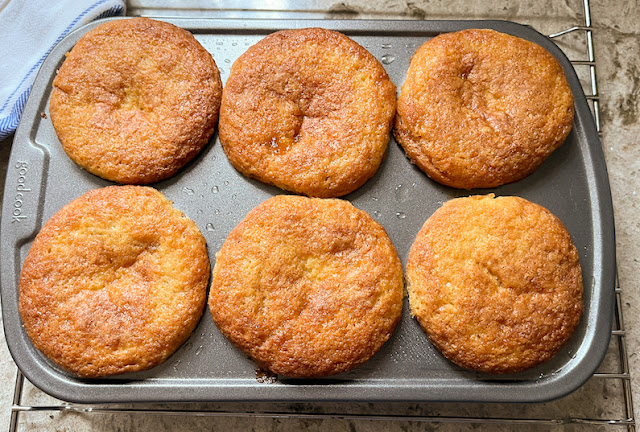
Bake the muffins for 20-25 minutes in your preheated oven, or until they are golden.

Mine kinda puffed up more than anticipated so the tops were overlarge but they were delicious and that’s what counts. Everyone loves a big muffin top, right? I’ve been told it’s the favorite part. 


Remove the pan from the oven and let the muffins cool for a few minutes before removing them from the pan and onto a wire rack.


Enjoy!


As mentioned above, it’s Muffin Monday, which means it’s time for my blogger friends to share their muffin recipes. Check out the links below


#MuffinMonday is a group of muffin loving bakers who get together once a month to bake muffins. You can see all of our lovely muffins by following our Pinterest board. Updated links for all of our past events and more information about Muffin Monday can be found on our home page.


Pin these Peach Jam Muffins!

Food Lust People Love: These small batch peach jam muffins are just the right amount of sweet, perfect for breakfast or snack time. Use store-bought or your homemade jam to make them!

 .

Tuesday, October 10, 2023

Slow Rise Sourdough Baguettes

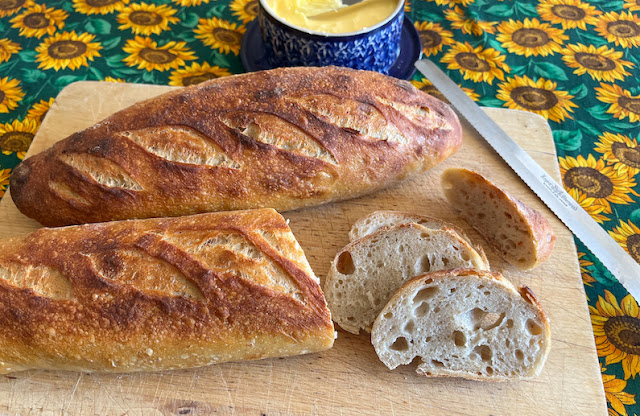
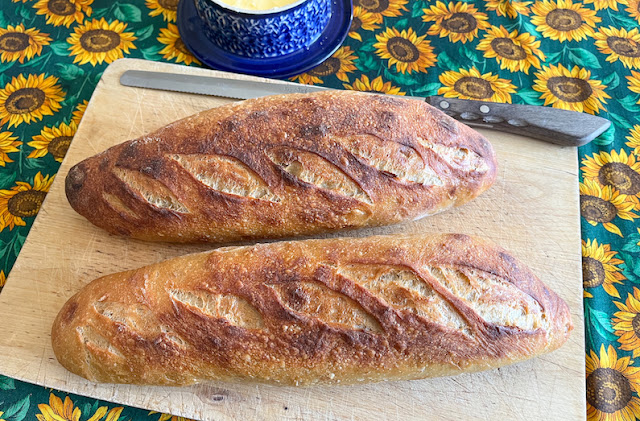
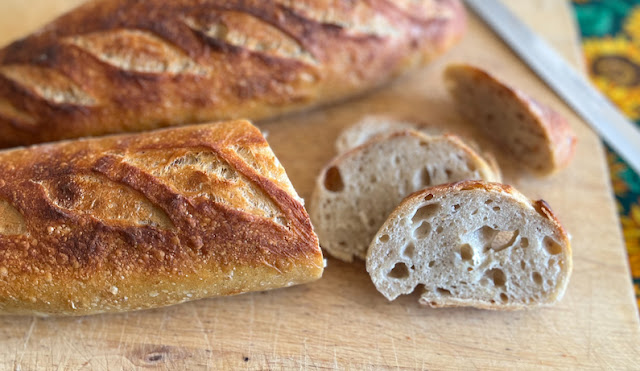
These slow rise sourdough baguettes are so flavorful that they just might be my favorite ever loaves. Slice and serve with butter. So good!

Food Lust People Love: These slow rise sourdough baguettes are so flavorful that they just might be my favorite ever loaves. Slice and serve with butter. So good!

This recipe is made in several easy steps and can take a couple of days but most of it is hands-off time. The dough is very forgiving so if you get busy and miss a pull and turn or leave it a bit longer in the refrigerator, no worries. Just pick up where you left off and it will be fine. 

We start by making the dough which spends the first overnight in the refrigerator then the next day, the sourdough starter is added, and you’ll pull and fold the dough a few times to build up the gluten. Then there’s a final night in the refrigerator before shaping and baking the baguettes on the third day. 

Slow Rise Sourdough Baguettes

This recipe is adapted from one on The Fresh Loaf. Mine didn’t turn out near as holey but the flavor is all there. 

Ingredients for two baguettes
3 2/3 cups or 455g strong white bread flour
1 1/3 cups or 320ml cold water
2/3 cup or 160g 100% hydration starter (fed equal parts water and flour by weight)
2 teaspoons fine sea salt 

Method
Mix the flour and cold water together to form a soft dough. 


Put it in a bowl and cover that with cling film. Refrigerate for 12-24 hours. Mine went in at 2:40 p.m. on day 1.

On day 2, using your clean hands, mix the sourdough starter and salt into the dough until it’s evenly distributed. 


I did this step at 11:40 a.m. that day so my dough was in the refrigerator for about 21 hours. 

Leave the dough out, the bowl covered with cling film, at room temp (70 to 75°F or 21 to 24°C) for about three hours until it grows about 1/3 in volume. 

Stretch and fold it every half hour or so to develop the gluten. (I set a timer to remind myself. You might want to do the same.) If your kitchen is too cool, find a warmer place to set the dough.


When the three hours are up, put the covered dough bowl back in the refrigerator for another overnight stay. Mine went back in the fridge a few minutes after the three-hour rise time was up, so around 2:50 p.m.

On day three, when you are ready to bake, take the dough out of the refrigerator. If it has not doubled or nearly doubled, give it more time to rise at room temperature. Mine was just about doubled that morning around 8 a.m. but I left it out for two hours to warm up. 


After your dough is sufficiently risen, divide it into two equal balls and and rest them for 40 minutes. 


Shape the dough into baguettes using this method here from King Arthur Flour: https://youtu.be/IRDL3lPQSkc

Proof for 24-28 minutes, then score deeply with a sharp knife or lame. Again, I offer you a King Arthur Flour video for method: https://youtu.be/ZaLnzomvEF8 Even after watching that a bunch of times, I still didn’t cut as deeply as I should have! 


During that last proof, preheat your oven to 450°F or 232°C with an iron skillet, if you have one, or another baking pan, if you don’t, on the bottom of the oven. 

Put the baguettes into the preheated oven bake and quickly add boiling water to the skillet on the bottom. Close the oven door immediately to keep in the steam. 

Bake the baguettes for about 25 minutes or until golden brown and well risen. 


Remove from the oven and leave to cool on a wire rack. 


When cool, slice to serve. 

Food Lust People Love: These slow rise sourdough baguettes are so flavorful that they just might be my favorite ever loaves. Slice and serve with butter. So good!

Food Lust People Love: These slow rise sourdough baguettes are so flavorful that they just might be my favorite ever loaves. Slice and serve with butter. So good!

Enjoy! 

It's the second Tuesday of the month so that means it's Bread Bakers time! Today we are sharing baguette recipes Many thanks to our host, Renu of Cook with Renu. Check out the recipe links we are sharing below:

#BreadBakers is a group of bread loving bakers who get together once a month to bake bread with a common ingredient or theme. Follow our Pinterest board right here. Links are also updated each month on this home page. We take turns hosting each month and choosing the theme/ingredient.


Pin these Slow Rise Sourdough Baguettes!

Food Lust People Love: These slow rise sourdough baguettes are so flavorful that they just might be my favorite ever loaves. Slice and serve with butter. So good!

 .